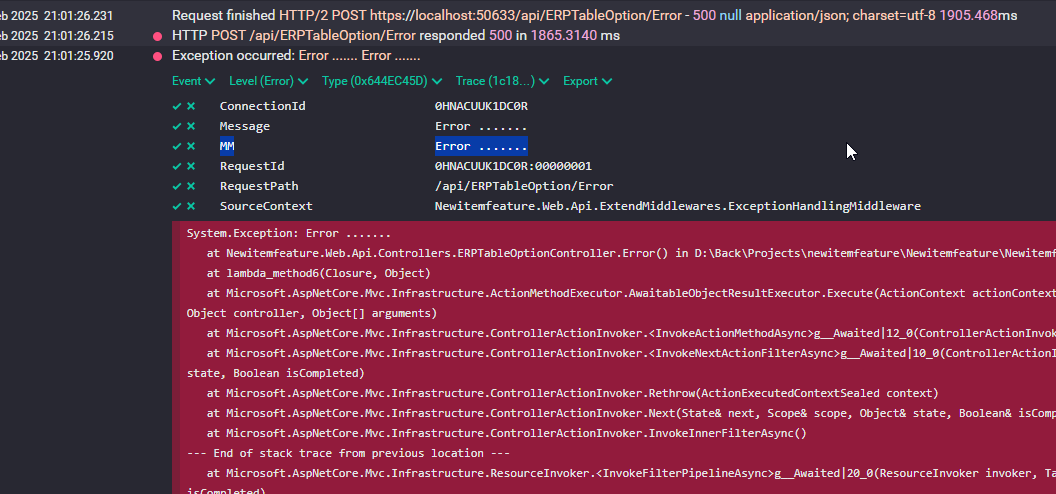
.net 使用 Serilog 和 Seq 构建强大的日志系统 电脑版发表于:2025/2/14 21:02  >#.net 使用 Serilog 和 Seq 构建强大的日志系统 [TOC] tn2>在现代软件开发中,日志记录是确保应用程序稳定性和可维护性的关键环节。Serilog 是一个功能强大的 .NET 日志库,而 Seq 是一个集中式的日志服务器,两者结合可以为您的应用程序提供一个高效、灵活且易于管理的日志解决方案。本文将介绍如何在 .NET 应用程序中使用 Serilog 和 Seq 进行日志记录。 Serilog 简介 ------------ tn2>Serilog 是一个流行的 .NET 日志库,以其简洁的 API 和丰富的扩展功能而闻名。Serilog 支持多种日志输出方式(称为 Sinks),包括控制台、文件、Seq、Elasticsearch 等。通过 Serilog,您可以轻松地将日志信息输出到不同的目标,并根据需要进行配置。 Seq 简介 ------------ tn2>Seq 是一个集中式的日志服务器,专为 Serilog 设计。它提供了强大的日志存储、查询和可视化功能,非常适合用于生产环境中的日志管理。Seq 支持日志的全文搜索、实时监控和警报功能,能够帮助您快速定位和解决问题。 安装和配置 ------------ ### Seq日志服务器安装方式 tn2>Seq 提供了多种安装方式,包括 Docker、Windows 安装包和 Linux 安装包。 以下是通过 Docker Compose安装 Seq 的步骤(修改`docker-compose.yml`): ```yaml version: '3.4' services: ... newitemfeature.seq: image: docker.1ms.run/datalust/seq container_name: newitemfeature-seq environment: - ACCEPT_EULA=Y ports: - 5341:5341 - 8081:80 ``` tn2>对Seq日志服务器的`80`端口映射外部`8081`端口,并开放日志接口`5341`。 也可以使用docker一行命令进行安装: ```yaml docker run --name newitemfeature-seq -d -p 5341:5341 -p 8081:80 docker.1ms.run/datalust/seq ``` tn>由于不能直接访问`docker.io`,所以我这里改成了国内能访问的接口`docker.1ms.run/datalust/seq`,更多国内可以参考的镜像网站请参考:<a href="https://fcp7.com/docker-dockerhub-mirrors.html#%e5%8f%af%e7%94%a8%e7%9a%84-docker-%e9%95%9c%e5%83%8f%e5%9c%b0%e5%9d%80">2025年最新可用!Docker/DockerHub 国内镜像源/加速列表</a> ### 配置 Serilog tn2>在您的 .NET 应用程序中,您需要安装 Serilog 和 Seq 的相关 NuGet 包: ```yaml <PackageReference Include="Serilog.AspNetCore" Version="8.0.3" /> <PackageReference Include="Serilog.Sinks.Seq" Version="8.0.0" /> ``` tn2>接下来,在程序启动时配置 Serilog,使其将日志输出到 Seq 服务器: ```csharp builder.Host.UseSerilog((context,loggerConfig) => loggerConfig.ReadFrom.Configuration(context.Configuration)); ``` tn2>具体我们在`appsettings.json`中来进行修改我们的配置。 ```json { "Serilog": { "Using": [ "Serilog.Sinks.Console", "Serilog.Sinks.Seq" ], // 上述代码指定了 Serilog 使用的日志输出插件(Sinks): // - Serilog.Sinks.Console:将日志输出到控制台。 // - Serilog.Sinks.Seq:将日志输出到 Seq 服务器(一个集中式日志服务器)。 "MinimumLevel": { "Default": "Information", // 默认的日志级别设置为 "Information",表示会记录 Information 及以上级别的日志(如 Warning、Error、Fatal)。 "Override": { "Microsoft": "Information" // 对于 "Microsoft" 命名空间下的日志,将日志级别覆盖为 "Information"。 // 这通常用于调整框架日志的详细程度。 } }, "WriteTo": [ { "Name": "Console" }, // 将日志写入控制台。 { "Name": "Seq", "Args": { "serverUrl": "http://newitemfeature-seq:5341" } // 将日志写入 Seq 服务器,指定 Seq 服务器的地址为 "http://newitemfeature-seq:5341"。 } ], "Enrich": [ "FromLogContext", "WithMachineName", "WithThreadId" ] // 日志的丰富化设置: // - FromLogContext:从日志上下文中获取额外信息(如请求 ID 等)。 // - WithMachineName:在日志中添加机器名称。 // - WithThreadId:在日志中添加线程 ID。 } } ``` 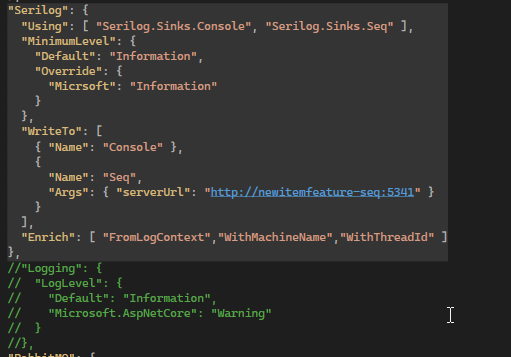 tn2>添加拦截的请求的进行使用Serilog日志记录。 ```csharp app.UseSerilogRequestLogging(); ``` tn2>然后我们这里就可以启动程序了,我这里是使用`Docker Compose`进行启动的,打开Seq会发现大量的日志信息(`http://127.0.0.1:8081`)。 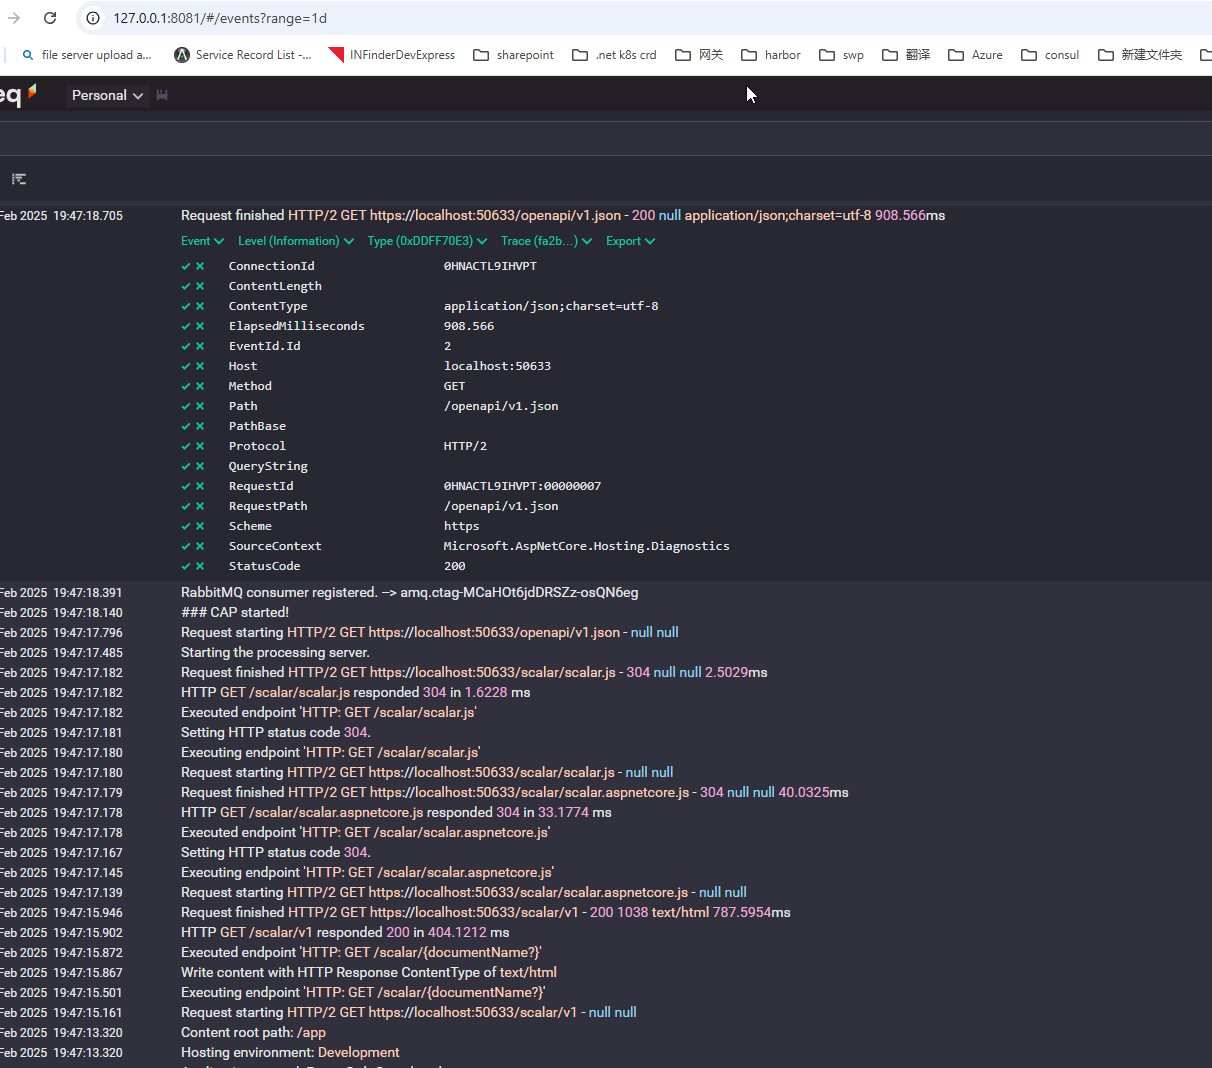 异常中间件 ------------ tn2>这里我们自定义一个异常记录中间件,这样如果有什么报错可以根据我们想要的格式进行显示Seq日志服务器上。 ```csharp public class ExceptionHandlingMiddleware { private readonly RequestDelegate _next; private readonly ILogger<ExceptionHandlingMiddleware> _logger; public ExceptionHandlingMiddleware(RequestDelegate next, ILogger<ExceptionHandlingMiddleware> logger) { _next = next; _logger = logger; } public async Task InvokeAsync(Microsoft.AspNetCore.Http.HttpContext context) { try { await _next(context); } catch (Exception exception) { _logger.LogError(exception, "Exception occurred: {Message}", exception.Message); var exceptionDetails = GetExceptionDetails(exception); var problemDetails = new ProblemDetails { Status = exceptionDetails.Status, Type = exceptionDetails.Type, Title = exceptionDetails.Title, Detail = exceptionDetails.Detail }; if (exceptionDetails.Errors is not null) { problemDetails.Extensions["errors"] = exceptionDetails.Errors; } context.Response.StatusCode = exceptionDetails.Status; await context.Response.WriteAsJsonAsync(problemDetails); } } private static ExceptionDetails GetExceptionDetails(Exception exception) { var details = new ExceptionDetails { Type = exception.GetType().FullName, Title = "An error occurred while processing your request.", Status = 500, // 默认状态码为 500 (Internal Server Error) Detail = exception.Message, Errors = new Dictionary<string, object?>() }; // 根据异常类型设置不同的响应信息 if (exception is ArgumentException argEx) { details.Title = "Invalid argument provided."; details.Status = 400; details.Errors.Add("Argument", argEx.ParamName); } else if (exception is UnauthorizedAccessException unauthorizedEx) { details.Title = "Access denied."; details.Status = 403; // Forbidden } else if (exception is KeyNotFoundException keyNotFoundEx) { details.Title = "Resource not found."; details.Status = 404; // Not Found details.Errors.Add("Resource", keyNotFoundEx.Message); } else if (exception is ValidationException validationEx) { details.Title = "Validation failed."; details.Status = 400; // Bad Request details.Errors.Add("Validation", validationEx.Message); } else if (exception is InvalidOperationException invalidOpEx) { details.Title = "Invalid operation."; details.Status = 400; // Bad Request details.Errors.Add("Operation", invalidOpEx.Message); } return details; } public class ExceptionDetails { public string? Type { get; set; } public string? Title { get; set; } public int Status { get; set; } public string? Detail { get; set; } public IDictionary<string, object?> Errors { get; set; } } } ``` tn2>添加上我们这个异常中间件。 ```csharp app.UseMiddleware<ExceptionHandlingMiddleware>(); ``` tn2>这里我们调用一个异常的接口测试一下。 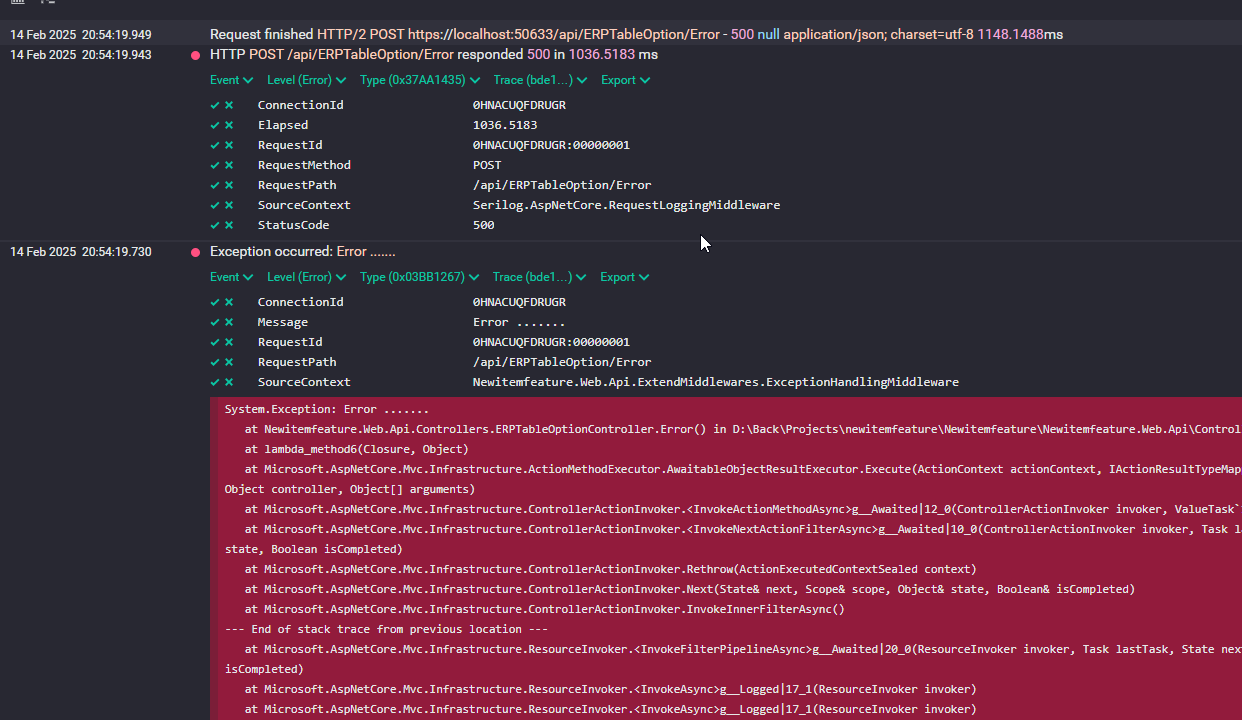 tn2>如果还希望写多个不同的属性进行展示,这里我添加一个`MM`举例,可以在下面的代码进行修改: ```csharp _logger.LogError(exception, "Exception occurred: {Message}", exception.Message); 修改为: _logger.LogError(exception, "Exception occurred: {Message} {MM}", exception.Message, exception.Message); ```