WPF基础学习笔记 电脑版发表于:2025/1/4 15:16  >#WPF基础学习笔记 [TOC] ### WPF简介 tn2>在WPF(Windows Presentation Foundation)中,布局控件用于管理和组织界面元素的排列与尺寸。不同的布局控件具有不同的布局策略,了解这些控件的使用方式能够帮助我们设计更加灵活和高效的用户界面。 Grid:网格布局 ------------ tn2>`Grid`是WPF中最常用的布局控件之一,通常用于实现复杂的基于行和列的布局。它允许开发者通过定义行和列的`RowDefinitions`和`ColumnDefinitions`来精确控制每个控件的排列位置。 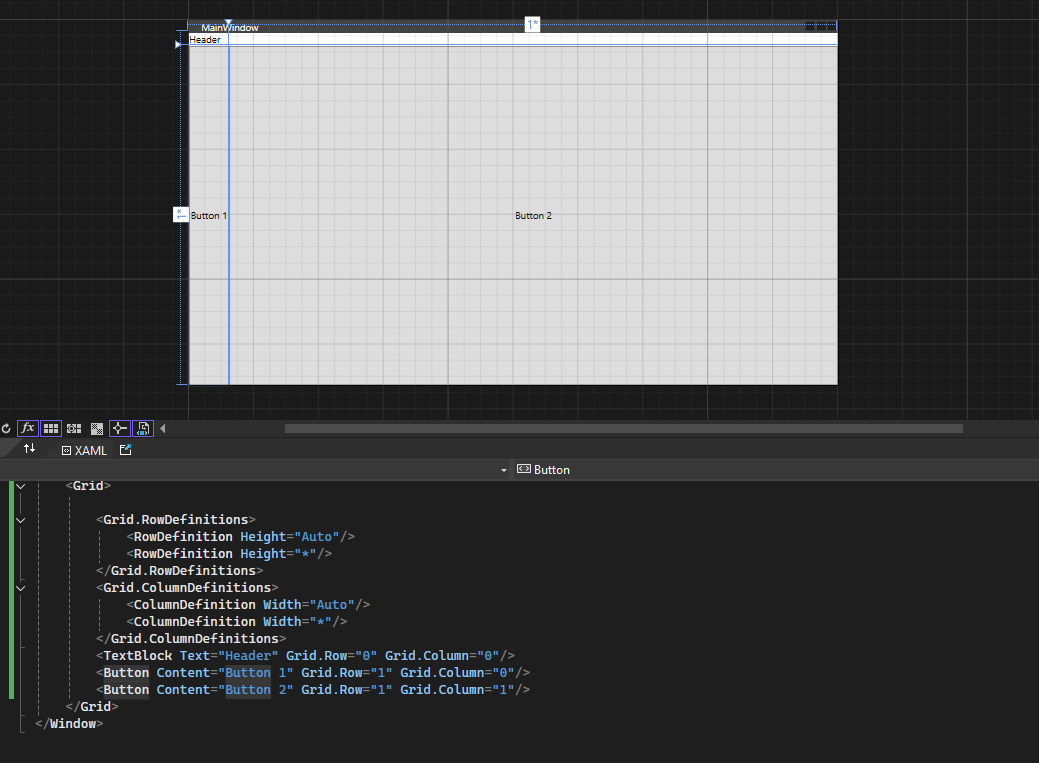 ```xml <Grid> <Grid.RowDefinitions> <RowDefinition Height="Auto"/> <RowDefinition Height="*"/> </Grid.RowDefinitions> <Grid.ColumnDefinitions> <ColumnDefinition Width="Auto"/> <ColumnDefinition Width="*"/> </Grid.ColumnDefinitions> <TextBlock Text="Header" Grid.Row="0" Grid.Column="0"/> <Button Content="Button 1" Grid.Row="1" Grid.Column="0"/> <Button Content="Button 2" Grid.Row="1" Grid.Column="1"/> </Grid> ``` **特点**: - 支持动态调整行和列的大小。 - 可以灵活地控制控件在指定单元格中的位置。 - 支持单元格合并。 StackPanel:堆叠布局 ------------ tn2>`StackPanel`是一个简单的布局控件,子元素会在垂直或水平方向上顺序排列。 它适用于简洁的线性布局,如列表、工具栏或菜单等。 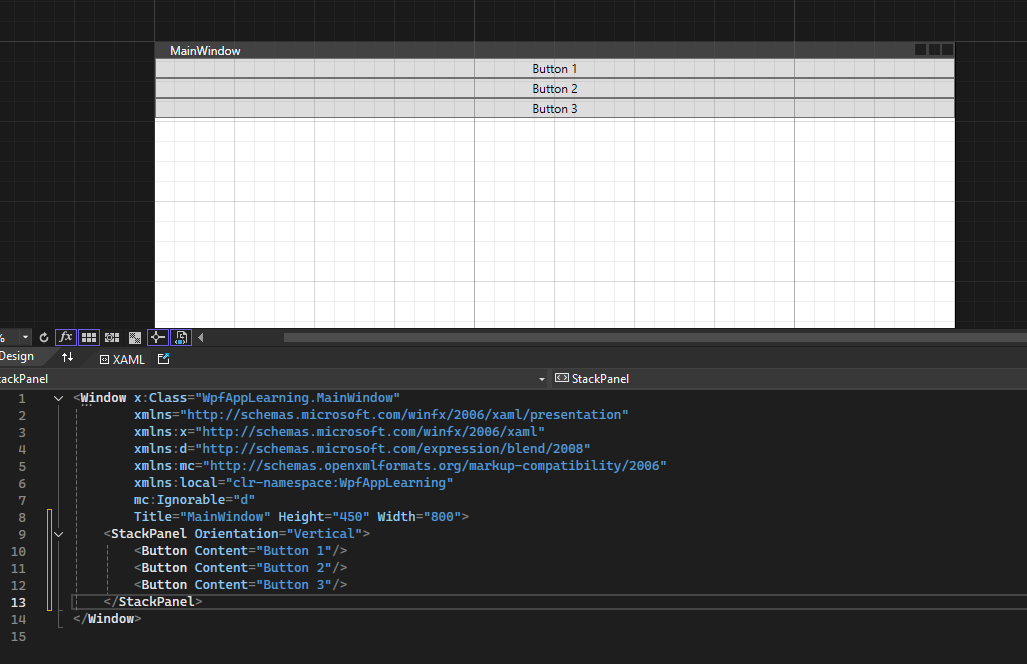 ```xml <StackPanel Orientation="Vertical"> <Button Content="Button 1"/> <Button Content="Button 2"/> <Button Content="Button 3"/> </StackPanel> ``` **特点**: - 元素沿着指定的方向(`Horizontal`或`Vertical`)堆叠。 - 子元素的大小取决于其内容的大小。 DockPanel:停靠布局 ------------ tn2>`DockPanel`允许将子控件停靠在容器的四个边(上、下、左、右),并自动填充剩余空间。 它非常适合于实现具有固定头部、侧边栏和内容区的布局结构。 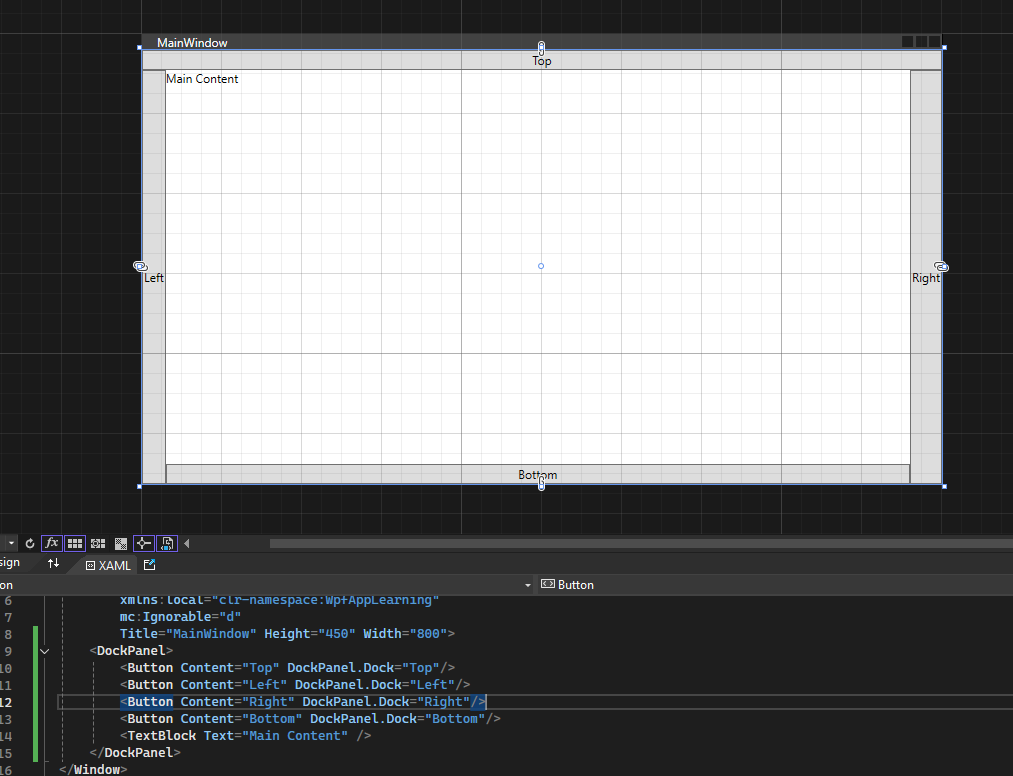 ```xml <DockPanel> <Button Content="Top" DockPanel.Dock="Top"/> <Button Content="Left" DockPanel.Dock="Left"/> <Button Content="Right" DockPanel.Dock="Right"/> <Button Content="Bottom" DockPanel.Dock="Bottom"/> <TextBlock Text="Main Content" /> </DockPanel> ``` tn>可以通过设置`LastChildFill="False"`取消让最后一个控件占满。 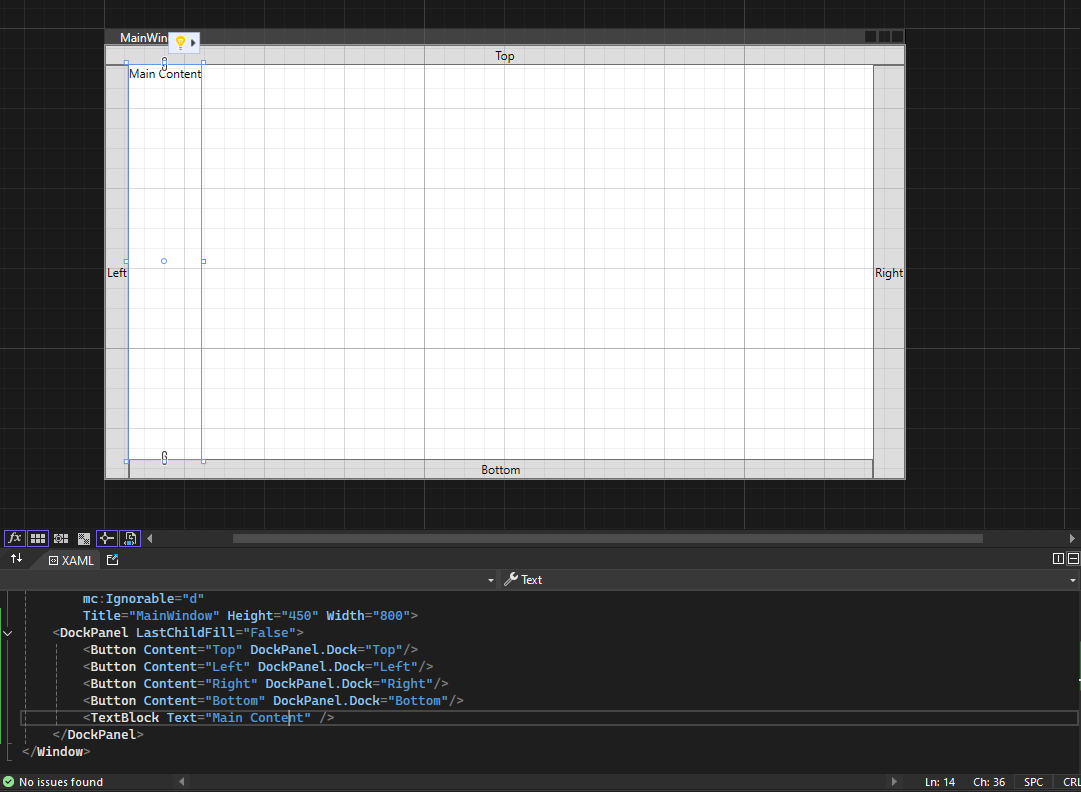 **特点**: - 支持控件停靠在容器的上、下、左、右或填充剩余空间。 - 默认情况下,第一个未指定停靠位置的控件会填充剩余空间。 WrapPanel:自动换行布局 ------------ tn2>`WrapPanel`用于将控件沿一个方向排列,当空间不足时自动换行。 它非常适合处理动态数量的元素,且不需要明确的行列定义。 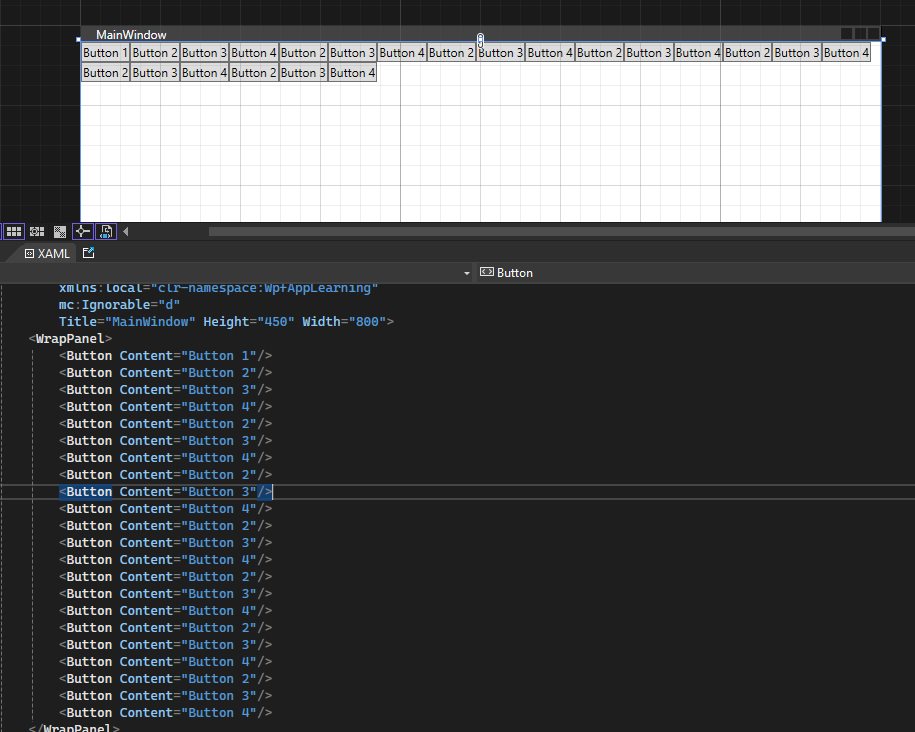 ```xml <WrapPanel> <Button Content="Button 1"/> <Button Content="Button 2"/> <Button Content="Button 3"/> <Button Content="Button 4"/> <Button Content="Button 2"/> <Button Content="Button 3"/> <Button Content="Button 4"/> <Button Content="Button 2"/> <Button Content="Button 3"/> <Button Content="Button 4"/> <Button Content="Button 2"/> <Button Content="Button 3"/> <Button Content="Button 4"/> <Button Content="Button 2"/> <Button Content="Button 3"/> <Button Content="Button 4"/> <Button Content="Button 2"/> <Button Content="Button 3"/> <Button Content="Button 4"/> <Button Content="Button 2"/> <Button Content="Button 3"/> <Button Content="Button 4"/> </WrapPanel> ``` **特点**: - 元素在指定的方向上排列,当当前行或列空间不足时,自动换行。 - 可以设置元素的宽度和高度,调整每个元素的布局。 UniformGrid:均匀网格布局 ------------ tn2>`UniformGrid`用于将子控件均匀地分布在一个网格中,确保每个控件的大小相同。 它自动调整控件的布局,适用于固定数量控件的布局需求。 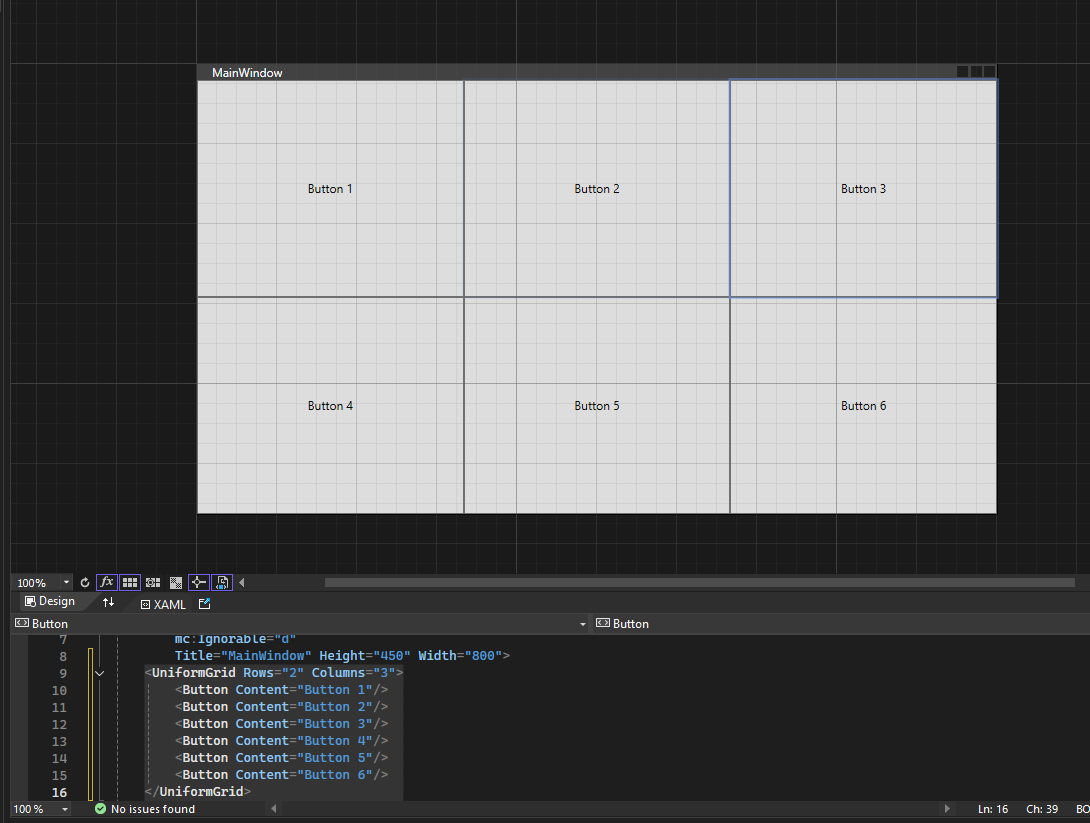 ```xml <UniformGrid Rows="2" Columns="3"> <Button Content="Button 1"/> <Button Content="Button 2"/> <Button Content="Button 3"/> <Button Content="Button 4"/> <Button Content="Button 5"/> <Button Content="Button 6"/> </UniformGrid> ``` **解析**: - `UniformGrid`将布局划分为2行3列,每个按钮的大小会自动调整以填充网格单元。 Canvas:绝对定位布局 ------------ tn2>`Canvas`用于精确控制子元素的位置,它允许开发者通过设置元素的`Left`、`Top`、`Right`和`Bottom`属性来指定其位置。 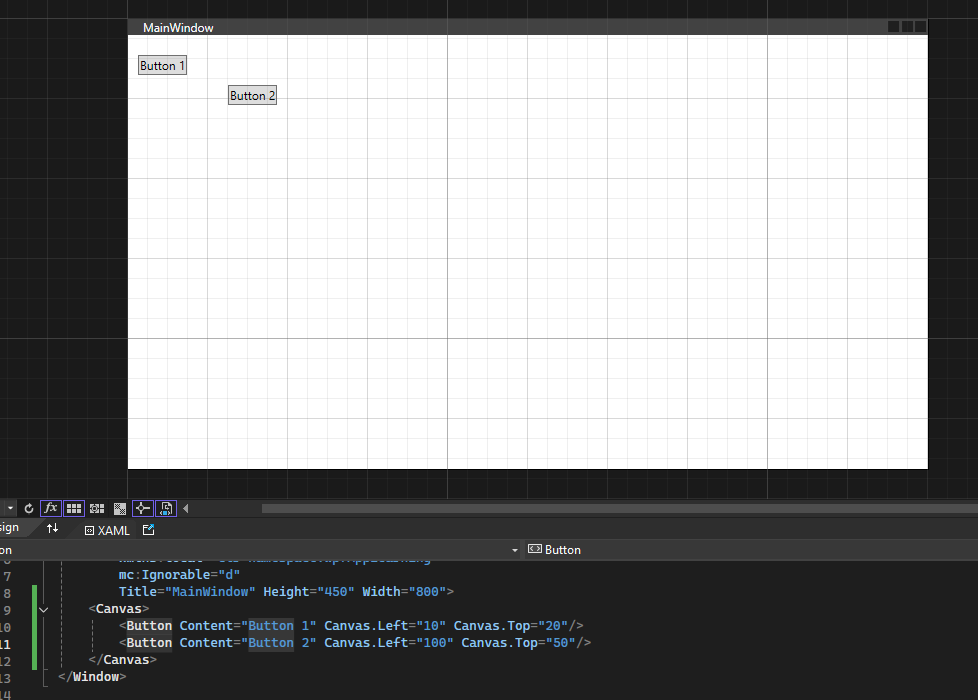 ```xml <Canvas> <Button Content="Button 1" Canvas.Left="10" Canvas.Top="20"/> <Button Content="Button 2" Canvas.Left="100" Canvas.Top="50"/> </Canvas> ``` **特点**: - 适合需要精确控制位置的场景。 - 使用绝对坐标定位元素。 InkCanvas:绘图和手写输入 ------------ tn2>`InkCanvas`是专为捕捉手写输入或绘图而设计的控件。 它提供了一个画布,用户可以在其上自由绘制线条或图形。 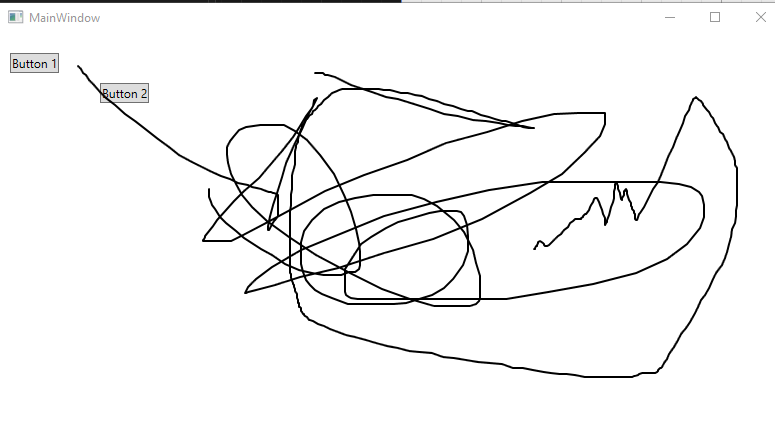 ```xml <InkCanvas> <Button Content="Button 1" InkCanvas.Left="10" InkCanvas.Top="20"/> <Button Content="Button 2" InkCanvas.Left="100" InkCanvas.Top="50"/> </InkCanvas> ``` tn>`InkCanvas`提供一个白色背景的画布,用户可以用手写笔或鼠标在上面进行绘制。 自定义一个排序插件 ------------ tn2>首先创建一个`OrderedPanel`类文件,并实现`Panel`类。 ```csharp public class OrderedPanel: Panel { // 重写 MeasureOverride 方法,用于测量子元素的方法 // availableSize是父面板在布局时传递给它的空间大小。 protected override Size MeasureOverride(Size availableSize) { foreach (UIElement child in InternalChildren) { // 让每个子元素都进行测量,子元素告诉父容器它需要的空间(即它的尺寸)。 child.Measure(availableSize); } // 返回一个可以容纳所有子元素的尺寸 return availableSize; } // 重写 ArrangeOverride 方法,用于排序和排列子元素 // 确定每个子元素的 实际位置和大小。 protected override Size ArrangeOverride(Size finalSize) { // 获取所有子元素,并按 Order 属性排序 var sortedChildren = InternalChildren.Cast<UIElement>() .OrderBy(child => GetPROrder(child)) .ToList(); double currentX = 0; // X坐标,用于排列子元素 // 为每个子元素进行排列 foreach (UIElement child in sortedChildren) { // 获取子元素的尺寸 Size childSize = child.DesiredSize; // 指定子元素实际位置和大小的方法。 child.Arrange(new Rect(currentX, 0, childSize.Width, childSize.Height)); // 更新当前X坐标,进行下一次排列 currentX += childSize.Width; } // 返回面板最终尺寸 return finalSize; } // 获取子元素的 Order 属性 private int GetPROrder(UIElement element) { // 如果子元素是 Button 或者其他你希望支持的类型 if (element is FrameworkElement fe) { var orderProperty = fe.GetValue(OrderProperty); return orderProperty is int order ? order : 0; } return 0; // 默认顺序是 0 } // 注册 Order 属性,方便在 XAML 中使用 public static readonly DependencyProperty OrderProperty = DependencyProperty.RegisterAttached("Order", typeof(int), typeof(OrderedPanel), new PropertyMetadata(0)); // 设置子元素的 Order 属性 public static void SetOrder(UIElement element, int value) { element.SetValue(OrderProperty, value); } // 获取子元素的 Order 属性 public static int GetOrder(UIElement element) { return (int)element.GetValue(OrderProperty); } } ``` tn2>然后我们需要重新生成一下项目,打开我们的`MainWindow.xaml`文件。 ```xml <Window x:Class="WpfAppPlug.MainWindow" xmlns="http://schemas.microsoft.com/winfx/2006/xaml/presentation" xmlns:x="http://schemas.microsoft.com/winfx/2006/xaml" xmlns:d="http://schemas.microsoft.com/expression/blend/2008" xmlns:mc="http://schemas.openxmlformats.org/markup-compatibility/2006" xmlns:local="clr-namespace:WpfAppPlug" mc:Ignorable="d" Title="MainWindow" Height="450" Width="800"> <Grid> <!-- 使用自定义的 OrderedPanel --> <local:OrderedPanel> <!-- 设置每个子元素的 Order 属性 --> <Button Content="Button 1" Width="100" Height="50" local:OrderedPanel.Order="2"/> <Button Content="Button 2" Width="100" Height="50" local:OrderedPanel.Order="1"/> <Button Content="Button 3" Width="100" Height="50" local:OrderedPanel.Order="3"/> </local:OrderedPanel> </Grid> </Window> ``` 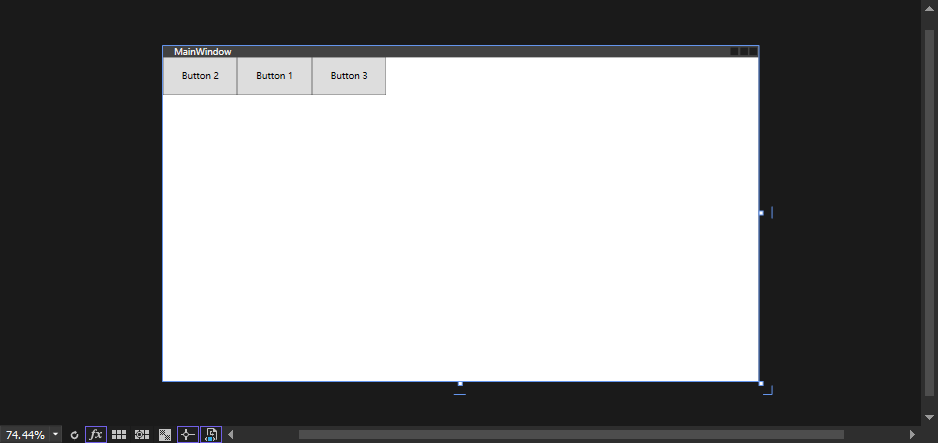 无边框窗口的设置 ------------ tn2>设置`WindowStyle="None"`:去掉标题栏和边框。 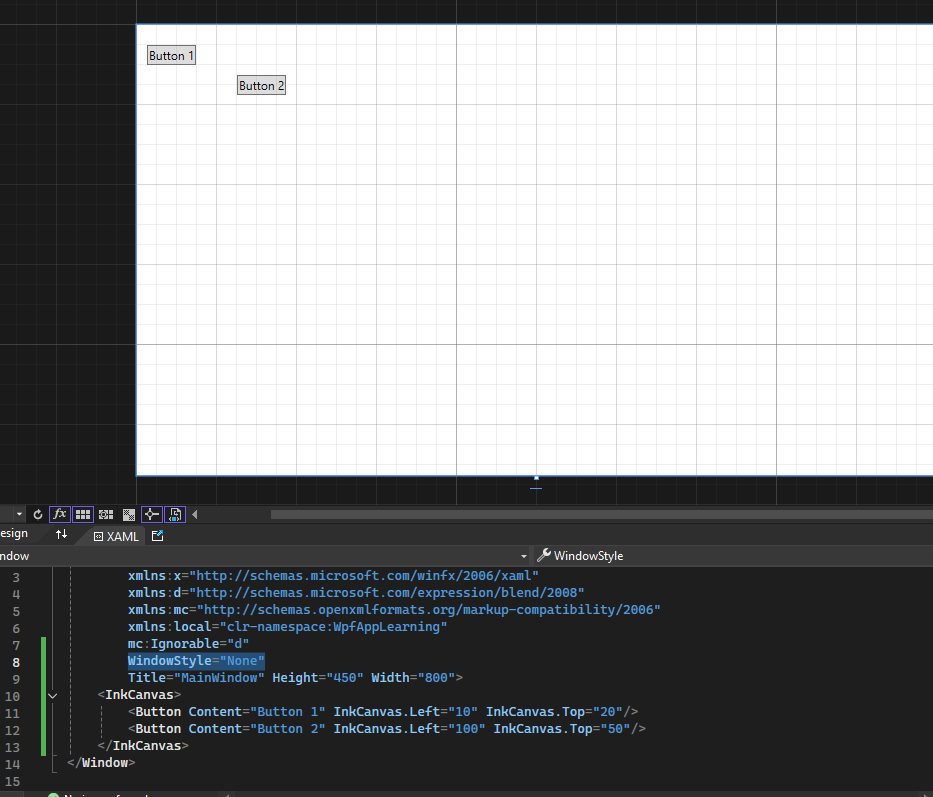 tn2>设置`AllowsTransparency="True"`+`Background="Transparent"`:启用透明窗口。 只有启用透明,才能去除窗口的边框和背景色。 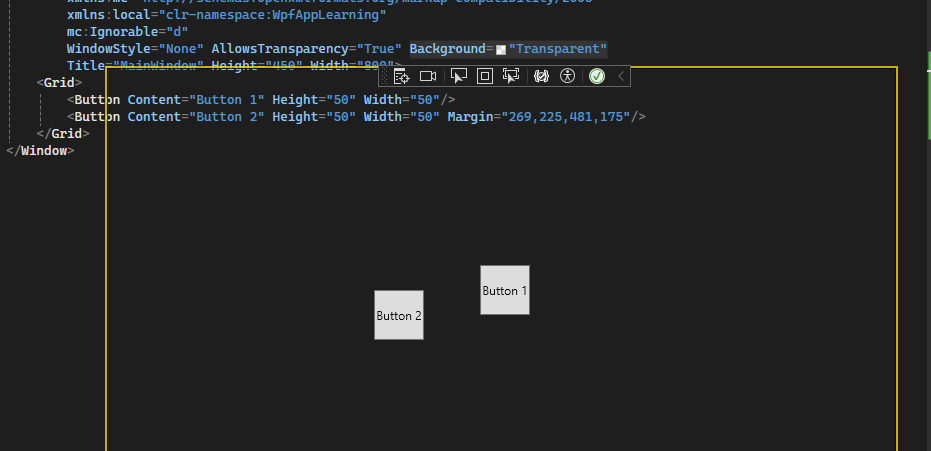 tn2>设置`WindowStartupLocation`属性用于控制窗口在启动时的位置。它决定了窗口在屏幕上的初始位置。 它有以下几个值: | 值 | 描述 | | ------------ | ------------ | | `Manual` | 手动设置窗口的启动位置。窗口的位置可以通过设置Top和Left来控制。 | |`CenterScreen`|窗口启动时会自动居中在屏幕上。| |`CenterOwner`|如果窗口有父窗口(Owner),则新窗口会在父窗口上居中。| |`WindowsDefaultLocation`|系统默认的启动位置。| 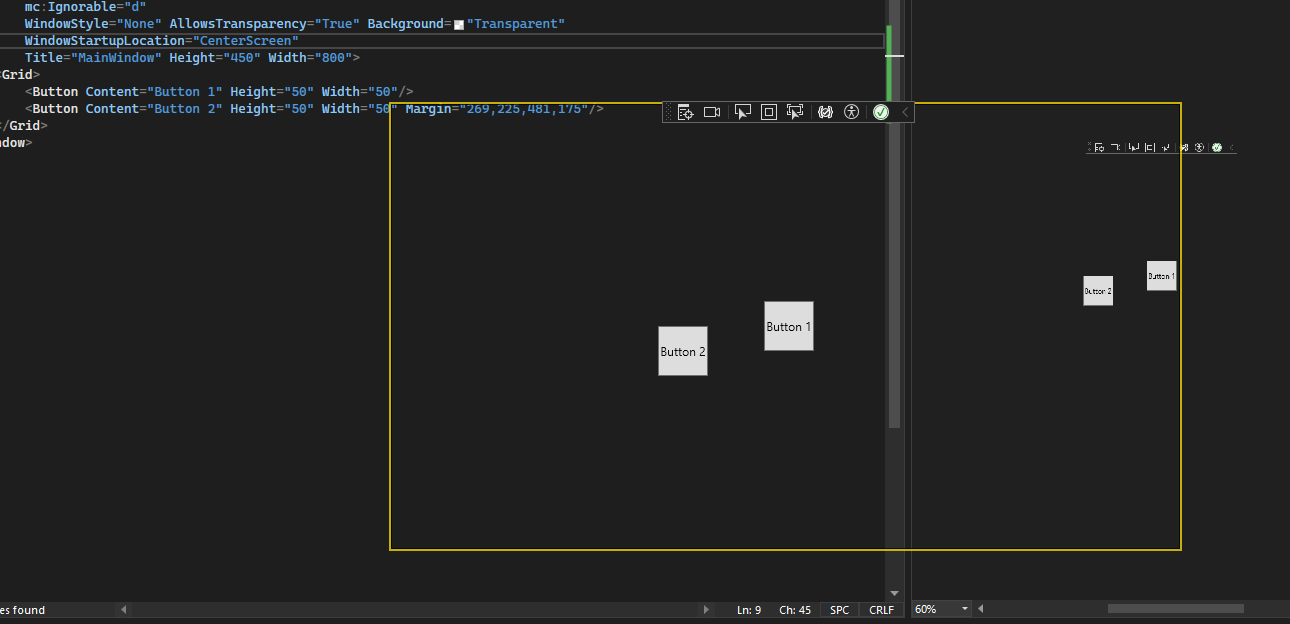 设置图片和音频文件路径 ------------ #### 图片设置 tn2>WPF 中的 `Image` 控件用于显示图像。 您可以直接在 XAML 中通过 `Source` 属性来指定图片的路径,支持的路径类型包括相对路径、绝对路径以及资源路径。 如果您将图片作为嵌入资源添加到项目中(例如,存放在 `Resources` 文件夹中),您可以通过 `pack://` URI 引用它: 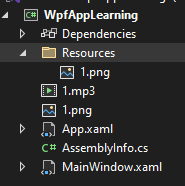 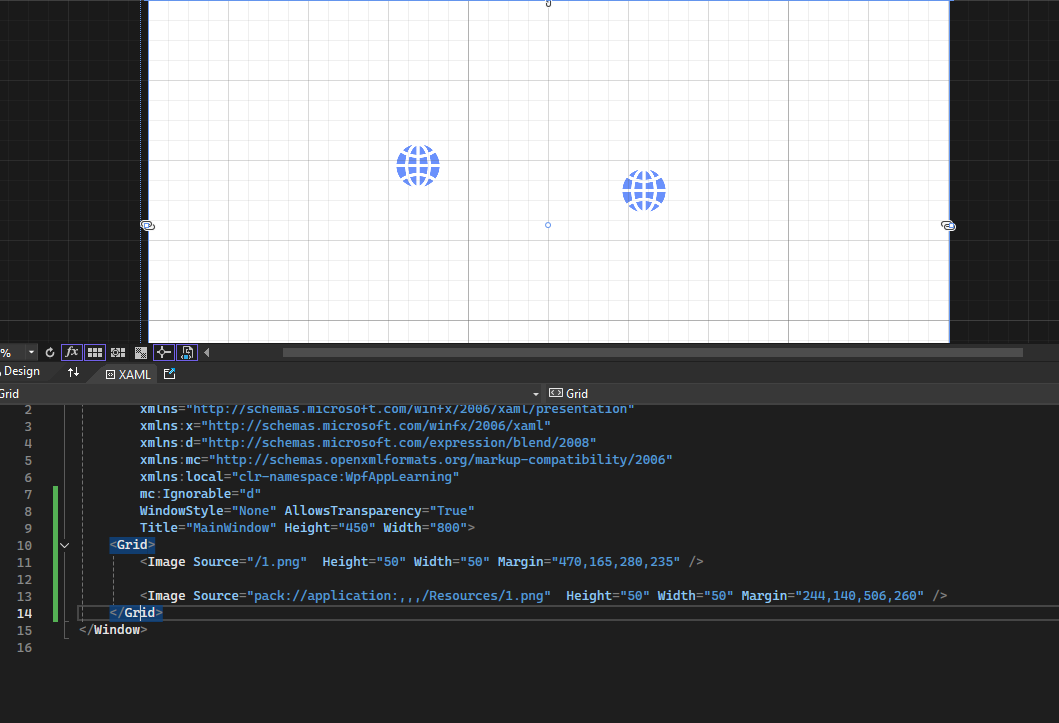 ```xml <Grid> <Image Source="/1.png" Height="50" Width="50" Margin="470,165,280,235" /> <Image Source="pack://application:,,,/Resources/1.png" Height="50" Width="50" Margin="244,140,506,260" /> </Grid> ``` #### 播放嵌入资源中的音频 tn2>假设您将音频文件添加为项目资源并设置了 `Build Action` 为 `Resource`,您可以通过 `MediaElement` 控件播放该音频: 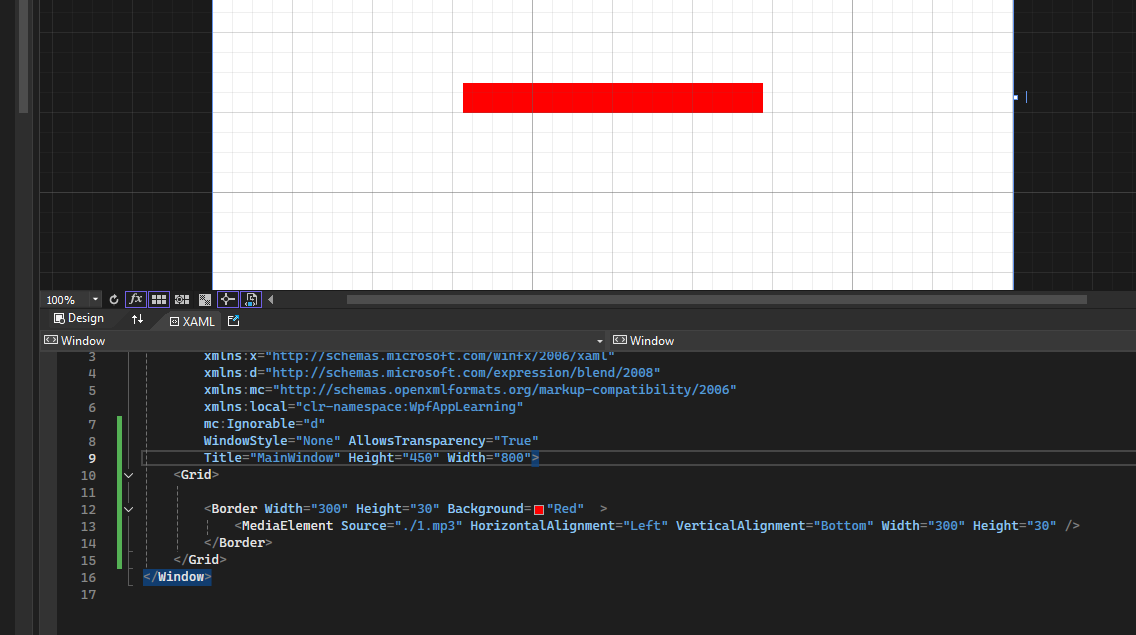 ```xml <Border Width="300" Height="30" Background="Red" > <MediaElement Source="./1.mp3" HorizontalAlignment="Left" VerticalAlignment="Bottom" Width="300" Height="30" /> </Border> ``` 静态资源与动态资源 ------------ tn2>在 WPF 中,静态资源(Static Resources)是指在应用程序运行时可以直接引用的资源,如颜色、样式、模板、图像等。使用静态资源的好处在于,可以将常用的资源集中管理,避免重复定义,增强可维护性和可重用性。 首先需要在 XAML 中引入 System 命名空间,可以方便定义(`double`、`int`...)这样的变量: ```xml xmlns:sys="clr-namespace:System;assembly=mscorlib" ``` #### 静态资源 tn2>这里使用 `sys:String`变量作为静态资源,通过`Button`进行显示这个静态资源。 ```xml <Window x:Class="WpfAppLearning.MainWindow" xmlns="http://schemas.microsoft.com/winfx/2006/xaml/presentation" xmlns:x="http://schemas.microsoft.com/winfx/2006/xaml" xmlns:d="http://schemas.microsoft.com/expression/blend/2008" xmlns:mc="http://schemas.openxmlformats.org/markup-compatibility/2006" xmlns:local="clr-namespace:WpfAppLearning" xmlns:sys="clr-namespace:System;assembly=mscorlib" mc:Ignorable="d" WindowStyle="None" AllowsTransparency="True" Title="MainWindow" Height="450" Width="800"> <Window.Resources> <sys:String x:Key="buttonContent" >There is Buttion Value</sys:String> </Window.Resources> <Grid> <Button Width="300" Height="30" Content="{StaticResource buttonContent}"></Button> </Grid> </Window> ```  #### 动态资源 tn2>**动态资源**(`DynamicResource`)的值可以在运行时进行更新。 因此,如果您需要在运行时动态更改这些变量的值,使用动态资源可能更合适。 ```xml <Window x:Class="WpfAppLearning.MainWindow" xmlns="http://schemas.microsoft.com/winfx/2006/xaml/presentation" xmlns:x="http://schemas.microsoft.com/winfx/2006/xaml" xmlns:d="http://schemas.microsoft.com/expression/blend/2008" xmlns:mc="http://schemas.openxmlformats.org/markup-compatibility/2006" xmlns:local="clr-namespace:WpfAppLearning" xmlns:sys="clr-namespace:System;assembly=mscorlib" mc:Ignorable="d" WindowStyle="None" AllowsTransparency="True" Title="MainWindow" Height="450" Width="800"> <Window.Resources> <sys:String x:Key="buttonContent" >There is Buttion Value</sys:String> </Window.Resources> <Grid> <Button Width="300" Height="30" Content="{DynamicResource buttonContent}" Click="Button_Click" ></Button> </Grid> </Window> ``` tn2>注意这里将`StaticResource`改成了`DynamicResource`,在后台的Button_Click事件中每点击一次`buttonContent`对改资源进行动态加`1`。 ```csharp private void Button_Click(object sender, RoutedEventArgs e) { // 在当前资源的基础上添加1 var buttonWidth = Resources["buttonContent"].ToString(); Resources["buttonContent"] += "1"; } ```  #### 静态资源定义类型资源 tn2>首先我们定义一个`TestModel`作为测试,然后在前端引用我们的命名空间,并定义其中的值。 ```csharp namespace WpfAppLearning { public class TestModel { public int Id { get; set; } public string Name { get; set; } } } ``` ```xml xmlns:hmy="clr-namespace:WpfAppLearning" ``` ```xml <Window x:Class="WpfAppLearning.MainWindow" xmlns="http://schemas.microsoft.com/winfx/2006/xaml/presentation" xmlns:x="http://schemas.microsoft.com/winfx/2006/xaml" xmlns:d="http://schemas.microsoft.com/expression/blend/2008" xmlns:mc="http://schemas.openxmlformats.org/markup-compatibility/2006" xmlns:local="clr-namespace:WpfAppLearning" xmlns:sys="clr-namespace:System;assembly=mscorlib" xmlns:hmy="clr-namespace:WpfAppLearning" mc:Ignorable="d" WindowStyle="None" AllowsTransparency="True" Title="MainWindow" Height="450" Width="800"> <Window.Resources> <sys:String x:Key="buttonContent" >There is Buttion Value</sys:String> <hmy:TestModel x:Key="MM" Id="10" Name="hmyz1z1"></hmy:TestModel> </Window.Resources> <Grid> <Button Width="300" Height="30" Content="{DynamicResource buttonContent}" Click="Button_Click" ></Button> <Label Width="300" Height="30" Content="{Binding Source={StaticResource MM},Path=Name}" Margin="250,175,250,245"></Label> </Grid> </Window> ```  tn2>在`Button`中同样可以定义资源,如果使用的是`StaticResource`它将不会进行改变,如果是`DynamicResource`它将进行改变值。举例:  ```csharp <Button Width="300" Height="30" Content="{DynamicResource buttonContent}" Click="Button_Click" > <Button.Resources> <sys:String x:Key="buttonContent" >Change</sys:String> </Button.Resources> </Button> ``` 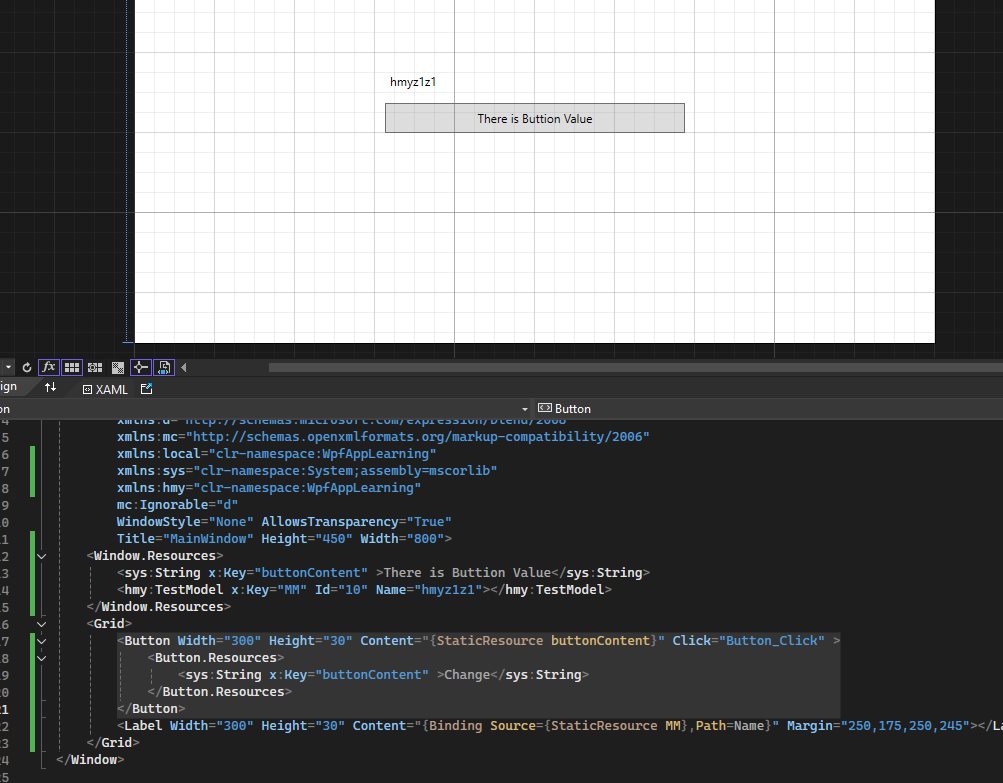 ```xml <Button Width="300" Height="30" Content="{StaticResource buttonContent}" Click="Button_Click" > <Button.Resources> <sys:String x:Key="buttonContent" >Change</sys:String> </Button.Resources> </Button> ``` tn2>资源的递归搜索:自身资源-->父级资源-->......-->窗口资源-->应用程序资源-->框架系统资源。 #### 静态资源与动态资源区别 tn2>静态资源:程序编译时确定,程序编译后-->BAML(资源确定)。 动态资源:运行时可监听资源变化。 #### SolidColorBrush 的使用 tn2>`SolidColorBrush` 是一种用于填充颜色的画刷,常用于设置控件的背景、前景色等。 `SolidColorBrush` 是 WPF 中最基础的一种画刷类型,它允许你指定一个简单的颜色(例如,`Red`、`#FF0000` 等)。 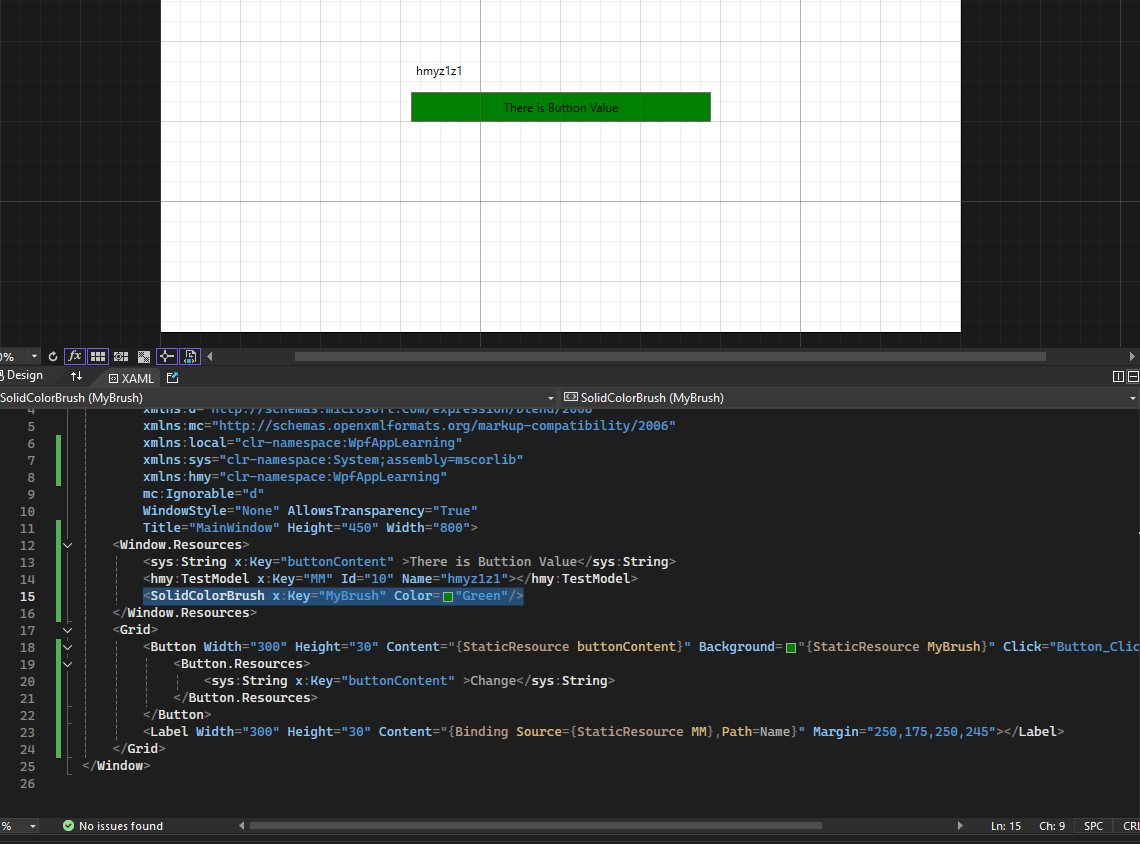 ```xml <Window x:Class="WpfAppLearning.MainWindow" xmlns="http://schemas.microsoft.com/winfx/2006/xaml/presentation" xmlns:x="http://schemas.microsoft.com/winfx/2006/xaml" xmlns:d="http://schemas.microsoft.com/expression/blend/2008" xmlns:mc="http://schemas.openxmlformats.org/markup-compatibility/2006" xmlns:local="clr-namespace:WpfAppLearning" xmlns:sys="clr-namespace:System;assembly=mscorlib" xmlns:hmy="clr-namespace:WpfAppLearning" mc:Ignorable="d" WindowStyle="None" AllowsTransparency="True" Title="MainWindow" Height="450" Width="800"> <Window.Resources> <sys:String x:Key="buttonContent" >There is Buttion Value</sys:String> <hmy:TestModel x:Key="MM" Id="10" Name="hmyz1z1"></hmy:TestModel> <SolidColorBrush x:Key="MyBrush" Color="Green"/> </Window.Resources> <Grid> <Button Width="300" Height="30" Content="{StaticResource buttonContent}" Background="{StaticResource MyBrush}" Click="Button_Click" > <Button.Resources> <sys:String x:Key="buttonContent" >Change</sys:String> </Button.Resources> </Button> <Label Width="300" Height="30" Content="{Binding Source={StaticResource MM},Path=Name}" Margin="250,175,250,245"></Label> </Grid> </Window> ``` #### pack定义规则 tn2>在 WPF 中,`pack` URI 是一种用于引用应用程序资源(如图像、字体、文件等)和程序集资源的特殊路径格式。它是一种相对路径机制,使得应用程序资源可以在不同的环境和部署方式下无缝访问(例如,本地文件、嵌入式资源、外部程序集等)。`pack` 路径通常用于资源绑定、图像加载、样式等场景。 格式如下: ```xml pack://application:,,,/[程序集名称;]component/路径 ``` tn2>如果要嵌入字体资源。 ```xml <TextBlock FontFamily="pack://application:,,,/Fonts/#MyFont"/> ``` #### ResourceDictionary资源字典 tn2>`ResourceDictionary` 相当于一个资源集合,可以放在`Window.Resources`下面也可以放入一个单独的链接中。 ```xml <ResourceDictionary> <sys:String x:Key="buttonContent" >There is Buttion Value</sys:String> <hmy:TestModel x:Key="MM" Id="10" Name="hmyz1z1"></hmy:TestModel> <SolidColorBrush x:Key="MyBrush" Color="Green"/> </ResourceDictionary> ``` 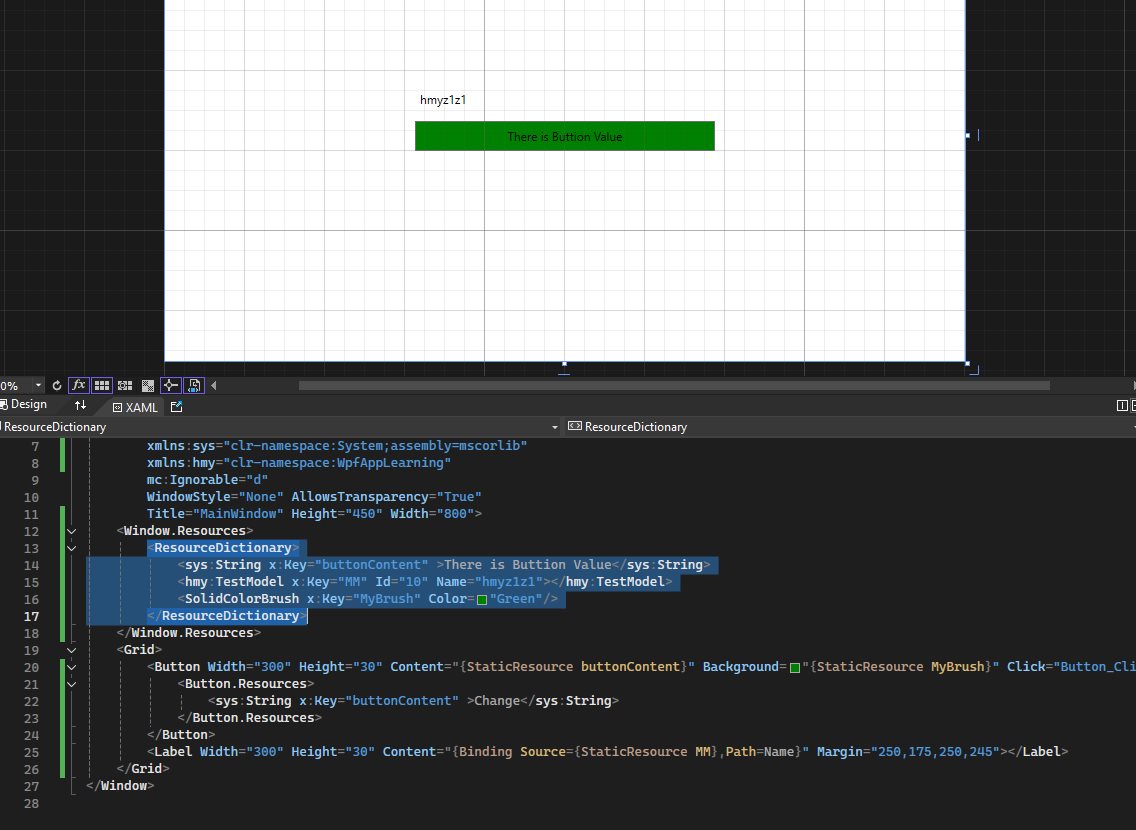 tn2>定义到单独的`GR.xaml`中。 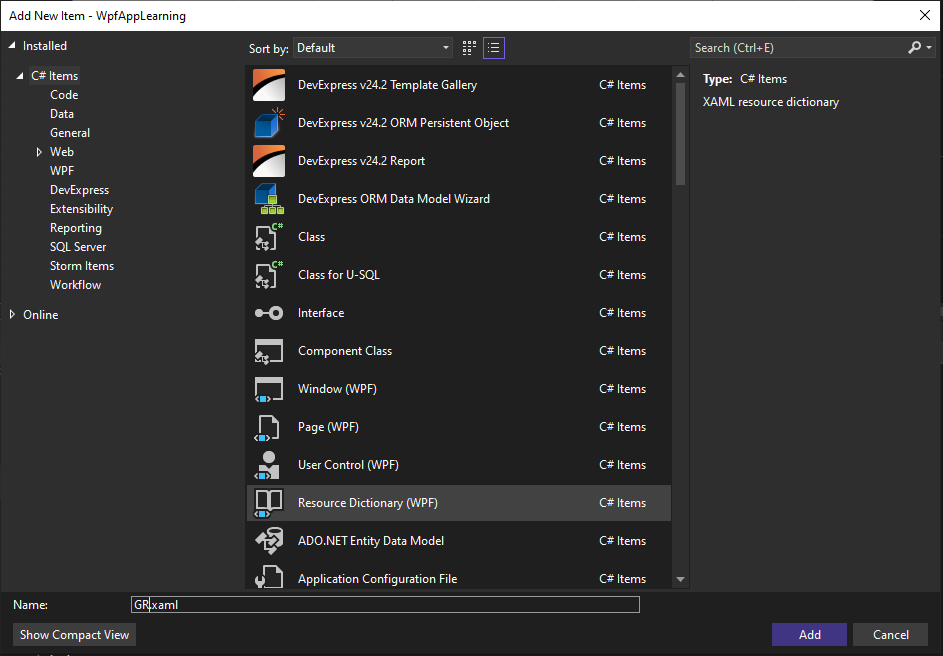 ```xml <ResourceDictionary xmlns="http://schemas.microsoft.com/winfx/2006/xaml/presentation" xmlns:x="http://schemas.microsoft.com/winfx/2006/xaml" xmlns:sys="clr-namespace:System;assembly=mscorlib" xmlns:hmy="clr-namespace:WpfAppLearning"> <sys:String x:Key="buttonContent" >There is Buttion Value</sys:String> <hmy:TestModel x:Key="MM" Id="10" Name="hmyz1z1"></hmy:TestModel> <SolidColorBrush x:Key="MyBrush" Color="Green"/> </ResourceDictionary> ``` ```xml <Window.Resources> <ResourceDictionary Source="pack://application:,,,/GR.xaml"></ResourceDictionary> </Window.Resources> <Grid> <Button Width="300" Height="30" Content="{StaticResource buttonContent}" Background="{StaticResource MyBrush}" Click="Button_Click" > <Button.Resources> <sys:String x:Key="buttonContent" >Change</sys:String> </Button.Resources> </Button> <Label Width="300" Height="30" Content="{Binding Source={StaticResource MM},Path=Name}" Margin="250,175,250,245"></Label> </Grid> ```  #### 使用内置的系统颜色 tn2>WPF 提供了一个名为 `SystemColors` 的类,它包含了一些常见的系统颜色,如窗口背景色、按钮面板色、选择背景色等。 - `SystemColors.ActiveBorder`:活动边框颜色 - `SystemColors.ActiveCaption`:活动窗口标题栏的颜色 - `SystemColors.AppWorkspace`:应用程序工作区背景色 - `SystemColors.ButtonFace`:按钮面板颜色 - `SystemColors.Highlight`:选中项的背景颜色 - `SystemColors.HotTrack`:鼠标悬停时的颜色 - `SystemColors.InactiveBorder`:非活动边框颜色 - `SystemColors.Window`:窗口背景颜色 ```xml <Label Width="300" Height="30" Content="{Binding Source={StaticResource MM},Path=Name}" Background="{x:Static SystemColors.ActiveBorderBrush}" Margin="250,175,250,245"></Label> ``` 