.net6 Signalr+Vue3 的运用(下) 电脑版发表于:2023/2/1 17:29  >#.net6 Signalr+Vue3 的运用(下) [TOC] tn2>上篇链接:https://www.tnblog.net/hb/article/details/7961 SignalR 中的用户 ------------ tn>SignalR 中的单个用户可以与一个应用建立多个连接。 举例:当你手机和电脑连接到SignalR时,识别到当前用户多个设备可以同时发送消息。 可以通过中心内的`Context.UserIdentifier`属性访问连接的用户标识符。 ### 示例 tn2>接下来我们结合上篇,在`ClientHubController`控制器的基础上,添加一个`SendCustomUserMessage2`接口专门对单一用户关联的所有设备发送消息。 ```csharp /// <summary> /// 发送指定消息给指定的用户 /// </summary> /// <param name="userid"></param> /// <param name="date"></param> /// <param name="hubContext"></param> /// <returns></returns> [HttpGet("SendCustomUserMessage2", Name = "SendCustomUserMessage2")] public async Task<IActionResult> SendCustomUserMessage2( string username, string date, [FromServices] IHubContext<ChatHub, IChatClient> hubContext ) { await hubContext.Clients.User(username).SendCustomUserMessage(date); return Ok("Send Successful!"); } ``` tn2>测试两个页面登录同一个`bob`用户,然后在服务器端swagger调用方法,两个页面将同时收到消息。 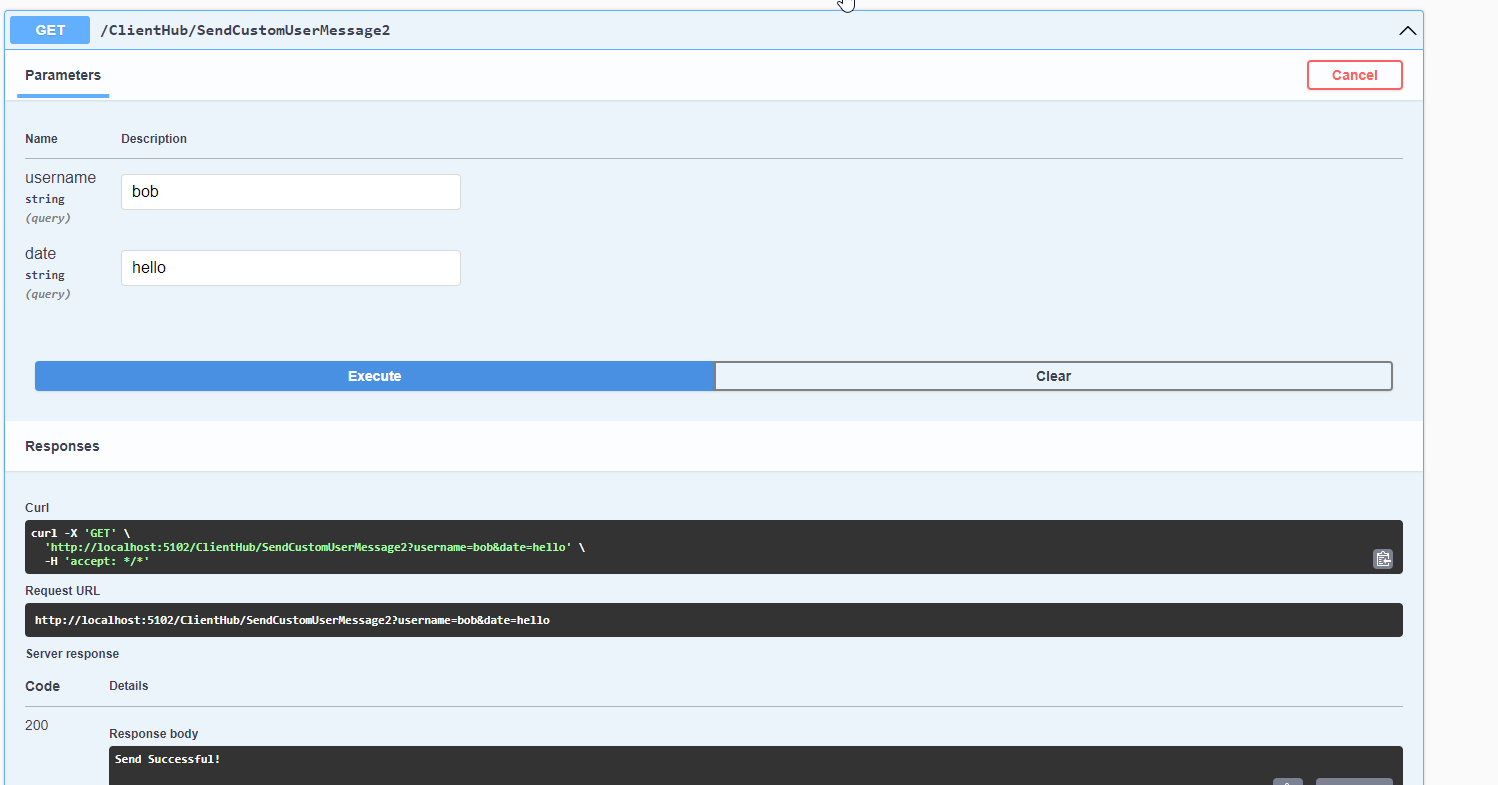  tn2>那么有人要问了能不能不以`UserIdentifier`作为标识换成其他标识,比如通过邮箱来进行标识? 可以进行改变授权的逻辑吗? 当然可以。 ### 自定义设备标识 tn>可以通过实现`IUserIdProvider`接口中的`GetUserId`方法,来进行设备的区分,我这里通过邮箱的方式来作为我们区分的标识。 tn2>首先我们在后端定义`EmailBasedUserIdProvider`类实现`IUserIdProvider`接口,然后我们再对其重新进行依赖注入。 ```csharp public class EmailBasedUserIdProvider : IUserIdProvider { public string? GetUserId(HubConnectionContext connection) { return connection.User?.FindFirst(ClaimTypes.Email)?.Value; } } ``` ```csharp builder.Services.AddSingleton<IUserIdProvider, EmailBasedUserIdProvider>(); ``` tn2>然后我们在`MyJWTBearer`中添加一个`Email`的Claim参数。 ```csharp var claims = new[] { new Claim(ClaimTypes.NameIdentifier, httpContext.Request.Query["user"]), new Claim(ClaimTypes.Email, $"{httpContext.Request.Query["user"]}@tnblog.com"), }; ``` tn2>这样就可以了,测试一下。 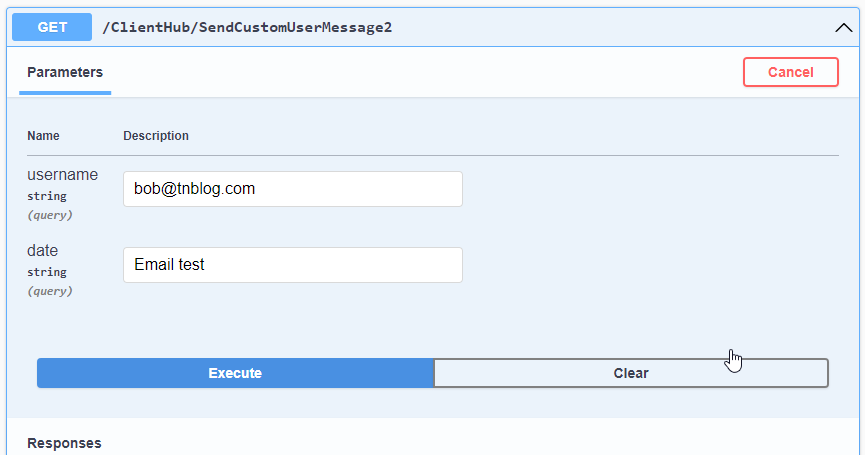  ### 自定义授权逻辑 tn2>接下来我们通过定义`TnblogRequirement `实现自定义授权,然后添加一下自定义授权策略一下,并在`SendMessage`方法上添加自定义授权。 ```csharp public class TnblogRequirement : AuthorizationHandler<TnblogRequirement, HubInvocationContext>, IAuthorizationRequirement { protected override Task HandleRequirementAsync(AuthorizationHandlerContext context, TnblogRequirement requirement, HubInvocationContext resource) { // 首先用户的授权Identity 属性不能为空 // 然后我们禁用cc@tnblog.com邮箱的账户 if ( context.User.Identity != null && (context.User?.FindFirst(ClaimTypes.Email).Value != "cc@tnblog.com") ) { context.Succeed(requirement); } else { context.Fail(new AuthorizationFailureReason(requirement, "授权失败")); } return Task.CompletedTask; } } ``` ```csharp builder.Services.AddAuthorization(options => { options.AddPolicy("Tnblog", policy => { policy.Requirements.Add(new TnblogRequirement()); }); }); ``` ```csharp [Authorize("Tnblog")] public async Task SendMessage(string data) { Console.WriteLine("Have one Data!"); await Clients.All.SendAll(_common.SendAll(data)); await Clients.Caller.SendAll(_common.SendCaller()); } ``` tn2>接下来我们分别用bob账户和cc账户来进行检测,发现cc账户发送消息失败。 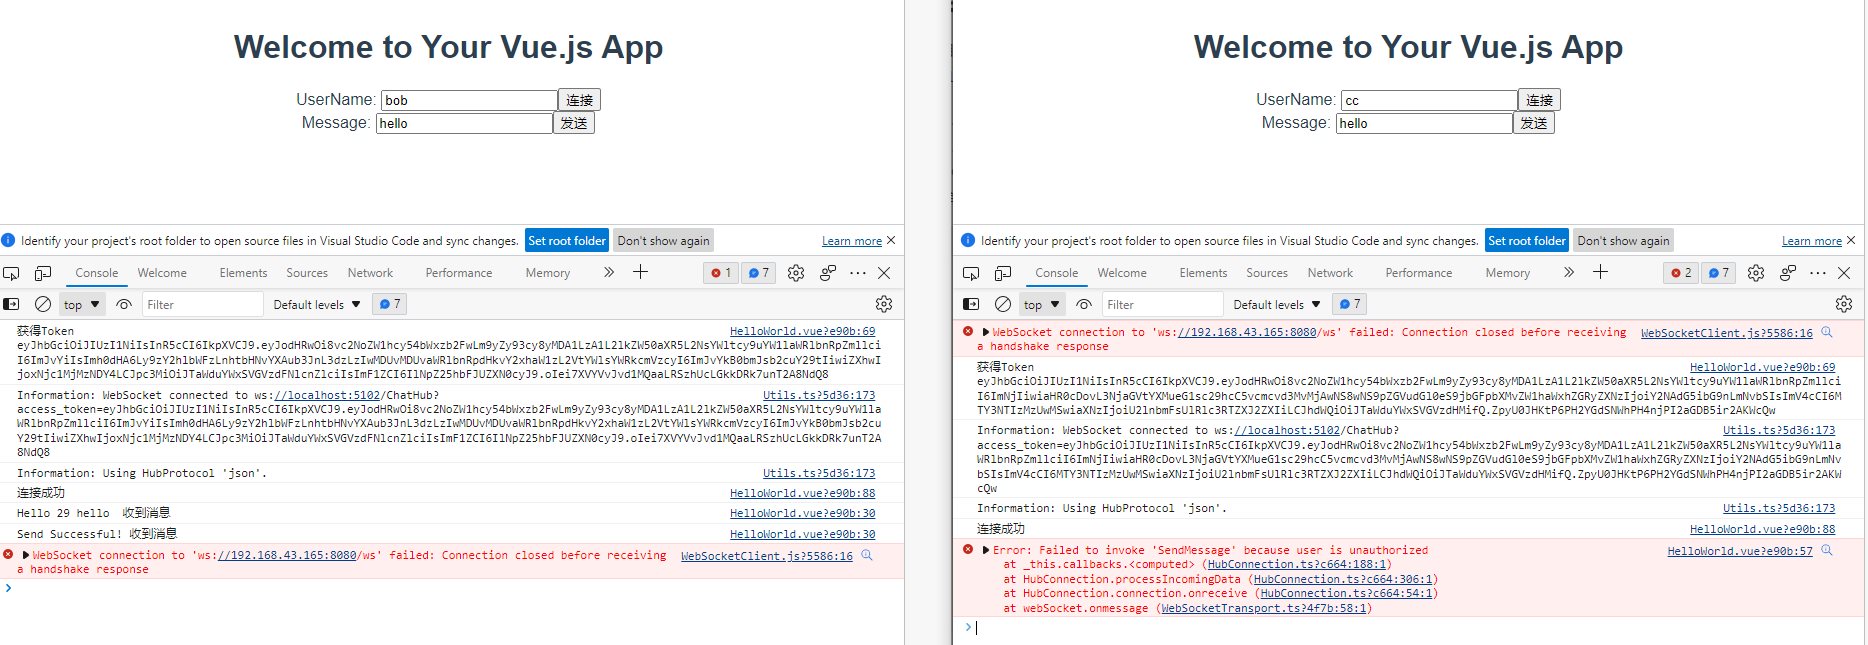 SignalR 中的组 ------------ tn2>简单来讲,按照客户端连接来进行分组。 在`ChatHub`中,我们可以直接使用`Group`来进行组的添加和删除,由于它的Groups是不允许外部查看访问的所以我这里自定义的一个类来专门记录。 ```csharp public static class GroupStore { public static Dictionary<string, List<string>> Groups = new Dictionary<string, List<string>>(); public static void Add(string groupname,string Id) { if (Groups.ContainsKey(groupname)) { if (Groups.TryGetValue(groupname,out var values)) { if (values.Contains(Id)) return; values.Add(Id); } else { throw new Exception("Add group Error"); } } else { var newvalues = new List<string>() { Id }; Groups.Add(groupname, newvalues); } } public static void Remove(string groupname, string Id) { if (Groups.ContainsKey(groupname)) { if (Groups.TryGetValue(groupname, out var values)) { if (!values.Contains(Id)) return; values.Remove(Id); if (!(values.Count > 0)) Groups.Remove(groupname); } else { throw new Exception("Remove group Error"); } } } /// <summary> /// 连接断开时删除 /// </summary> /// <param name="Id"></param> public static void UnConnection(string Id) { Groups.Where(x=>x.Value.Contains(Id)).AsParallel().ForAll(x => x.Value.Remove(Id)); } } ``` tn2>在`ChatHub`中,添加可以调用组的方法 ```csharp public override Task OnDisconnectedAsync(Exception exception) { var id = Context.ConnectionId; UserIdsStore.Ids.Remove(id); _logger.LogInformation($"Client ConnectionId=> [[{id}]] Already Close Connection Server!"); // 删除相关组下的信息 GroupStore.UnConnection(Context.ConnectionId); return base.OnDisconnectedAsync(exception); } /// <summary> /// 添加组 /// </summary> /// <param name="groupName"></param> /// <returns></returns> public async Task AddToGroup(string groupName) { await Groups.AddToGroupAsync(Context.ConnectionId, groupName); // 按照组来发送消息 await Clients.Group(groupName).SendCustomUserMessage($"{Context.ConnectionId} has joined the group {groupName}."); GroupStore.Add(groupName, Context.ConnectionId); } /// <summary> /// 删除组 /// </summary> /// <param name="groupName"></param> /// <returns></returns> public async Task RemoveFromGroup(string groupName) { await Groups.RemoveFromGroupAsync(Context.ConnectionId, groupName); // 按照组来发送消息 await Clients.Group(groupName).SendCustomUserMessage($"{Context.ConnectionId} has left the group {groupName}."); GroupStore.Remove(groupName, Context.ConnectionId); } ``` tn2>在Vue客户端中,我们添加组和离开组的一些内容。 ```javascript <div> Group: <input type="text" v-model="group" > <button @click="onAddGroupButton" >加入组</button> <button @click="onRemoveGroupButton" >离开组</button> </div> ... onAddGroupButton() { var e = this signal .invoke('AddToGroup', e.group) .catch(function(err) {return console.error(err) }) }, onRemoveGroupButton() { var e = this signal .invoke('RemoveFromGroup', e.group) .catch(function(err) {return console.error(err) }) }, ```  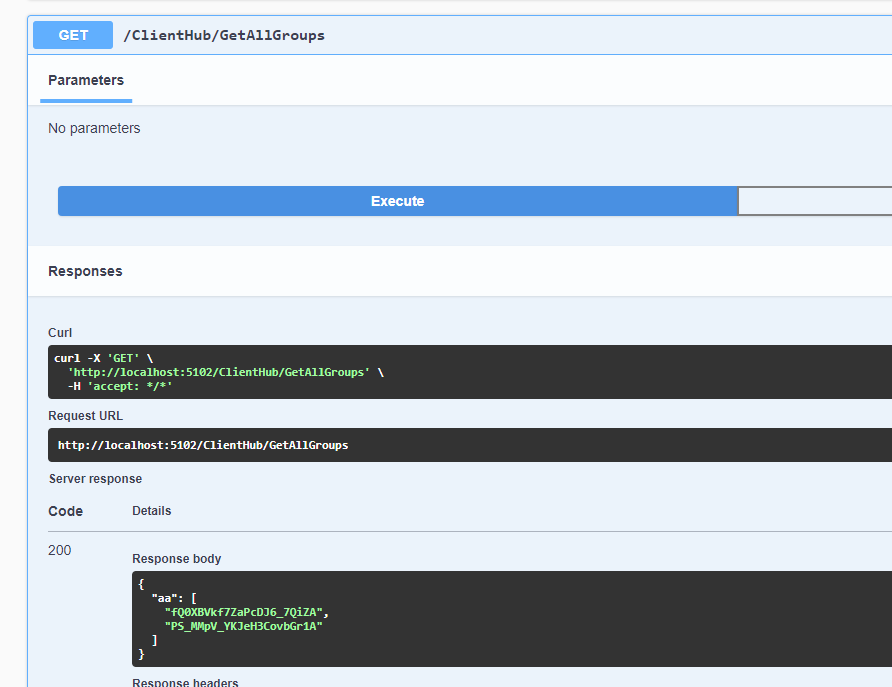 tn2>断开第二个页面的链接(刷新一下),再次查看。 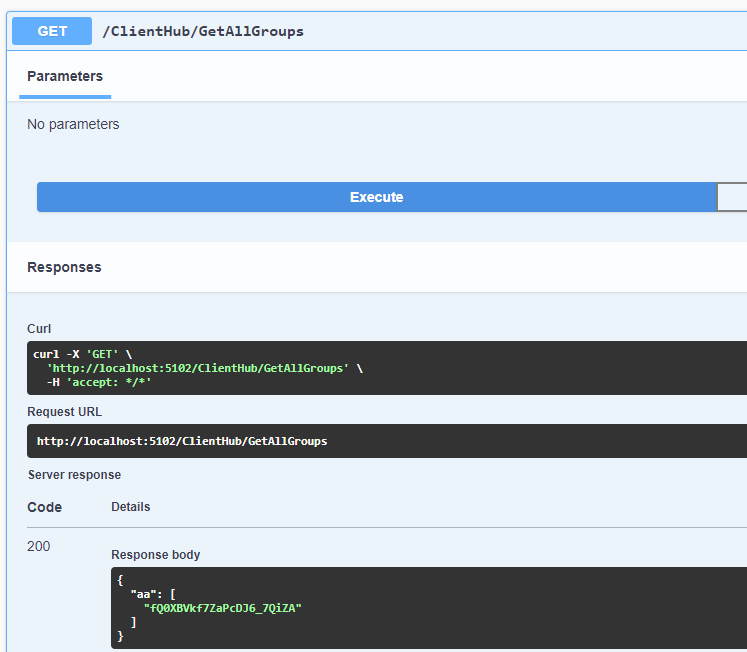 tn2>我们让bob用户离开aa组,再次查看。 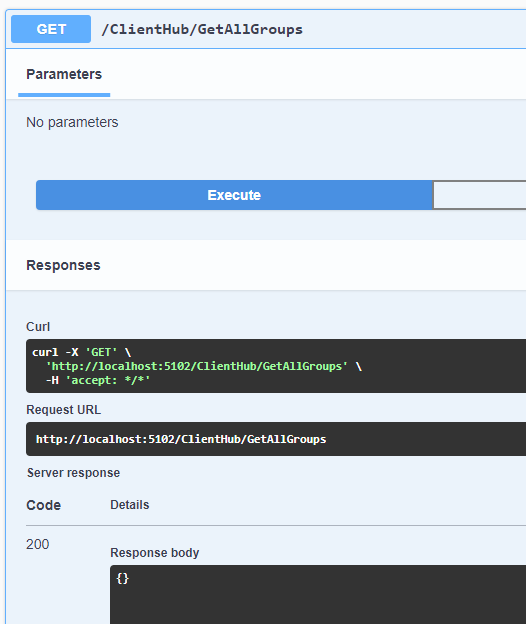 使用实体发送消息 ------------ tn2>首先在后端定义我们的实体和服务器上的接口。 ```csharp public class TestModel { public string Message { get; set; } public string Email { get; set; } } ``` ```csharp /// <summary> /// 发送实体模型 ChatHub类中 /// </summary> /// <param name="data"></param> /// <returns></returns> public async Task SendTestModelMessage(TestModel data) { await Clients.All.SendTestModel(data); await Clients.Caller.SendAll(_common.SendCaller()); } ``` ```csharp public interface IChatClient { Task SendTestModel(TestModel model); } ``` tn2>更改客户端,在客户端中添加相关接口的发送与接收。 ```javascript <div> Message: <input type="text" v-model="message1" > Email: <input type="text" v-model="email" > <button @click="onModelClickButton" >发送实体</button> </div> ... message1: "", email: "", ... onModelClickButton() { var e = this signal .invoke('SendTestModelMessage',{ message: e.message1, email: e.email }) .catch(function(err) {return console.error(err) }) } ``` 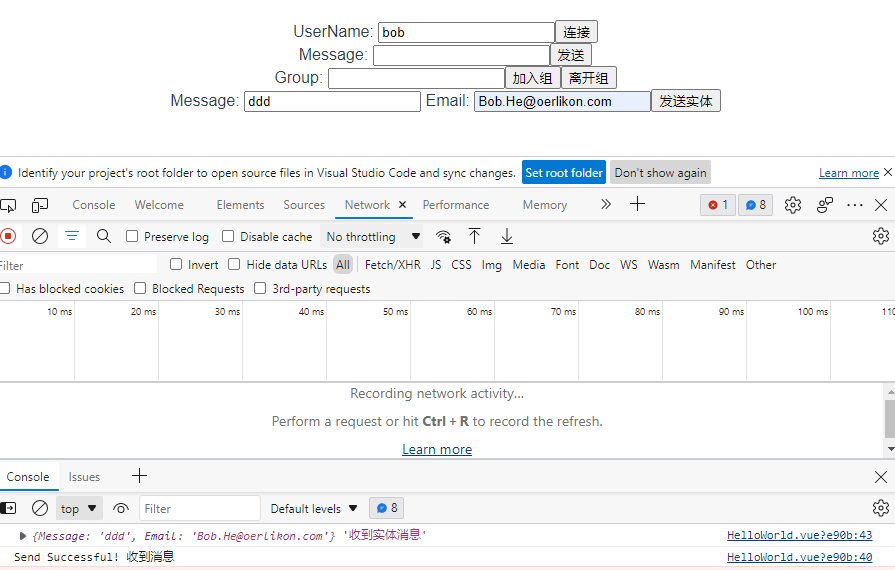 tn>最后建议在发送消息的时候使用:`ConfigureAwait`异步发送避免卡死现象。 tn>参考:https://zhuanlan.zhihu.com/p/424383788