Kubernetes .Net6 CRD 电脑版发表于:2022/8/10 22:24  >#Kubernetes .Net6 CRD [TOC] ## CRD介绍 tn2>简单来说就是自定义资源,像Pod、Service、Deployment一样。 创建自定义资源的资源类型为:`CustomResourceDefinition`。 ## 简单示范 tn2>我们通过一个Demo来进行简单的示例与创建。 编辑`croncustomresource.yaml`文件,内容如下: ```yaml apiVersion: apiextensions.k8s.io/v1 kind: CustomResourceDefinition metadata: # 名字必需与下面的 spec 字段匹配,并且格式为 '<名称的复数形式>.<组名>' name: crontabs.stable.example.com spec: # 组名称,用于 REST API: /apis/<组>/<版本> group: stable.example.com # 列举此 CustomResourceDefinition 所支持的版本 versions: # 版本名称,如v1、v1alpha3等 - name: v1 # 是否启用 served: true # 是否进行存储 storage: true schema: openAPIV3Schema: type: object properties: spec: # 定义spec为object类型的字段 type: object properties: # 定义需要的字段 cronSpec: type: string image: type: string replicas: type: integer # API生效范围,可以是 Namespaced 或 Cluster scope: Namespaced names: # 名称的复数形式,要求全部小写,用于 URL:/apis/<组>/<版本>/<名称的复数形式> plural: crontabs # 名称的单数形式,也要小写,作为命令行使用时和显示时的别名 singular: crontab # kind CRD的资源名称类型 kind: CronTab # 缩写形式的名称,小写。 shortNames: - ct ``` tn2>接着我们来创建该自定义资源。 ```bash kubectl apply -f croncustomresource.yaml ```  tn2>创建一个我们自定义的`CronTab`资源。 ```bash vim cron.yaml ``` ```yaml apiVersion: "stable.example.com/v1" kind: CronTab metadata: name: my-new-cron-object spec: cronSpec: "* * * * */5" image: my-awesome-cron-image replicas: 3 ``` ```bash kubectl apply -f cron.yaml # 查看资源 kubectl get ct ``` 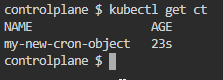 tn2>然后我们可以删除掉我们自定义的资源。 ```bash kubectl delete -f croncustomresource.yaml kubectl get ct ```  tn2>当然我们还可以对指定的字段进行验证值规则,与设计默认值。 举例: 设置`cronSpec`字段值必须为时间规则,默认为`5 0 * * *`。 设置`replicas`字段值必须为1-10区间,且默认值为1; ```yaml cronSpec: type: string pattern: '^(\d+|\*)(/\d+)?(\s+(\d+|\*)(/\d+)?){4}$' default: "5 0 * * *" image: type: string replicas: type: integer minimum: 1 maximum: 10 default: 1 ``` ## Scale 子资源 tn2>从kubernetes 1.11+开始,在CRD的定义中引入了名为`subresources`的配置,可以设置的选项包括status和scale两类。 | 字段 | 描述 | | ------------ | ------------ | | `status` | 启动`/status`路径,其值来自CRD的.status字段,要求CRD控制器能够设置和更新这个字段的值。 | | `scale` | 启动`/scale`路径,支持通过其他Kubernetes控制器(如HorizontalPodAutoscaler控制器)与CRD资源对象实例进行交互。用户通过 `kubectl scale` 命令也能对该CRD资源对象进行扩容或缩容操作,要求CRD本身支持多个副本的形式运行。 | tn2>关于Scale子资源定义了以下字段: | 字段 | 描述 | | ------------ | ------------ | | `specReplicasPath` | 指定我们定义的`.spec.replicas`字段。(必需定义)。`/scale` | | `statusReplicasPath` | 指定我们定义的`.status.replicas`字段。`/status` | | `labelSelectorPath` | 指定我们定义的`.status.labelSelector`字段。`/status` | ```yaml apiVersion: apiextensions.k8s.io/v1 kind: CustomResourceDefinition metadata: name: crontabs.stable.example.com spec: group: stable.example.com versions: - name: v1 served: true storage: true schema: openAPIV3Schema: type: object properties: spec: type: object properties: cronSpec: type: string image: type: string replicas: type: integer status: type: object properties: replicas: type: integer labelSelector: type: string # subresources 描述定制资源的子资源 subresources: # status 启用 status 子资源 status: {} # scale 启用 scale 子资源 scale: # specReplicasPath 定义定制资源中对应 scale.spec.replicas 的 JSON 路径 specReplicasPath: .spec.replicas # statusReplicasPath 定义定制资源中对应 scale.status.replicas 的 JSON 路径 statusReplicasPath: .status.replicas # labelSelectorPath 定义定制资源中对应 scale.status.selector 的 JSON 路径 labelSelectorPath: .status.labelSelector scope: Namespaced names: plural: crontabs singular: crontab kind: CronTab shortNames: - ct ``` tn2>创建自定义资源,与CronTab资源。 ```bash kubectl apply -f croncustomresource.yaml kubectl apply -f cron.yaml kubectl get ct ``` 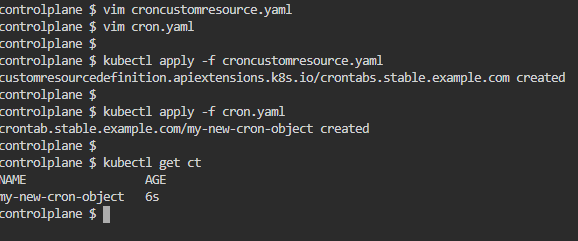 tn2>通过API Endpoint查看资源对象的状态。 ```bash # /apis/<api group 名称>/<版本>/namespaces/<名称空间>/<资源名称>/status curl https://172.30.1.2:6443/apis/stable.example.com/v1/namespaces/default/crontabs/my-new-cron-object/status \ --cacert /etc/kubernetes/pki/ca.crt \ --cert /etc/kubernetes/pki/apiserver-kubelet-client.crt \ --key /etc/kubernetes/pki/apiserver-kubelet-client.key ``` 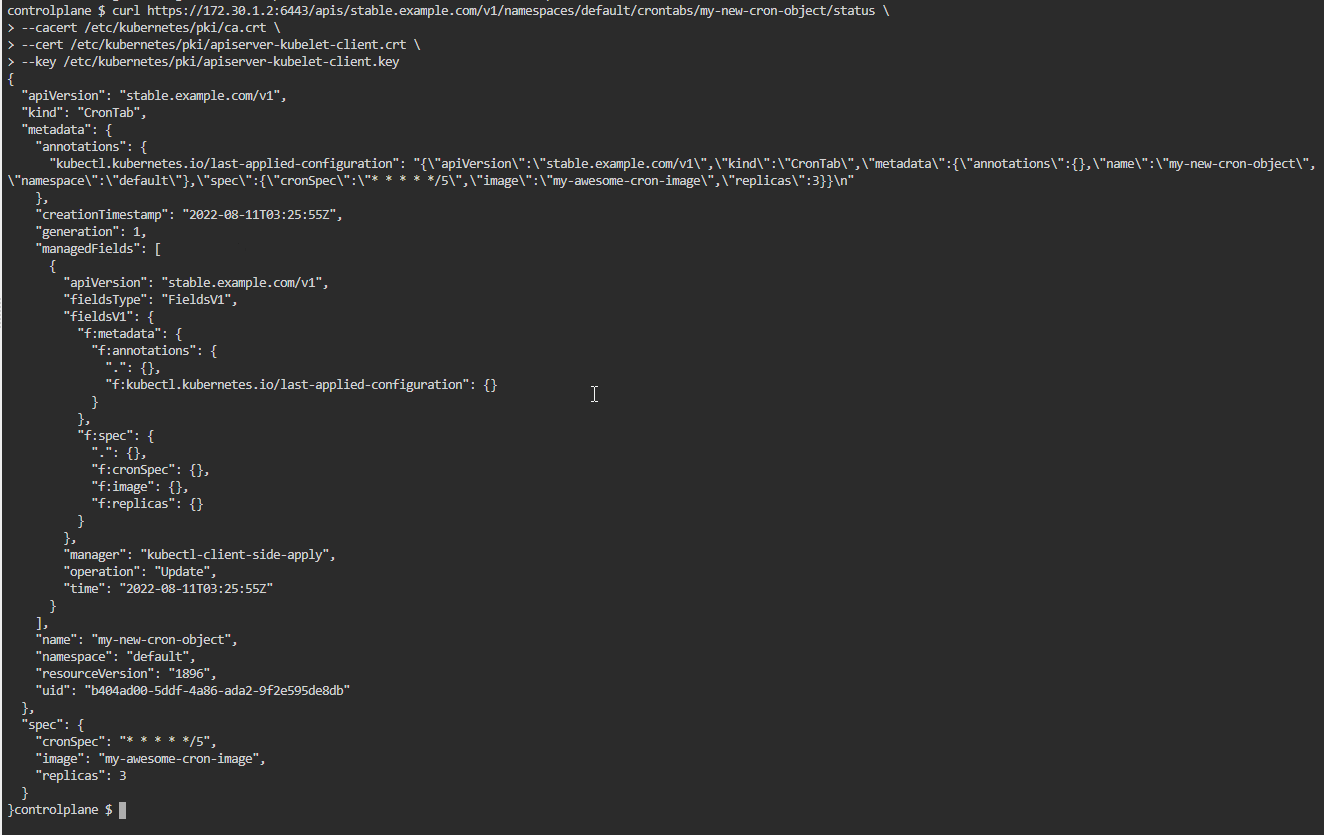 tn2>可通过使用`kubectl scale`命令对Pod的副本数量进行调整。 ```bash # 查看当前副本数 kubectl get ct my-new-cron-object -o yaml | grep "replicas:" # /apis/<api group 名称>/<版本>/namespaces/<名称空间>/<资源名称>/scaled # https://172.30.1.2:6443/apis/stable.example.com/v1/namespaces/default/crontabs/my-new-cron-object/scaled # 设置当前副本数为5 kubectl scale crontab/my-new-cron-object --replicas=5 kubectl get ct my-new-cron-object -o yaml | grep "replicas:" ``` 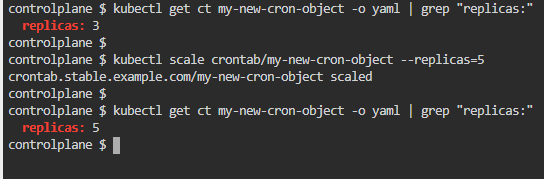 ## 显示多个列 tn2>我们发现这样查看副本数很不方便,我们可以通过在`croncustomresource.yaml`中定义`additionalPrinterColumns`字段。 ```yaml apiVersion: apiextensions.k8s.io/v1 kind: CustomResourceDefinition metadata: name: crontabs.stable.example.com spec: group: stable.example.com versions: - name: v1 served: true storage: true schema: openAPIV3Schema: type: object properties: spec: type: object properties: cronSpec: type: string image: type: string replicas: type: integer status: type: object properties: replicas: type: integer labelSelector: type: string subresources: status: {} scale: specReplicasPath: .spec.replicas statusReplicasPath: .status.replicas labelSelectorPath: .status.labelSelector additionalPrinterColumns: # Spec列显示cronSpec字段 - name: Spec type: string description: The cron spec defining the interval a CronJob is run jsonPath: .spec.cronSpec # Replicas列显示replicas字段 - name: Replicas type: integer description: The number of jobs launched by the CronJob jsonPath: .spec.replicas # Age列显示creationTimestamp时间字段,这个在创建资源的时候会产生 - name: Age type: date jsonPath: .metadata.creationTimestamp scope: Namespaced names: plural: crontabs singular: crontab kind: CronTab shortNames: - ct ``` tn2>更新我们的自定义的CRD资源。 ```bash kubectl apply -f croncustomresource.yaml # 查看ct kubectl get ct ``` 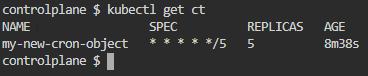 ## .net crd资源的实现 >### 实现目标 tn2>我们想通过CRD定义自己的CSharpApp资源,通过编写代码,直接让其执行。 具体请查看下图所示: 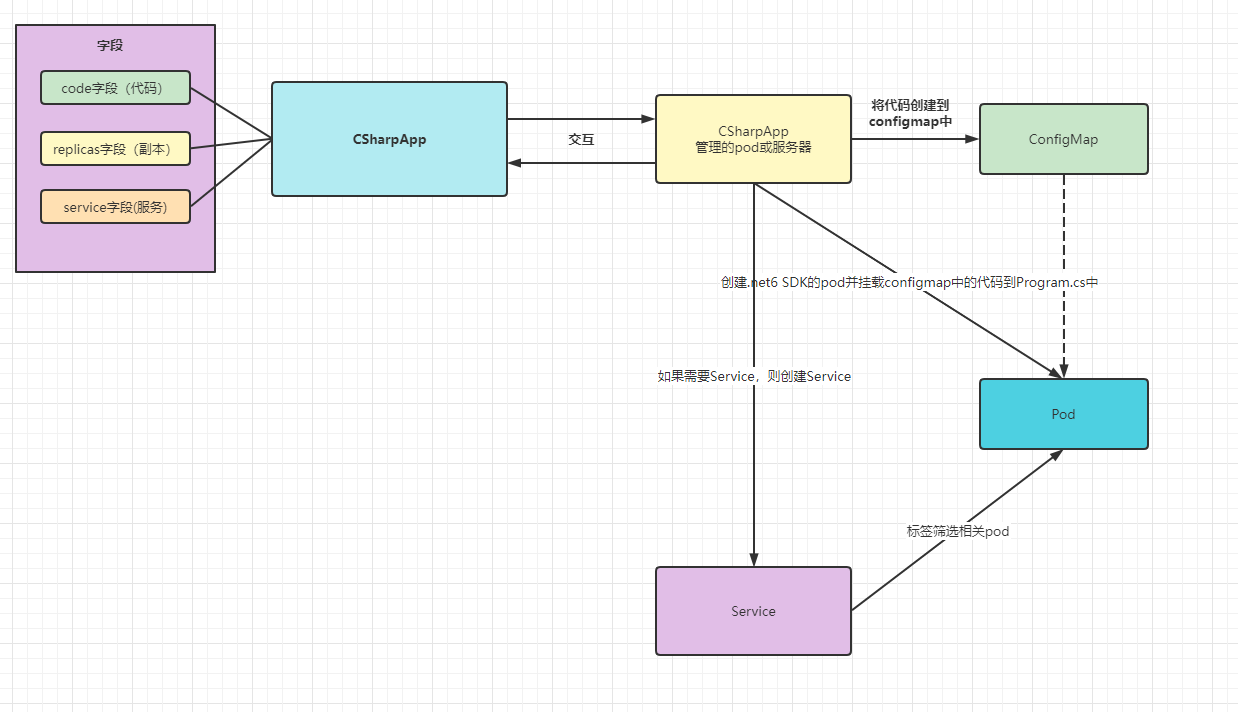 tn2>关于管理CSharpApp资源的服务器我们可以运行在本地,也可以运行在服务器上。总之它有管理的权限就可以了,kubeconfig啊、ServiceAccount...等 这是Common sense。 那我们管理CSharpApp资源的服务器通过监控自定义资源的事件来做不同的操作。代码的架构如下: 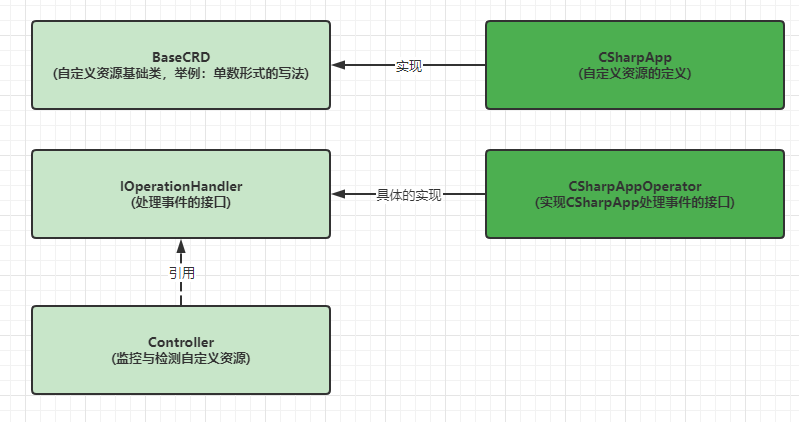 tn2>更多具体的请看代码地址(有注释):https://gitee.com/zuxiazijiahebo/k8s-plugs >### 部署CRD tn2>创建`crd.yaml`文件,并执行如下命令。 ```bash vim crd.yaml ``` ```yaml apiVersion: apiextensions.k8s.io/v1 kind: CustomResourceDefinition metadata: name: csharpapps.k8s.jijiechen.com spec: group: k8s.jijiechen.com versions: - name: v1alpha1 served: true storage: true schema: openAPIV3Schema: type: object description: "An application running csharp source" properties: spec: type: object required: - code properties: code: type: string replicas: type: integer format: int32 service: type: object description: "Service properties when the application provides network services" properties: port: type: integer format: int32 type: enum: - LoadBalancer - ClusterIP - NodePort type: string required: - port scope: Namespaced names: plural: csharpapps singular: csharpapp kind: CSharpApp shortNames: - csa ``` ```bash kubectl apply -f crd.yaml ``` tn2>运行我们的项目,这里为了方便我就在本地进行运行了;如果你需要在pod上运行请注意需要授权运行,可参考如下定义的ServiceAccess(注意:需要添加serviceAccountName字段): ```yaml kind: ServiceAccount apiVersion: v1 metadata: name: csharpapp-pod namespace: 你的名称空间 --- apiVersion: rbac.authorization.k8s.io/v1 kind: RoleBinding metadata: name: csharpapp-pod-operator-role namespace: 你的名称空间 roleRef: apiGroup: rbac.authorization.k8s.io kind: ClusterRole name: cluster-admin subjects: - kind: ServiceAccount name: csharpapp-pod namespace: 你的名称空间 ``` tn2>本地运行 ```bash dotnet run ``` 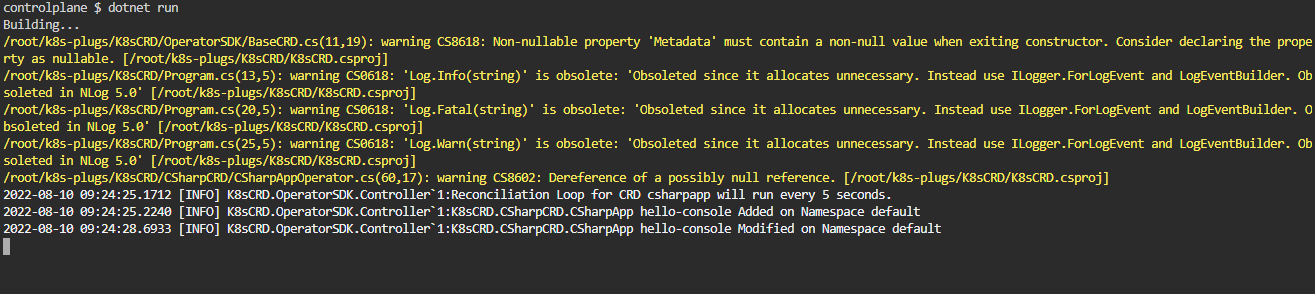 tn2>关于我们创建的容器,并不直接是`mcr.microsoft.com/dotnet/sdk:6.0`,而是通过一定的封装的,其执行的内容就是创建web项目,并替换Program.cs然后运行。 相关Dockerfile和run.sh如下: ```bash FROM mcr.microsoft.com/dotnet/sdk:6.0 COPY run.sh /run.sh ENTRYPOINT ["/bin/bash", "-f", "/run.sh"] ``` ```bash #!/bin/bash SRC=/etc/cs-source/Program.cs if [ ! -f "$SRC" ]; then echo "No C# source file detected." echo 1 fi WORK_DIR=/tmp/Proj$RANDOM mkdir -p $WORK_DIR cd $WORK_DIR dotnet new web cp $SRC $WORK_DIR/ dotnet run ``` >### 测试 tn2>接下来创建我们的测试`console.yaml` ```bash vim console.yaml ``` ```yaml apiVersion: k8s.jijiechen.com/v1alpha1 kind: CSharpApp metadata: name: hello-console namespace: default spec: code: | Console.WriteLine("Hello world from CSharp App"); Thread.Sleep(Timeout.Infinite); replicas: 2 ``` ```bash kubectl apply -f console.yaml kubectl get pod -w ```  tn2>由于我们的副本数量设置的是2,所以创建了两个pod,接下来我们查看其中一个pod的日志信息,发现已经将刚刚的代码给打印出来了。 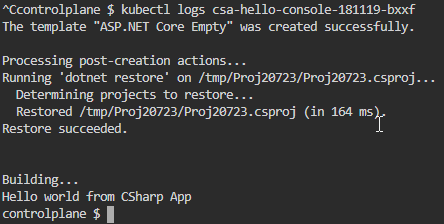 tn2>我们创建`web.yaml`来创建web项目测试,将它发布的类型设置为`LoadBalancer`,你们可以设置为默认的`ClusterService`。 ```bash vim web.yaml ``` ```yaml apiVersion: k8s.jijiechen.com/v1alpha1 kind: CSharpApp metadata: name: hello-web namespace: default spec: code: | var app = WebApplication.Create(args); app.MapGet("/", () => "Hello World!"); app.Run("http://*:80"); replicas: 2 service: type: LoadBalancer port: 80 ``` ```bash kubectl apply -f web.yaml ``` 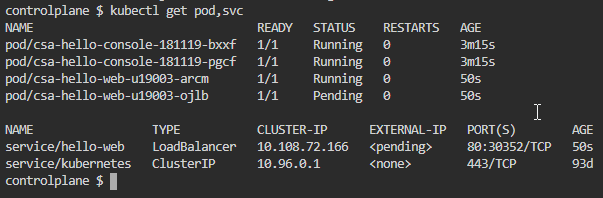 tn2>由于我这里LoadBalancer没有进行配置,所以我们可以直接访问cluster-ip也是没问题的。  tn2>可以看到访问没有任何问题。

