Kubernetes Telepresence 本地上云工具 电脑版发表于:2022/8/4 17:18  >#Kubernetes Telepresence 本地上云工具 [TOC] tn2>简介:它可以让集群中的环境可以在本地访问。 同样的也可以使本地开发的应用替换某个集群上的应用,使请求流量访问到本地。 ## Windows本地安装 tn2>用管理员打开Powershell ```bash # 下载最新的包 curl -fL https://app.getambassador.io/download/tel2/windows/amd64/latest/telepresence.zip -o telepresence.zip # 解压 Expand-Archive -Path telepresence.zip Remove-Item 'telepresence.zip' cd telepresence # 安装telepresence Set-ExecutionPolicy Bypass -Scope Process .\install-telepresence.ps1 # 删除下载的zip包 cd .. Remove-Item telepresence ``` tn2>然后重新打开一个新的Powershell进行登录,验证安装情况。 ```bash telepresence ```  tn>更多环境安装请参考:https://www.telepresence.io/docs/latest/install/ ##集群环境安装 tn2>接下来我们需要在集群中安装telepresence,方便控制我们的流量。 ```bash helm repo add datawire https://app.getambassador.io helm repo update kubectl create namespace ambassador helm install traffic-manager --namespace ambassador datawire/telepresence ``` tn2>如果想最小化用户管理,可以添加如下的权限进行设置。(如果不想这样也是没关系的,可以跳过下面的步骤) ```bash vim telepresenceRBAC.yaml ``` ```yaml --- apiVersion: v1 kind: ServiceAccount metadata: name: tp-user namespace: ambassador --- apiVersion: rbac.authorization.k8s.io/v1 kind: ClusterRole metadata: name: telepresence-role rules: - apiGroups: [""] resources: ["pods/log"] verbs: ["get"] - apiGroups: [""] resources: ["pods"] verbs: ["list"] - apiGroups: ["apps"] resources: ["deployments", "replicasets", "statefulsets"] verbs: ["get", "list", "watch"] - apiGroups: [""] resources: ["namespaces", "services"] verbs: ["get", "list", "watch"] - apiGroups: [""] resources: ["pods/portforward"] verbs: ["create"] --- apiVersion: rbac.authorization.k8s.io/v1 kind: ClusterRoleBinding metadata: name: telepresence-rolebinding subjects: - name: tp-user kind: ServiceAccount namespace: ambassador roleRef: apiGroup: rbac.authorization.k8s.io name: telepresence-role kind: ClusterRole ``` ```bash kubectl apply -f telepresenceRBAC.yaml ``` tn2>查看`tp-user`用户token,并创建相关的kubeconfig. ```bash kubectl get secrets -n ambassador kubectl -n ambassador describe secrets tp-user-token-72hkg ```  ```bash mkdir telepresence cd telepresence cp ~/.kube/config . vim config ``` ```yaml apiVersion: v1 clusters: - cluster: certificate-authority-data: xx server: https://xxxxx:xxxxx name: kubernetes contexts: - context: cluster: kubernetes user: tp-user name: tp-user current-context: tp-user kind: Config preferences: {} users: - name: tp-user user: token: eyJhbGciOiJSUzI1NiIsImtpZCI6IjB2REZjcFF6eW9SSHdid1UtTlRSaG5TUm4teFZMX3h5Y3NqVTJtVkdNMk0ifQ.eyJpc3MiOiJrdWJlcm5ldGVzL3NlcnZpY2VhY2NvdW50Iiwia3ViZXJuZXRlcy5pby9zZXJ2aWNlYWNjb3VudC9uYW1lc3BhY2UiOiJhbWJhc3NhZG9yIiwia3ViZXJuZXRlcy5pby9zZXJ2aWNlYWNjb3VudC9zZWNyZXQubmFtZSI6InRwLXVzZXItdG9rZW4tc2g2dnAiLCJrdWJlcm5ldGVzLmlvL3NlcnZpY2VhY2NvdW50L3NlcnZpY2UtYWNjb3VudC5uYW1lIjoidHAtdXNlciIsImt1YmVybmV0ZXMuaW8vc2VydmljZWFjY291bnQvc2VydmljZS1hY2NvdW50LnVpZCI6ImFhNmFiMzVmLTE1ZDQtNGE3Zi04NGYzLTRkOTkyMmJhODQ0NyIsInN1YiI6InN5c3RlbTpzZXJ2aWNlYWNjb3VudDphbWJhc3NhZG9yOnRwLXVzZXIifQ.leUMyrh6GZUNUWwYnBf6-jfUDwTb_N5a5jk866Q9sCuBHs8p4jwwRDq6sTdE1MkhiIWpDx-ZTX1ofcoBY2sn-CdzQZ2ifFTApMUT7yA5XJAoMppBWPnAF7E7BYR0n0MKdoQVdN_v6WjJEGx6_Bos1dhaQyFBJ2rVGIeZRokyK-S1nV81wM4Hg6AqdQWoUwGH5uS_IAnnD62E6HW6PzA9MSpLK3codZguVEvXKHLcOM_StDW-RW11Le4iowZBVLYX1jnmyatXoAEisBUV3uzcaFAdeV09lwVLNLBv9kB0VP19vNkMCOQlQ-36tnbhEvgtLTYcQumCVLT_j1ursZPm5w ``` tn2>这样我们的kubeconfig就创建好了。 ## 本地连接 tn2>我们可以直接通过如下命令来连接到我们的集群中。 ```bash telepresence connect ```  tn2>测试访问`default`名称空间下的`kubernetes`服务。 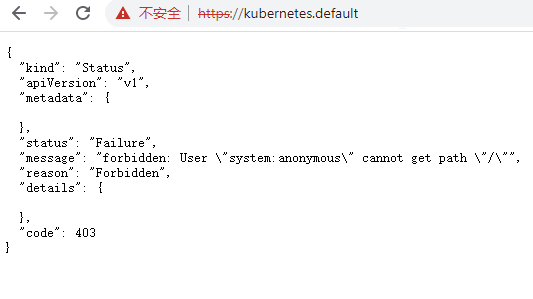 tn2>当然我们还可以访问集群中的其他服务。 如果想使用我们指定用户的kubeconfig的话需要加`--kubeconfig`参数。 ```bash telepresence connect --kubeconfig ./config ``` tn2>然后我们想断开连接的话可以执行如下命令。 ```bash telepresence quit ```  ## 本机应用映射到集群中 tn2>本地的网站应用在9090开放的端口,集群中对应的myserver服务9090端口将会导入流量到本地。 ```bash telepresence --swap-deployment myserver --expose 9090 ``` tn>更多请参考:https://www.telepresence.io/docs/latest/install/migrate-from-legacy/

