.net core 3.1 Identity Server4 (Hybrid模式) 电脑版发表于:2020/12/25 16:13  >#.net core 3.1 Identity Server4 (Hybrid模式) [TOC]  Hybrid 模式的理解 ------------ tn>Hybrid 模式相当于(Code模式+Impact模式),所以它又被称之为混合模式。大家可以看一下下面这张图。 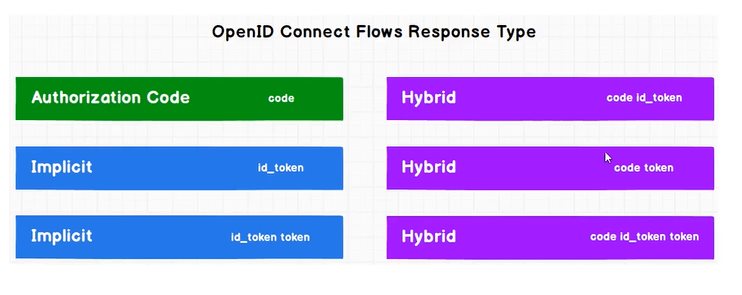 tn>我们可以发现它的类型`response_type`既可以为,`code id_token`,又可以`code token`,还可以`code id_token token`。虽然这很多样,接着我们来看它与与前三种又有哪些区别呢? 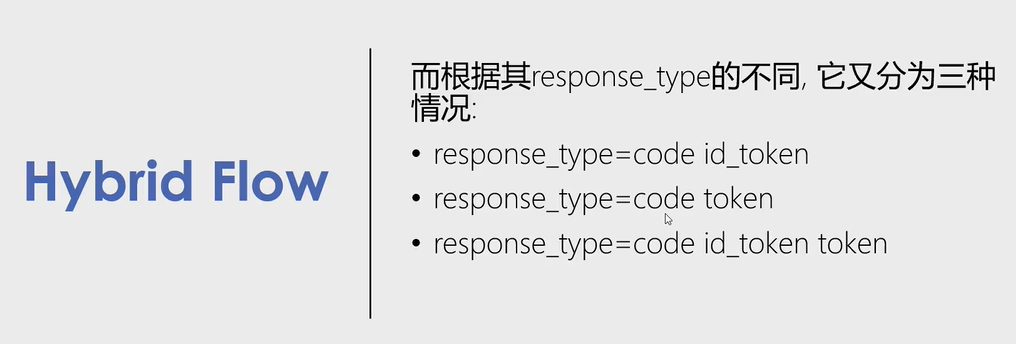 >### code与id_token tn>看看下面这张图。客户端先发起身份认证和授权请求,在授权端点进行身份认证和授权,然后获得`id token`以及授权码`Authorization Code`,随即客户端向授权服务器端点发起`Token`请求,最后获取到`id token`以及`Access Token` 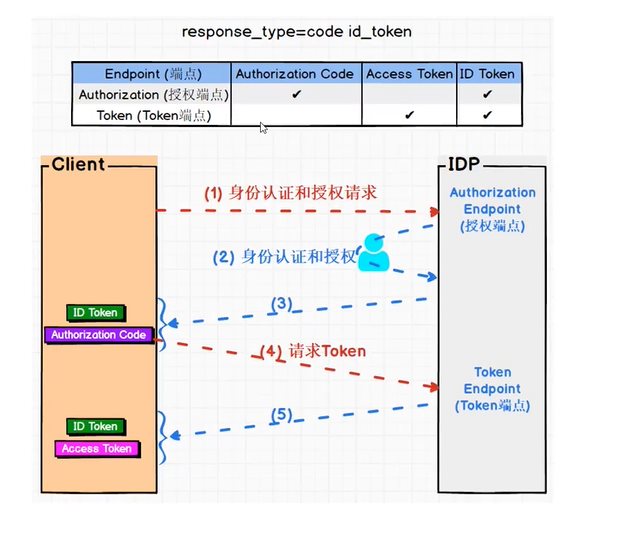 >### code与token tn>这与上面图的区别是,第一次获取了`Access Token`与授权码`Authorization Code`,第二次获取到了`Access Token`与`Id Token`。 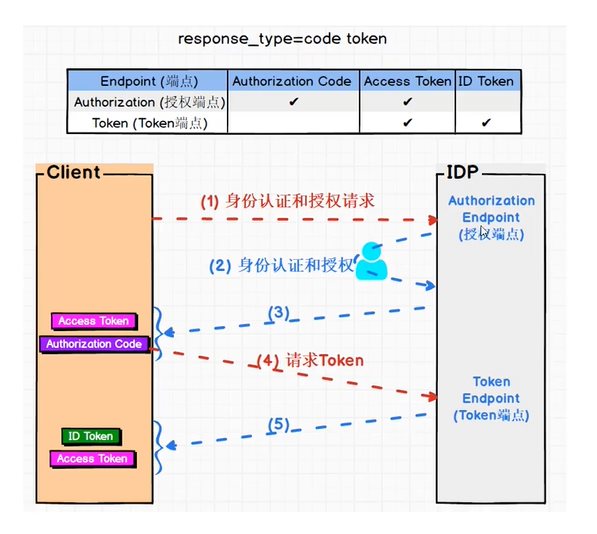 >### code,token与id token tn>这与上面图的区别是,第一次获取了`Id Token`,`Access Token`与授权码`Authorization Code`,第二次获取到了`Access Token`与`Id Token`。 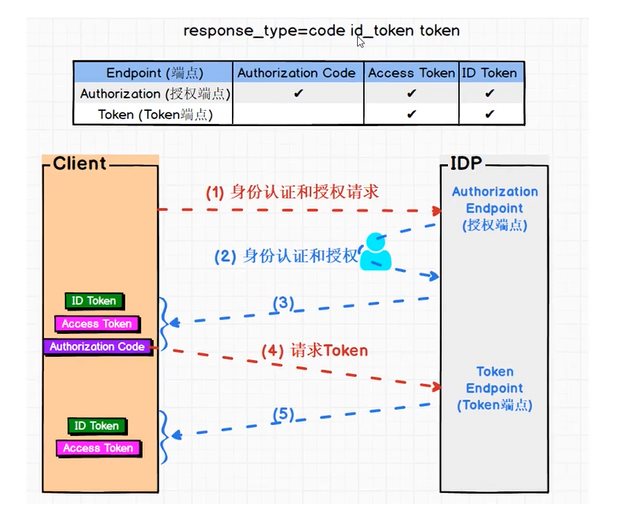 项目演示 ------------ tn>这里我只展示一个(`code id_token`)其他都是类似的 >### 在授权服务器中添加客户端信息(老客套了) ```csharp new Client { ClientId="hybrid_client", ClientSecrets = {new Secret("hybrid_client_secret".Sha256()) }, AllowedGrantTypes = GrantTypes.Hybrid, RequirePkce = false, RedirectUris = { "https://localhost:6027/signin-oidc" }, BackChannelLogoutUri = "https://localhost:6027/logout", PostLogoutRedirectUris = { "https://localhost:6027/signout-callback-oidc" }, // 是否需要将token放入到Claim中 AlwaysIncludeUserClaimsInIdToken = false, // 获取或设置一个值,该值指示是否允许脱机访问. 默认值为 false。 AllowOfflineAccess = true, AllowedScopes = { "ApiOne", IdentityServerConstants.StandardScopes.OpenId, IdentityServerConstants.StandardScopes.Profile, "rc.bc" } } ``` >### 创建Hybrid客户端项目(AiDaSi.OcDemo.HybridMvc) tn>基本上与`code`模式的mvc客户端相同,我就直接贴代码了哈!首先安装客户端的包! ```csharp <ItemGroup> <PackageReference Include="IdentityModel" Version="4.5.0" /> <PackageReference Include="Microsoft.AspNetCore.Authentication.OpenIdConnect" Version="3.1.9" /> </ItemGroup> ``` tn>`Startup`类 ```csharp public Startup(IConfiguration configuration) { Configuration = configuration; // 我们关闭了JWT的Claim 类型映射, 以便允许well-known claims JwtSecurityTokenHandler.DefaultInboundClaimTypeMap.Clear(); } public IConfiguration Configuration { get; } public void ConfigureServices(IServiceCollection services) { services.AddControllersWithViews(); services.AddHttpClient(); JwtSecurityTokenHandler.DefaultMapInboundClaims = false; services.AddSingleton<IDiscoveryCache>(r => { var factory = r.GetRequiredService<IHttpClientFactory>(); return new DiscoveryCache("https://localhost:7200", () => factory.CreateClient()); }); services.AddAuthentication(options => { options.DefaultScheme = "Cookies"; options.DefaultChallengeScheme = "oidc"; }) .AddCookie("Cookies") // 我们用作Cookies作为首选方式 .AddOpenIdConnect("oidc", options => { options.Authority = "https://localhost:7200"; options.RequireHttpsMetadata = false; options.ClientId = "hybrid_client"; options.ClientSecret = "hybrid_client_secret"; options.ResponseType = "code id_token"; options.GetClaimsFromUserInfoEndpoint = true; options.SaveTokens = true; options.Scope.Clear(); // 清理范围 options.Scope.Add("ApiOne"); options.Scope.Add("openid"); options.Scope.Add("profile"); options.Scope.Add("rc.bc"); options.Scope.Add("offline_access");// 脱机访问令牌 }); } public void Configure(IApplicationBuilder app, IWebHostEnvironment env) { if (env.IsDevelopment()) { app.UseDeveloperExceptionPage(); } else { app.UseExceptionHandler("/Home/Error"); } app.UseStaticFiles(); app.UseRouting(); app.UseAuthentication(); app.UseAuthorization(); app.UseEndpoints(endpoints => { endpoints.MapControllerRoute( name: "default", pattern: "{controller=Home}/{action=Index}/{id?}"); }); } ``` tn>修改`launchSettings.json`,设置端口为`6027` ```json { "profiles": { "AiDaSi.OcDemo.HybridMvc": { "commandName": "Project", "launchBrowser": true, "applicationUrl": "https://localhost:6027", "environmentVariables": { "ASPNETCORE_ENVIRONMENT": "Development" } } } } ``` tn>然后`HomeController.cs`控制器内容与页面跟`code mvc`是差不多的 ```csharp public class HomeController : Controller { private readonly ILogger<HomeController> _logger; private IHttpClientFactory _httpClientFactory; public HomeController(ILogger<HomeController> logger, IHttpClientFactory httpFactory) { _logger = logger; _httpClientFactory = httpFactory; } public IActionResult Index() { return View(); } [Authorize] public async Task<IActionResult> Privacy() { var accessToken = await HttpContext.GetTokenAsync(OpenIdConnectParameterNames.AccessToken); var idToken = await HttpContext.GetTokenAsync(OpenIdConnectParameterNames.IdToken); var refreshToken = await HttpContext.GetTokenAsync(OpenIdConnectParameterNames.RefreshToken); var code = await HttpContext.GetTokenAsync(OpenIdConnectParameterNames.Code); ViewData["accessToken"] = accessToken; ViewData["idToken"] = idToken; ViewData["refreshToken"] = refreshToken; ViewData["code"] = code; // 获取接口数据 var httpClient = _httpClientFactory.CreateClient(); //httpClient.DefaultRequestHeaders.Authorization = new AuthenticationHeaderValue("Bearer", accessToken); httpClient.SetBearerToken(accessToken); // 验证Token是否失效 string tokenStr = accessToken; var handler = new JwtSecurityTokenHandler(); var payload = handler.ReadJwtToken(tokenStr).Payload; var expclaim = payload.Claims.FirstOrDefault(x => x.Type == "exp"); DateTime dateTime = expclaim.Value.unixtime(); int compNum = DateTime.Compare(DateTime.Now, dateTime); //判断当前时间是否大于token的过期时间,如果有就刷新token,这样就能达到无缝衔接 if (compNum > 0) { await RenewTokensAsync(); return RedirectToAction(); } var Result = await httpClient.GetAsync("http://localhost:5280/WeatherForecast"); if (Result.IsSuccessStatusCode) { ViewData["Apione"] = await Result.Content.ReadAsStringAsync(); } return View(); } private async Task<string> RenewTokensAsync() { var client = _httpClientFactory.CreateClient(); var disco = await client.GetDiscoveryDocumentAsync("https://localhost:7200"); if (disco.IsError) { // 我们这里将Cookie清空掉 foreach (var item in Request.Cookies) { Response.Cookies.Delete(item.Key); } // 报错 return await Task.FromResult(disco.Error); // throw new Exception(disco.Error); } var refreshToken = await HttpContext.GetTokenAsync(OpenIdConnectParameterNames.RefreshToken); // 刷新token的操作 var tokenResponse = await client.RequestRefreshTokenAsync(new RefreshTokenRequest { Address = disco.TokenEndpoint, ClientId = "client_id_mvc", ClientSecret = "mvc_secret", RefreshToken = refreshToken }); #region 第一种写法 if (tokenResponse.IsError) { // 我们这里将Cookie清空掉 foreach (var item in Request.Cookies) { Response.Cookies.Delete(item.Key); } return await Task.FromResult(tokenResponse.Error); // 报错 // throw new Exception(tokenResponse.Error); } var expiresAt = DateTime.UtcNow + TimeSpan.FromSeconds(tokenResponse.ExpiresIn); var tokens = new[] { new AuthenticationToken { Name = OpenIdConnectParameterNames.IdToken, Value = tokenResponse.IdentityToken }, new AuthenticationToken { Name = OpenIdConnectParameterNames.AccessToken, Value = tokenResponse.AccessToken }, new AuthenticationToken { Name = OpenIdConnectParameterNames.RefreshToken, Value = tokenResponse.RefreshToken }, new AuthenticationToken { Name = "expires_at", Value = expiresAt.ToString("o", CultureInfo.InvariantCulture) } }; // 获取身份认证的结果,包含当前的pricipal和properties var currentAuthenticateResult = await HttpContext.AuthenticateAsync(CookieAuthenticationDefaults.AuthenticationScheme); // 把新的tokens存起来 currentAuthenticateResult.Properties.StoreTokens(tokens); // 登录 await HttpContext.SignInAsync(CookieAuthenticationDefaults.AuthenticationScheme, currentAuthenticateResult.Principal, currentAuthenticateResult.Properties); return tokenResponse.AccessToken; #endregion #region 第二种写法 //下面将修改上下文 var authInfo = await HttpContext.AuthenticateAsync("Cookies"); authInfo.Properties.UpdateTokenValue("access_token", tokenResponse.AccessToken); authInfo.Properties.UpdateTokenValue("id_token", tokenResponse.IdentityToken); authInfo.Properties.UpdateTokenValue("refresh_token", tokenResponse.RefreshToken); //二次认证(更新token) await HttpContext.SignInAsync("Cookies", authInfo.Principal, authInfo.Properties); #endregion } [ResponseCache(Duration = 0, Location = ResponseCacheLocation.None, NoStore = true)] public IActionResult Error() { return View(new ErrorViewModel { RequestId = Activity.Current?.Id ?? HttpContext.TraceIdentifier }); } } ``` tn>`Privacy.cshtml` ```html @{ ViewData["Title"] = "Privacy Policy"; } <h1>@ViewData["Title"]</h1> <h2>Access Token:</h2> <p>@ViewData["accessToken"]</p> <h2>Id Token:</h2> <p>@ViewData["idToken"]</p> <h2>Refresh Token:</h2> <p>@ViewData["refreshToken"]</p> <h2>Code:</h2> <p>@ViewData["code"]</p> <h2>Apione:</h2> <p>@ViewData["Apione"]</p> <dl> @foreach (var claim in User.Claims) { <dt>@claim.Type</dt> <dd>@claim.Value</dd> } </dl> ```  ```csharp public static class TimeHelper { //将unix时间戳转换成系统时间 public static DateTime unixtime(this string time) { DateTime dtStart = TimeZone.CurrentTimeZone.ToLocalTime(new DateTime(1970, 1, 1)); long lTime = long.Parse(time + "0000000"); TimeSpan toNow = new TimeSpan(lTime); DateTime dtResult = dtStart.Add(toNow); return dtResult; } //将系统时间转换成unix时间戳 public static long timeunix2(this DateTime dt) { DateTimeOffset dto = new DateTimeOffset(dt); return dto.ToUnixTimeSeconds(); } //将系统时间转换成unix时间戳 public static DateTime unixtime2(this double d) { System.DateTime time = System.DateTime.MinValue; System.DateTime startTime = TimeZone.CurrentTimeZone.ToLocalTime(new System.DateTime(1970, 1, 1)); time = startTime.AddMilliseconds(d); return time; } ``` 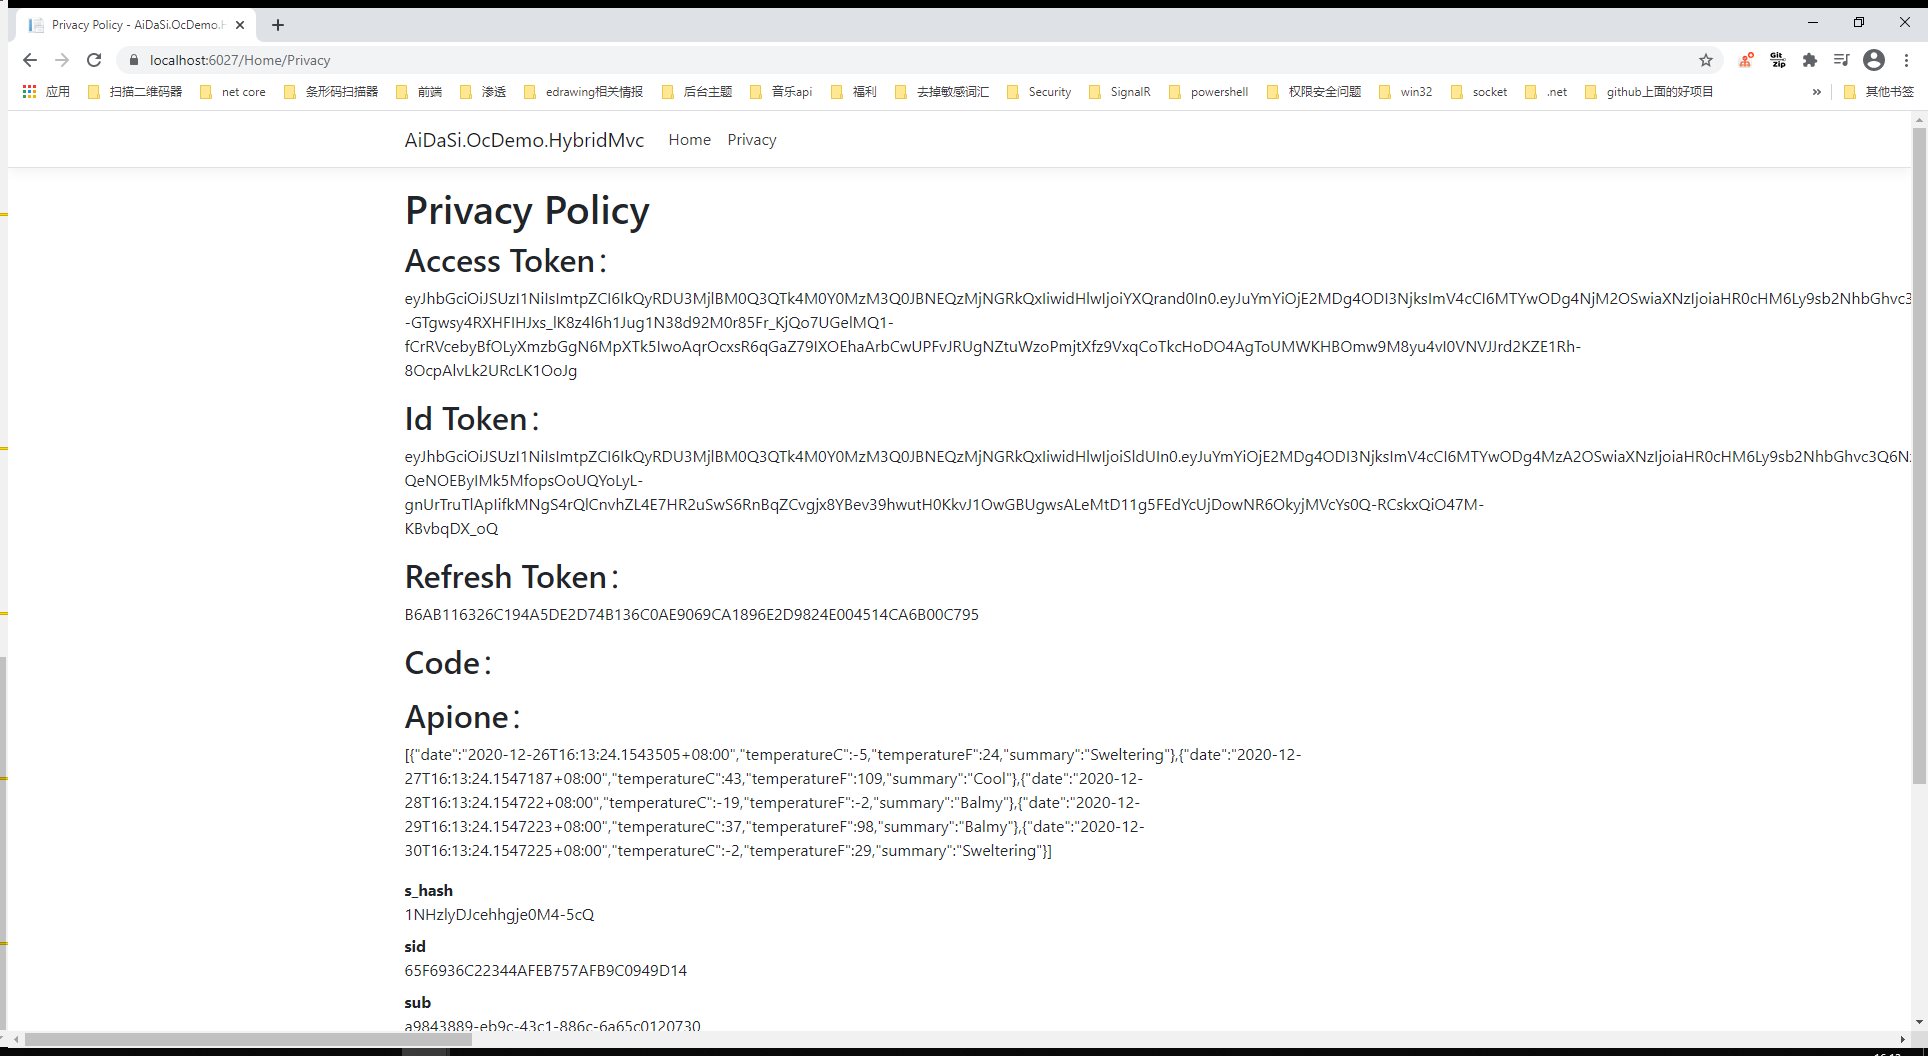 处理Claims ------------ tn>下面是客户端必须要的,在`Startup.cs`的`AddOpenIdConnect`中添加 ```csharp options.ClaimActions.Remove("nbf"); options.ClaimActions.Remove("amr"); options.ClaimActions.Remove("exp"); ``` tn>下面呢是在客户端中不需要的,但是如果在请求`Api`中是必要的话则在客户端中是不会呈现出来的(如:sid) ```csharp options.ClaimActions.DeleteClaim("sid"); options.ClaimActions.DeleteClaim("sub"); options.ClaimActions.DeleteClaim("idp"); ``` 退出设置 ------------ >### 服务器上设置退出 tn>设置退出页面的路径,并写对应的退出代码 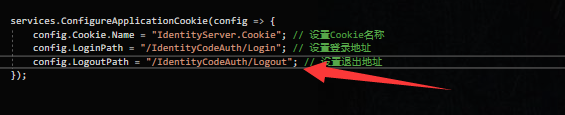 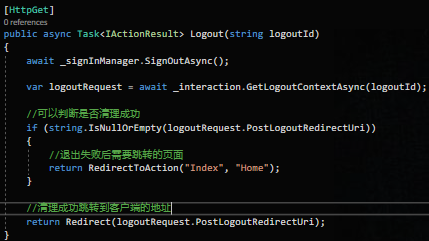 tn>在服务器端我们对它跳转回客户端的地址是:`https://localhost:6027/signout-callback-oidc`,也可以修改为客户端的其他路径 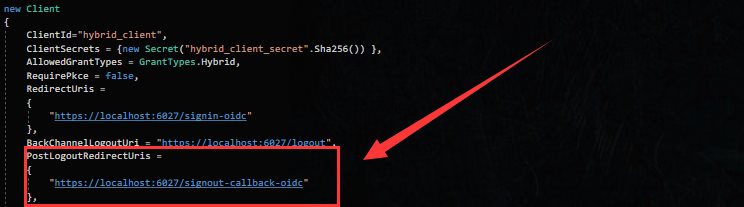 >### 客户端上设置退出 tn>找到客户端的`_Layout.cshtml`  tn>添加一个退出的按钮,并在`HomeController`中添加一个`Logout`的方法 ```html @if (User.Identity.IsAuthenticated) { <li class="nav-item"> <a class="nav-link text-dark" asp-area="" asp-controller="Home" asp-action="Logout">Logout</a> </li> } ``` 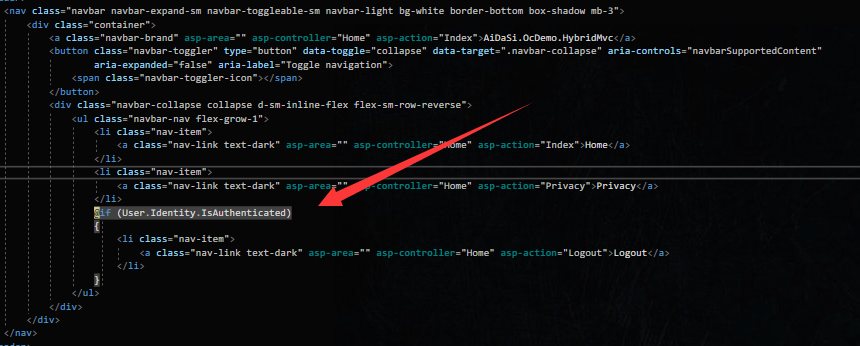 ```csharp public async Task<IActionResult> Logout() { return SignOut("Cookies", "oidc"); } ``` tn>运行项目,点击退出按钮成功退出 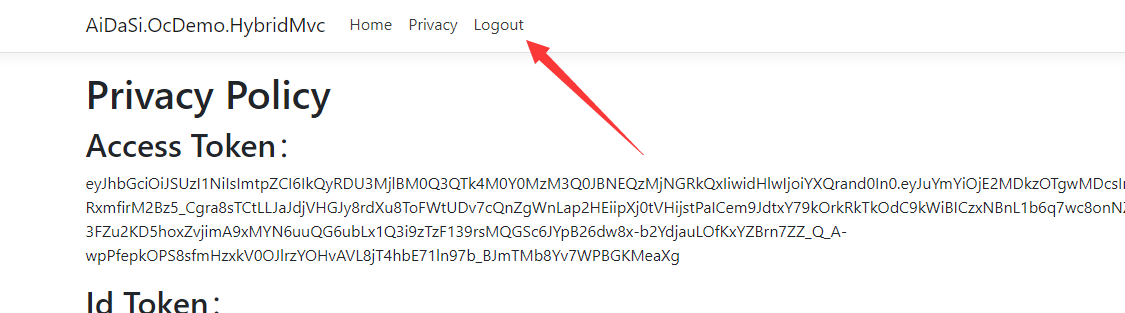  RBAC(角色控制) ------------ tn>全称为:Role-based Access Control ,通过预定义的角色赋予访问权限,每个角色规定了一套权限。 >### 在授权服务器中定义角色 tn>首先我们在`Create_Test_Users`扩展方法中添加用户的时候定义`管理员`与`普通`两个角色 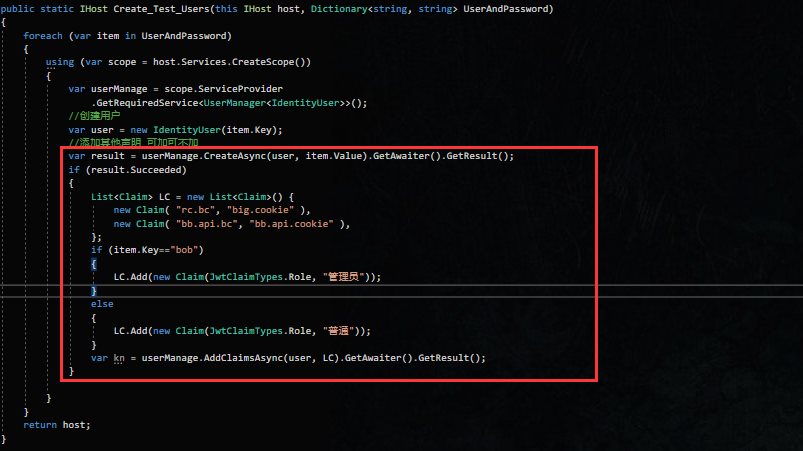 tn>接着在`GetIdentityResources`方法中创建身份资源 ```csharp new IdentityResource("roles","角色",new List<string>{ JwtClaimTypes.Role }), ``` 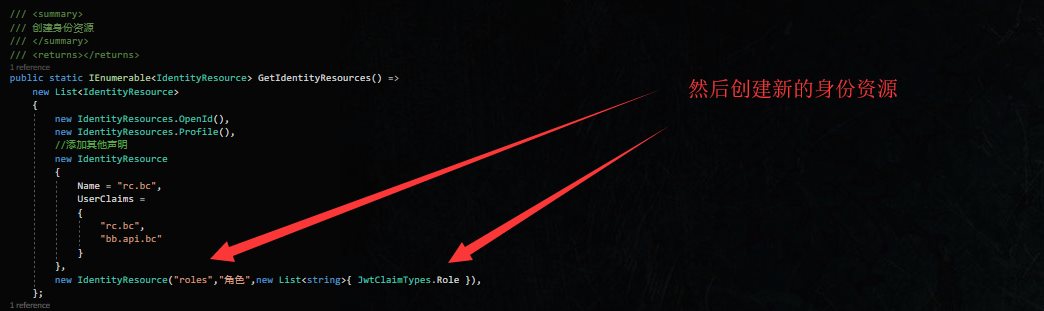 tn>设置客户端配置 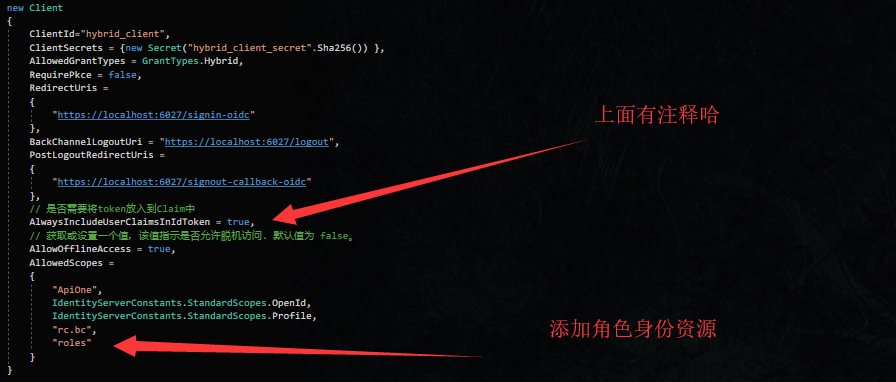 >### 在客户端中更新角色 tn>更新客户端代码配置  tn>创建`RbacController`控制器,添加角色所对应的方法(由于这里呢,比较偷懒就全部都跳到了`index`方法中),接着创建`/Rbac/index.cshtml`页面 ```csharp public class RbacController : Controller { [Authorize] public IActionResult Index() { return View(); } [Authorize(Roles = "管理员")] public IActionResult Admin() { return View("Index"); } [Authorize(Roles = "普通")] public IActionResult Common() { return View("Index"); } [Authorize(Roles = "管理员,普通")] public IActionResult Share() { return View("Index"); } } ``` ```html <div> <h1> 是不是管理员:@User.IsInRole("管理员") </h1> <h1> 是不是普通用户:@User.IsInRole("普通") </h1> </div> ``` tn>我们先用`bob`管理员用户运行测试看看 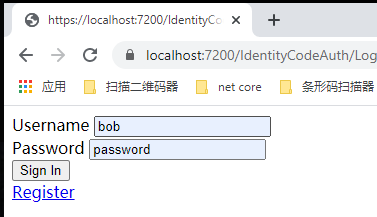 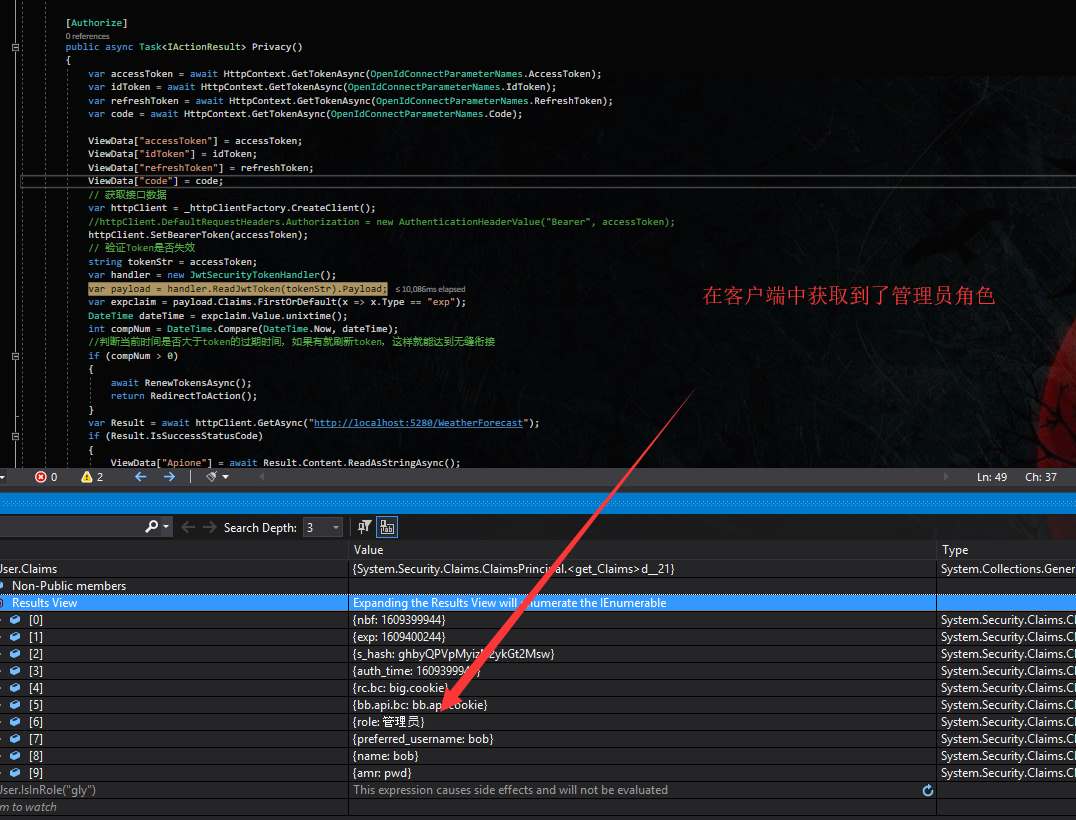 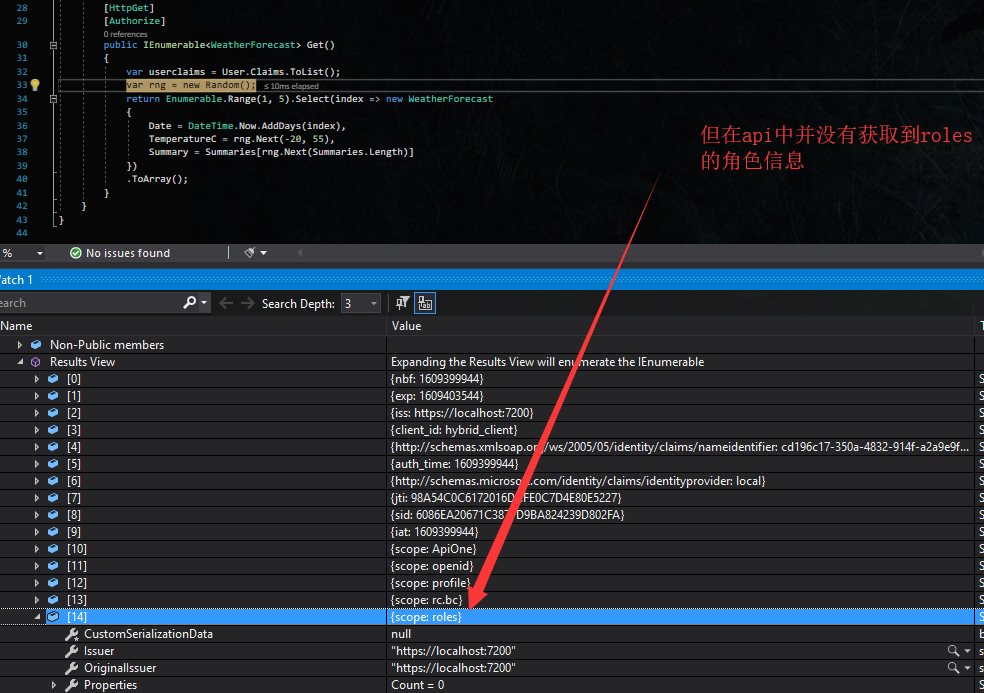 >稍后解决这个问题... 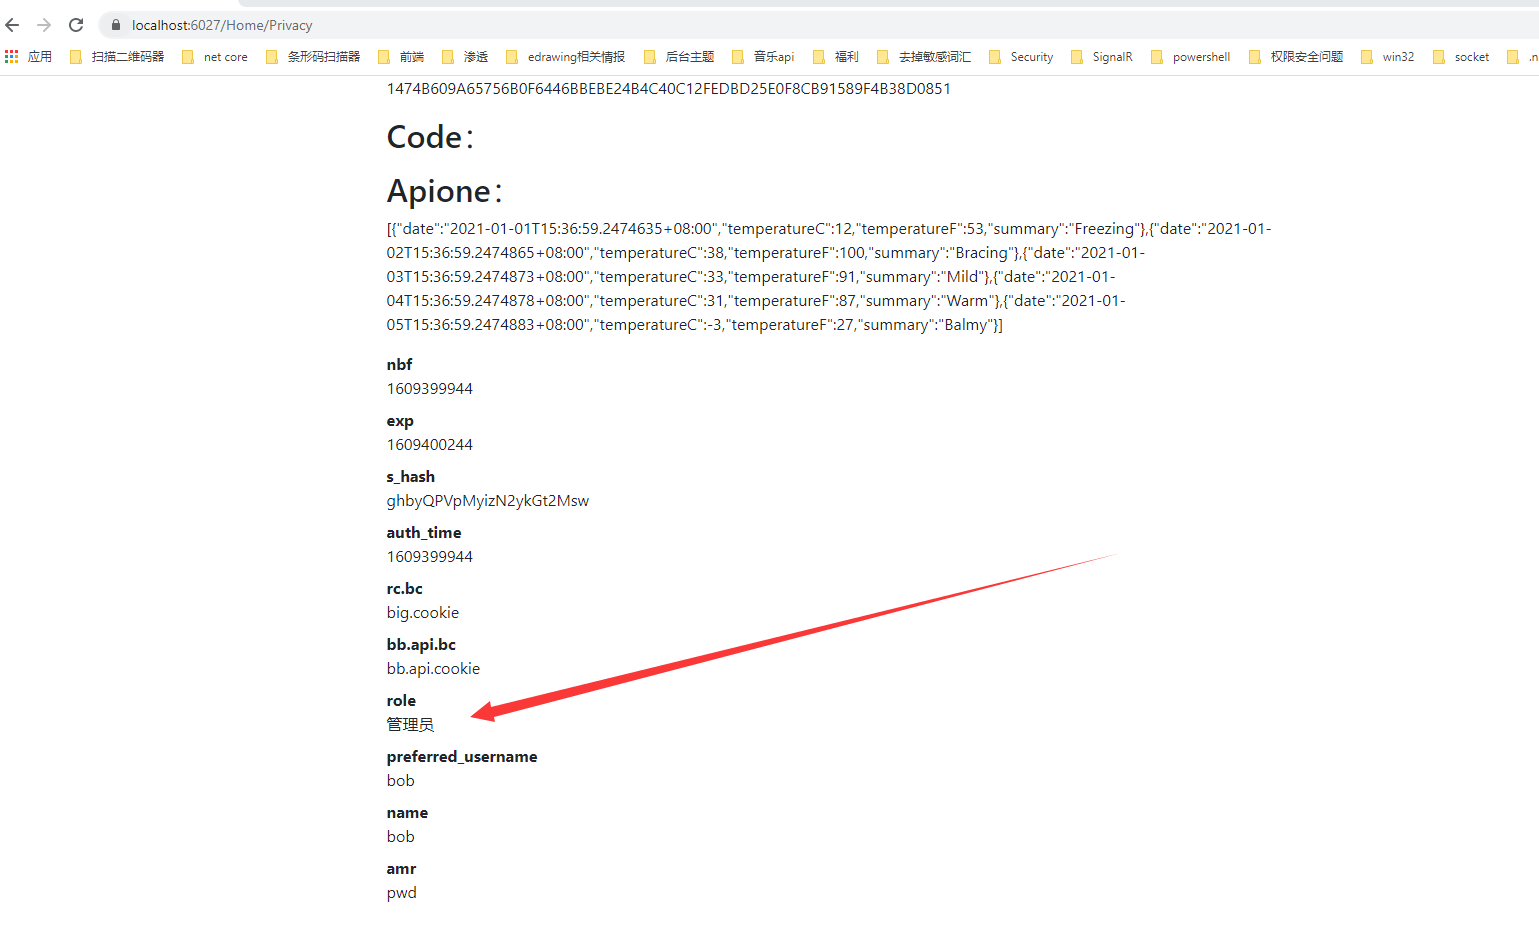 tn>接着我们去访问`https://localhost:6027/Rbac/index`页面进行角色判断 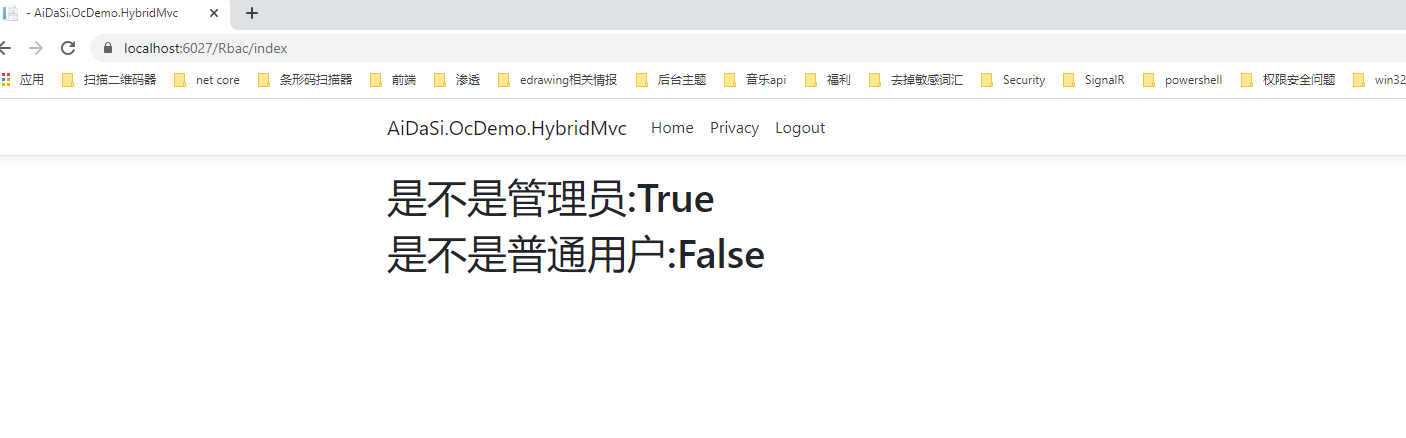 tn>退出后,我们再用`aidasi`普通用户运行测试看看 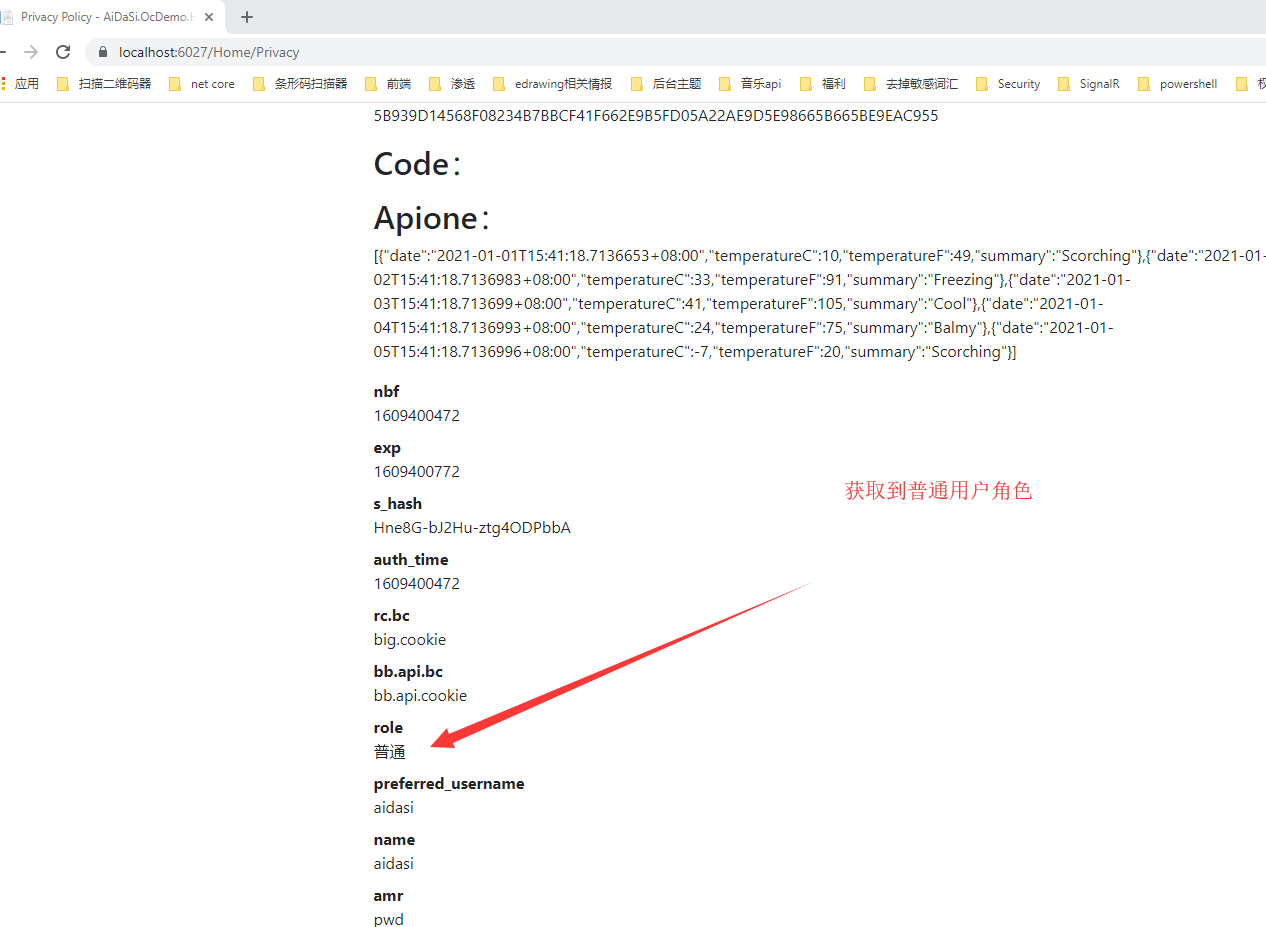 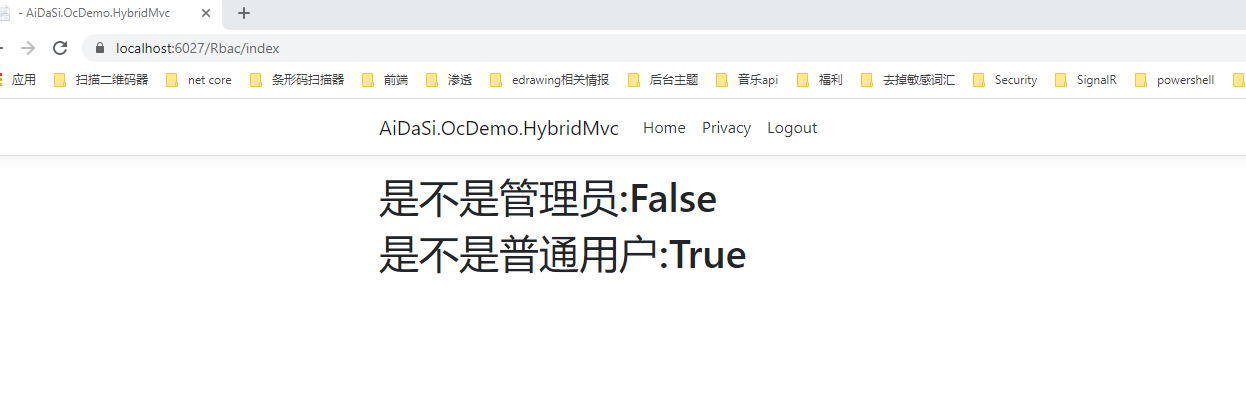 tn>我们看到我们都成功的验证出客户端的身份了,但接着我们会产生两个问题。 (1). 当我们的身份资源过多我们只需要其中的部分资源权限的时候怎么做?比如我只要`role`这个角色权限的`Claim`,这里却还有了`rc.bc`资源。 (2). 如果中间人知道接口资源的地址,如何进行身份认证? >### 解决问题一 tn>首先在授权服务器中将`AlwaysIncludeUserClaimsInIdToken`更改为`false`,其属性默认也为`false` ```csharp // 是否需要将所有token中的Data放入到Claim中 AlwaysIncludeUserClaimsInIdToken = false, ``` tn>然后在客户端中添加如下代码,添加对`role`的映射。 ```csharp options.GetClaimsFromUserInfoEndpoint = true; // 从json用户数据中选择一个具有给定键名和 将其添加为声明。如果索赔实体已包含索赔,则此项不起作用使用给定的ClaimType。如果找不到键或值为空的。 // 当授权服务器端 AlwaysIncludeUserClaimsInIdToken = false 时 options.ClaimActions.MapUniqueJsonKey("role", "role"); ``` tn>运行测试一下,我们会发现没有`rc.bc`的资源了,并且可以访问需要授权的方法  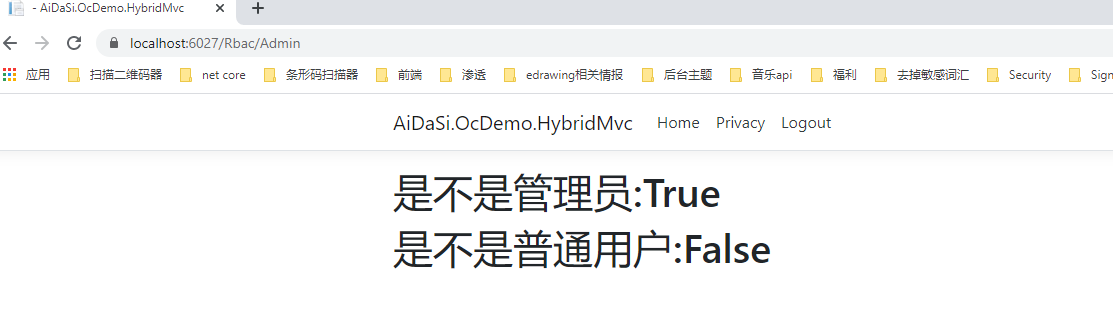 >### 解决问题二 tn>当访问接口资源时,我们的接口以`bb.api.bc`作为角色权限,当`Api资源`获取`WeatherForecastController`中数据时其值设定为`bb.api.cookie` 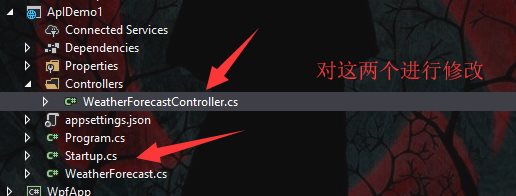 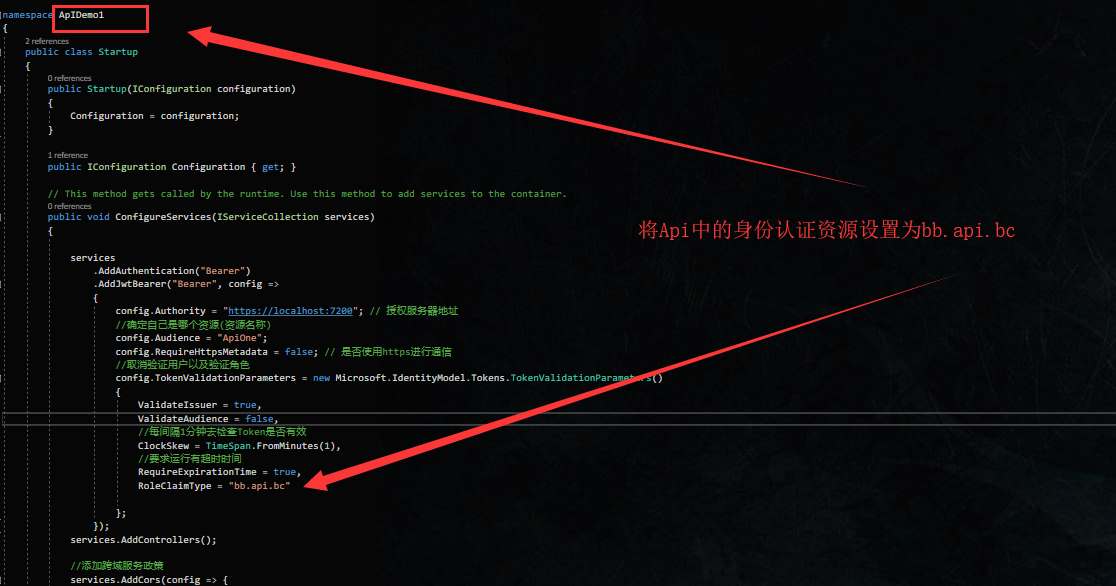 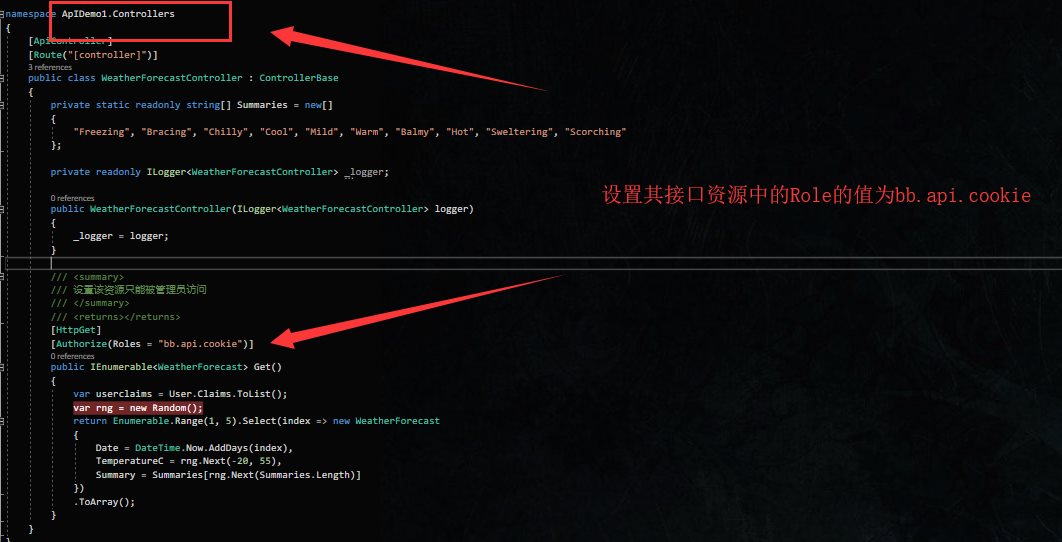 tn>在授权服务器上重新分配角色资源,只让`bob`独享经济,呸!独享`bb.api.bc`资源. 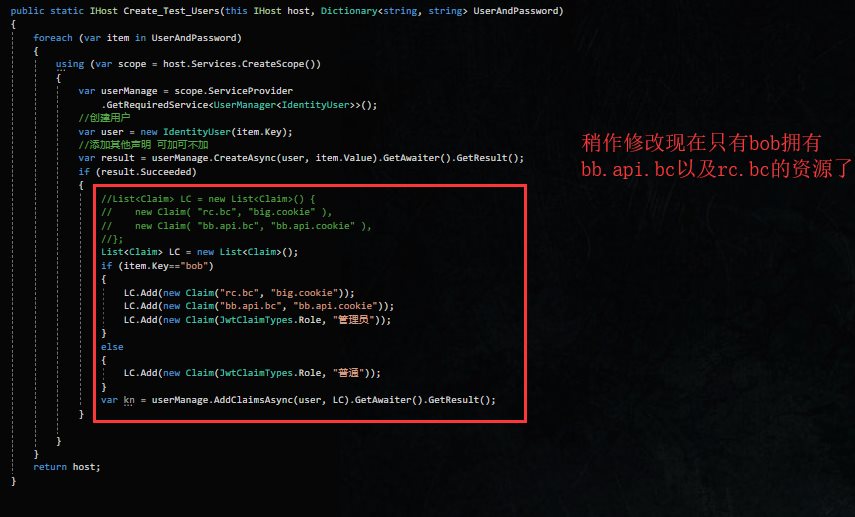  tn>在客户端中添加`bb.api.bc`的映射. ```csharp options.ClaimActions.MapUniqueJsonKey("bb.api.bc", "bb.api.bc"); ``` tn>接着运行测试 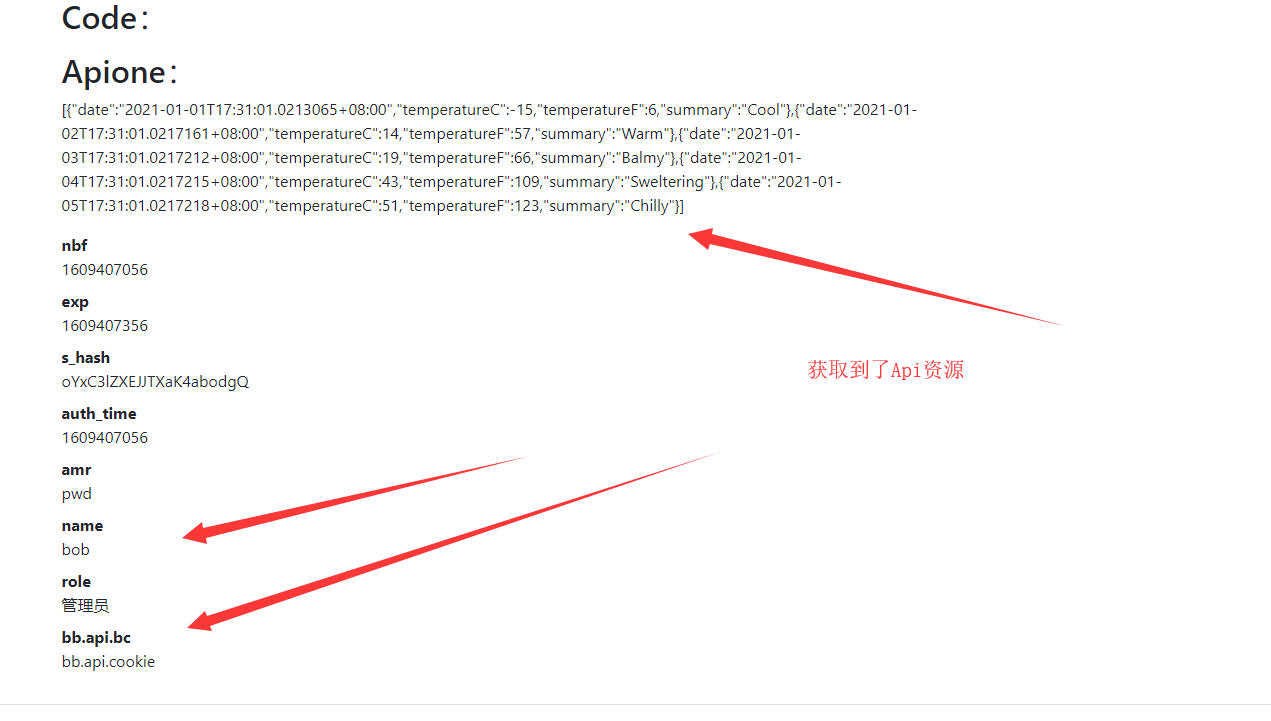 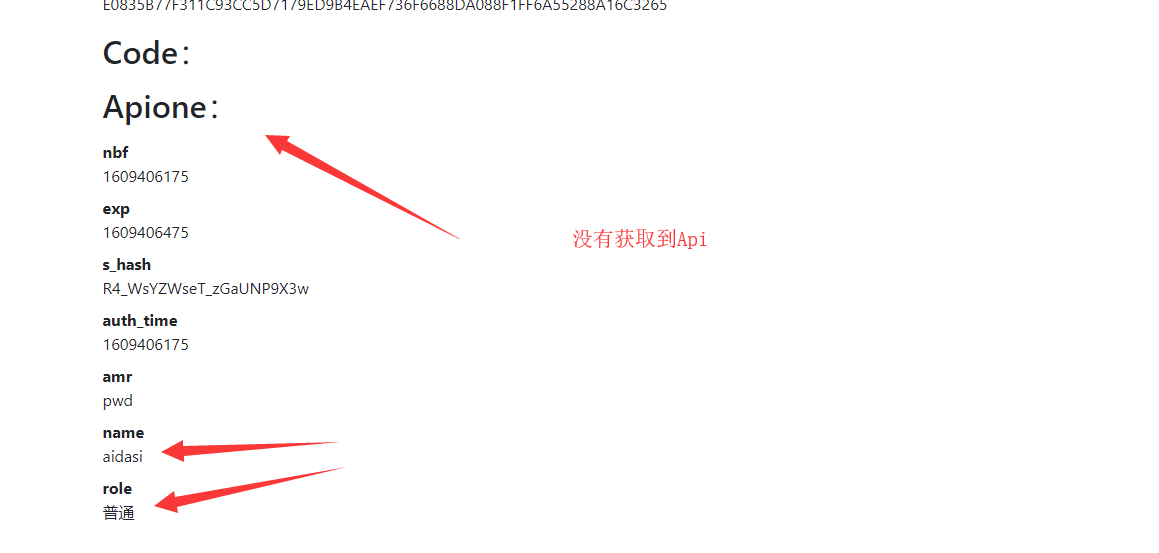 >### 解决未授权问题 tn>当我们用`bob`用户去访问普通用户的接口时,会发现它也是访问不了的,会跳转到一个无授权的页面。例如我们访问一下`/Rbac/Common`接口,它会去访问无授权的网页。(默认地址是:`/Account/AccessDenied`) 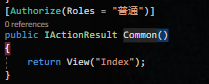 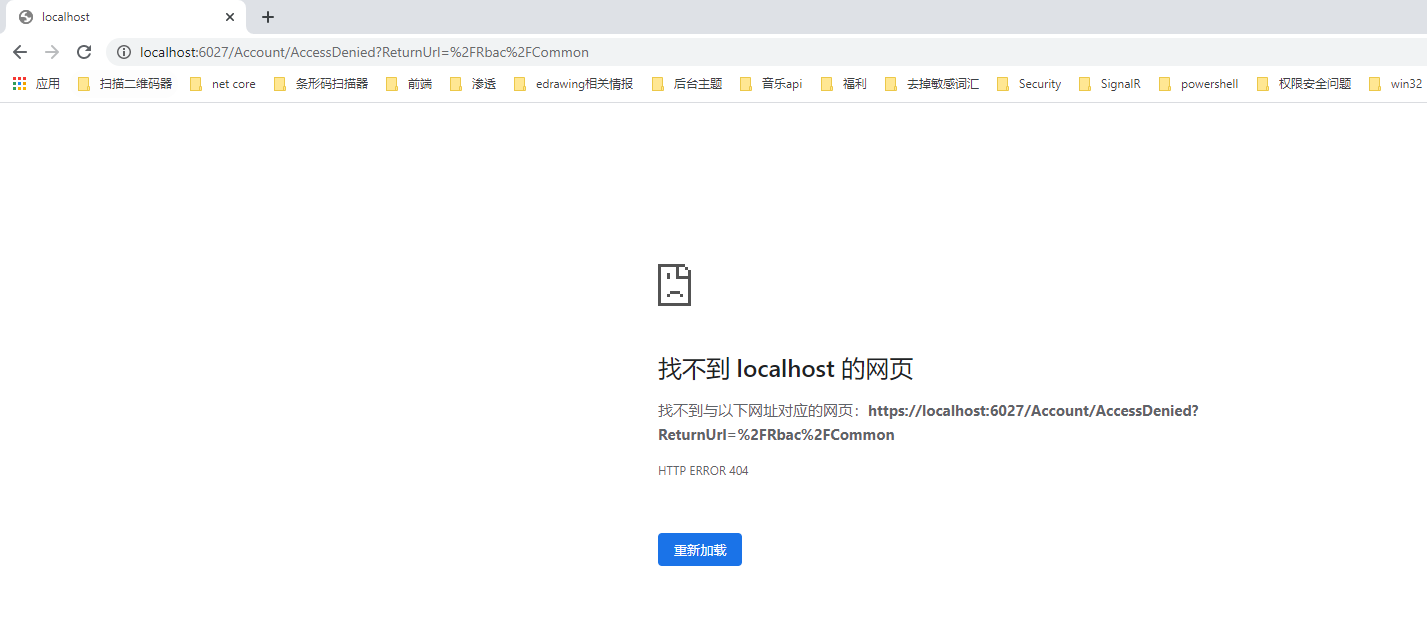 tn>接着我们可以创建相关的`Controller`与`View`,我们这里自定义未授权路径为`/UnAuthorized/AccessDenied`。 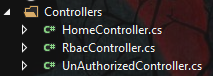 tn>在`UnAuthorized`控制器中添加如下代码 ```csharp public class UnAuthorizedController : Controller { /// <summary> /// 未授权访问 /// /UnAuthorized/AccessDenied /// </summary> /// <param name="ReturnUrl"></param> /// <returns></returns> public IActionResult AccessDenied(string ReturnUrl) { ViewBag.ReturnUrl = ReturnUrl; return View(); } } ``` tn>添加视图 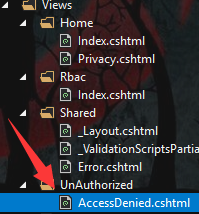 ```html <div> <h1> 你所访问的地址"@ViewBag.ReturnUrl"未进行授权 </h1> <h1> <a href="@ViewBag.ReturnUrl">是否再次尝试</a></h1> </div> ``` tn>最后在`Startup.cs`类中`ConfigureServices`下添加未授权访问页面的路径,最后运行测试。 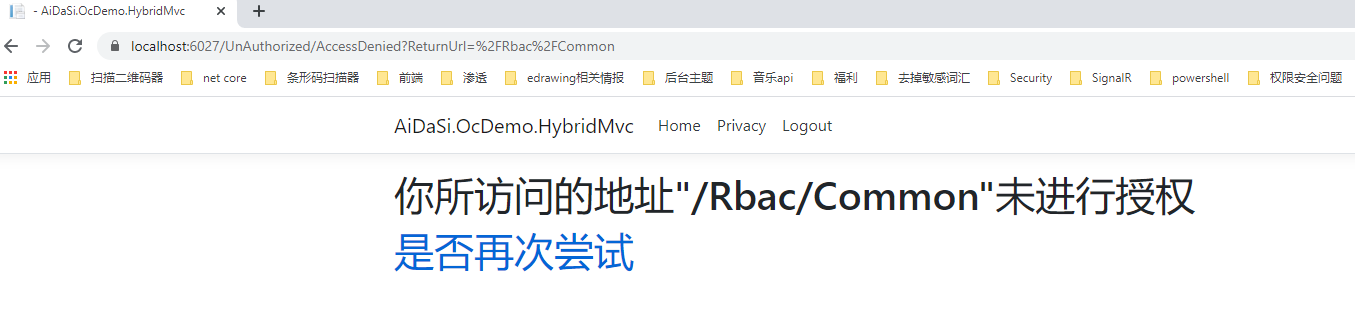 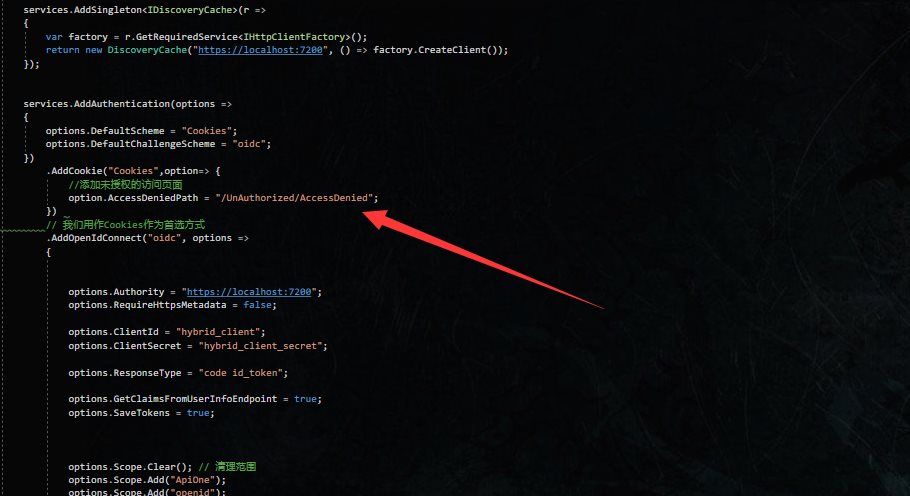 ```csharp .AddCookie("Cookies",option=> { //添加未授权的访问页面 option.AccessDeniedPath = "/UnAuthorized/AccessDenied"; }) ``` ABAC ------------ tn>Attribute-based Access Control 表示通过策略授予权限策略可能将多个属性`/claims`组合到一起允许复杂的权限规则。也简称ABAC >### 添加服务器端政策授权Claim tn>在添加政策授权字段时,添加`FamilyName`与`location`字段。 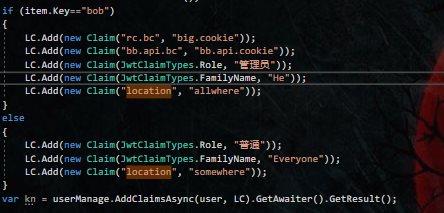 tn>同时需要添加身份资源授权 ```csharp new IdentityResource("locations","地点",new List<string>{ "location" }), ``` 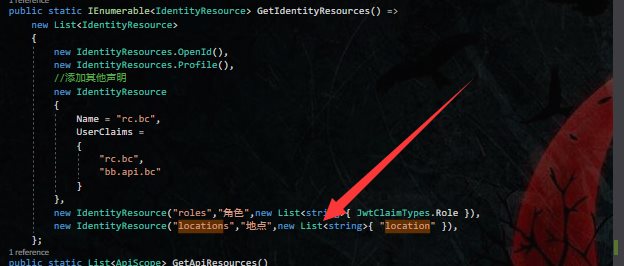 tn>如果需要访问`api`也能获取得到相关`Claim`的话,可以在后面直接添加。  tn>最后在`Client`中添加身份认证资源 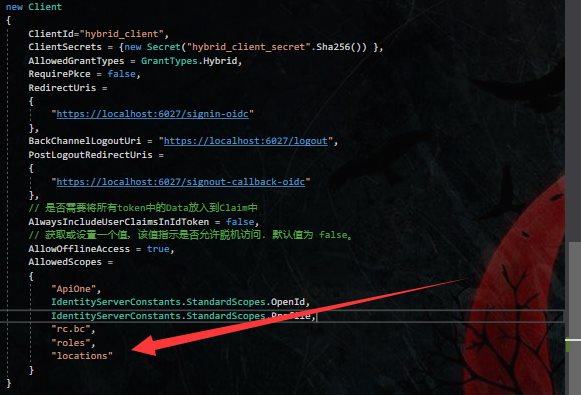 >### 添加客户端端政策授权 tn>在客户端`Startup`中,添加相关的`Scope` ```csharp options.Scope.Add("locations"); ``` tn>添加`locations`Claim的映射 ```csharp options.ClaimActions.MapUniqueJsonKey("location", "location"); ``` tn>随后在`AddAuthorization`服务注册中添加相关`Policy` ```csharp services.AddAuthorization(option => { option.AddPolicy("BobInAllWhere", builder => { // 需要身份验证的用户 builder.RequireAuthenticatedUser(); // 需要名为FamilyName的Claim值为"He"政策为有效 builder.RequireClaim(JwtClaimTypes.FamilyName, "He"); // 需要名为location的Claim值为"allwhere"政策为有效 builder.RequireClaim("location", "allwhere"); }); }); ``` tn>添加`AbacController`控制器,并对`Index.cshtml`视图添加`BobInAllWhere`的政策。 ```csharp public class AbacController : Controller { /// <summary> /// /Abac/Index /// </summary> /// <returns></returns> [Authorize(Policy = "BobInAllWhere")] public IActionResult Index() { return View(); } } ``` tn>添加`Index.cshtml`的内容 ```html 只有 Policy = "BobInAllWhere" 与 FamilyName = "He" 的可以访问 ``` >### 运行测试 tn>当我们用`bob`用户登录的时候 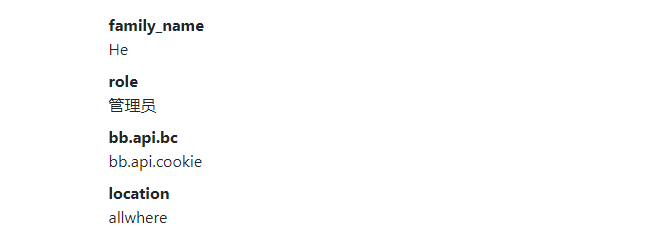 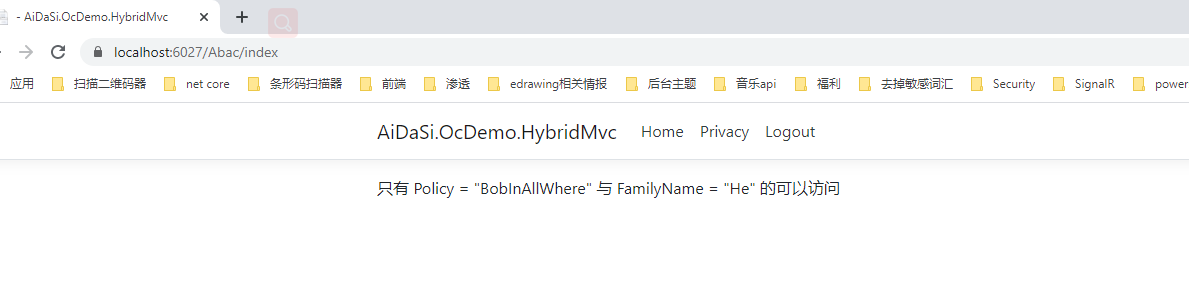 tn>当我们用`aidasi`用户登录的时候 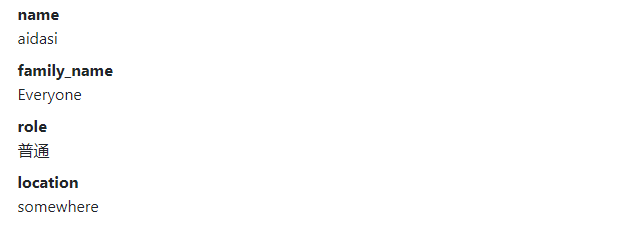 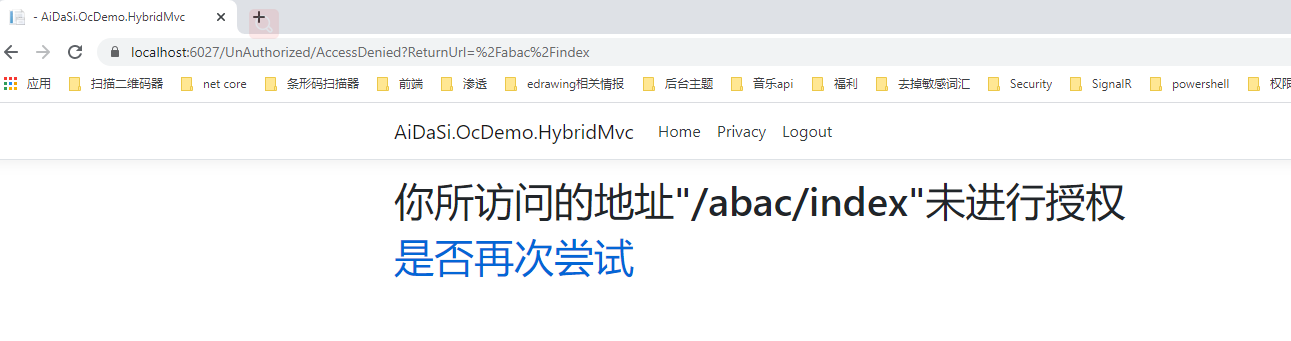 >### 自定义客户端政策处理 tn>添加如下文件到客户端 (HybridMvc) 中 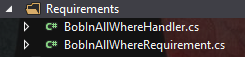 ```csharp public class BobInAllWhereRequirement: IAuthorizationRequirement { public BobInAllWhereRequirement() { } } ``` ```csharp public class BobInAllWhereHandler : AuthorizationHandler<BobInAllWhereRequirement> { protected override Task HandleRequirementAsync(AuthorizationHandlerContext context, BobInAllWhereRequirement requirement) { // 获取Claim中的familyName的值 var familyName = context.User.Claims.FirstOrDefault(c => c.Type == JwtClaimTypes.FamilyName)?.Value; // 获取Claim中的location的值 var location = context.User.Claims.FirstOrDefault(c => c.Type == "location")?.Value; // 判断familyName的值为He,location 的值为allwhere,并且要用户是登录的状态 if (familyName == "He" && location == "allwhere" && context.User.Identity.IsAuthenticated) { // 放行通过 context.Succeed(requirement); return Task.CompletedTask; } // 验证失败,通不过 context.Fail(); return Task.CompletedTask; } } ``` tn>在`Startup.cs`中添加自定义策略,其策略规则不变。 ```csharp services.AddAuthorization(option => { //option.AddPolicy("BobInAllWhere", builder => //{ // // 需要身份验证的用户 // builder.RequireAuthenticatedUser(); // // 需要名为FamilyName的Claim值为"He"政策为有效 // builder.RequireClaim(JwtClaimTypes.FamilyName, "He"); // // 需要名为location的Claim值为"allwhere"政策为有效 // builder.RequireClaim("location", "allwhere"); //}); option.AddPolicy("BobInAllWhere", builder => { builder.AddRequirements(new BobInAllWhereRequirement()); }); }); services.AddSingleton<IAuthorizationHandler, BobInAllWhereHandler>(); ``` 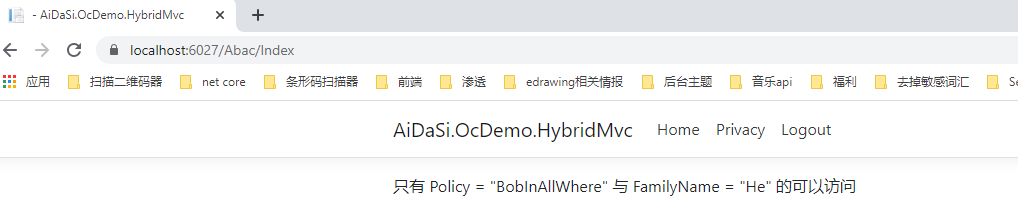 tn>在`HandleRequirementAsync`方法中如果没有对`context`进行调用验证通过或验证不通过的方法,都为验证不通过的方法。

