.net core 3.1 Identity Server4 (Code模式) 电脑版发表于:2020/12/15 14:33  >#.net core 3.1 Identity Server4 (Code模式) [TOC]  >### Code 模式的理解 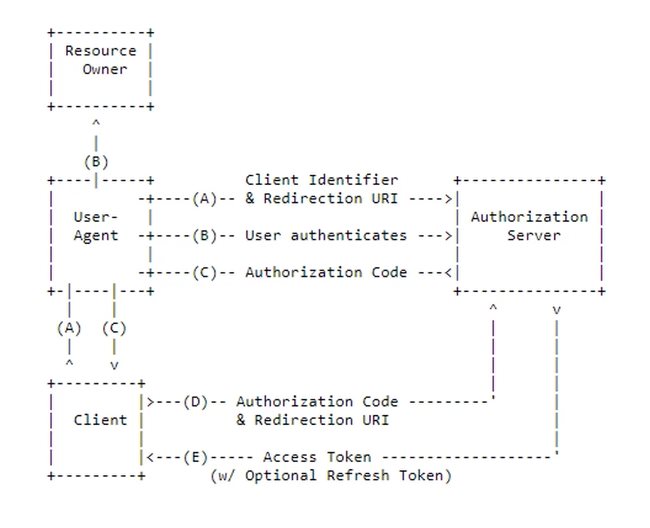 tn>大致说一下,这种授权模式的意义。 A. 用户通过浏览器在页面上请求客户端需要授权的页面时,会自动跳转到授权服务器上去登录(这里授权服务器会去验证客户端信息) B. 然后用户在授权服务器上的登录页面进行登录,登录成功后会返回一个授权验证码(授权验证码!=授权码) C. 然后跳转到用户需要授权的页面 D. 客户端就会拿这这授权验证码去授权服务器那边验证,然后获取授权码[access_token](注意这里授权服务器会去验证你的客户端,比如验证访问链接来源,secret,clientid) E. 获取到Access Token >### 创建MVC客户端(AiDaSi.OcDemo.MVC)  tn>安装依赖包 `Microsoft.AspNetCore.Authentication.OpenIdConnect` ```bash Install-Package Microsoft.AspNetCore.Authentication.OpenIdConnect -Version 3.1.9 ``` tn>修改`Startup.cs` ```csharp public void ConfigureServices(IServiceCollection services) { // 我们关闭了JWT的Claim 类型映射, 以便允许well-known claims JwtSecurityTokenHandler.DefaultInboundClaimTypeMap.Clear(); JwtSecurityTokenHandler.DefaultMapInboundClaims = false; services.AddAuthentication(options => { options.DefaultScheme = "Cookies"; options.DefaultChallengeScheme = "oidc"; }) .AddCookie("Cookies") // 我们用作Cookies作为首选方式 .AddOpenIdConnect("oidc", options => { options.SignInScheme = "Cookies"; options.Authority = "https://localhost:7200"; // 授权地址 options.ClientId = "client_id_mvc"; options.ClientSecret = "mvc_secret"; // 退出设置 options.SignedOutCallbackPath = "/Home/Index"; // options.RequireHttpsMetadata = true; // 为http方式请求尝试了一下行不通必须https两边都是 options.ResponseType = "code";// 类型 options.SaveTokens = true; // 保存token // options.GetClaimsFromUserInfoEndpoint = true; // 获取所有信息 options.Scope.Clear(); // 清理范围 options.Scope.Add("ApiOne"); options.Scope.Add("openid"); options.Scope.Add("profile"); options.Scope.Add("rc.bc"); options.Scope.Add("offline_access");// 脱机访问令牌 }); services.AddHttpClient(); services.AddControllersWithViews(); } ``` tn>在下面的`Configure`方法中添加好下列两句代码 ```csharp app.UseAuthentication(); app.UseAuthorization(); ``` tn>修改客户端`HomeController`中的`Privacy`方法与页面 ```csharp [Authorize] public async Task<IActionResult> Privacy() { var accessToken = await HttpContext.GetTokenAsync(OpenIdConnectParameterNames.AccessToken); var idToken = await HttpContext.GetTokenAsync(OpenIdConnectParameterNames.IdToken); var refreshToken = await HttpContext.GetTokenAsync(OpenIdConnectParameterNames.RefreshToken); var code = await HttpContext.GetTokenAsync(OpenIdConnectParameterNames.Code); ViewData["accessToken"] = accessToken; ViewData["idToken"] = idToken; ViewData["refreshToken"] = refreshToken; ViewData["code"] = code; // 获取接口数据 var httpClient = _httpClientFactory.CreateClient(); httpClient.DefaultRequestHeaders.Authorization = new AuthenticationHeaderValue("Bearer", accessToken); var Result = await httpClient.GetAsync("http://localhost:5280/WeatherForecast"); if (Result.IsSuccessStatusCode) { ViewData["Apione"] = await Result.Content.ReadAsStringAsync(); } return View(); } ``` ```html @{ ViewData["Title"] = "Privacy Policy"; } <h1>@ViewData["Title"]</h1> <h2>Access Token:</h2> <p>@ViewData["accessToken"]</p> <h2>Id Token:</h2> <p>@ViewData["idToken"]</p> <h2>Refresh Token:</h2> <p>@ViewData["refreshToken"]</p> <h2>Code:</h2> <p>@ViewData["code"]</p> <h2>Apione:</h2> <p>@ViewData["Apione"]</p> <dl> @foreach (var claim in User.Claims) { <dt>@claim.Type</dt> <dd>@claim.Value</dd> } </dl> ``` tn>将AiDaSi.OcDemo.Authenzation(授权服务器),ApIDemo1(接口)修改为https。因为本人亲自尝试了很多遍,如果为http,在授权服务器登录成功后将会一直循环到login登录页面那儿...(这是幻术伊邪那美^_^)。 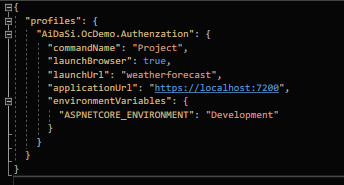 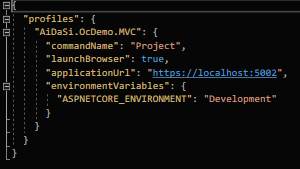 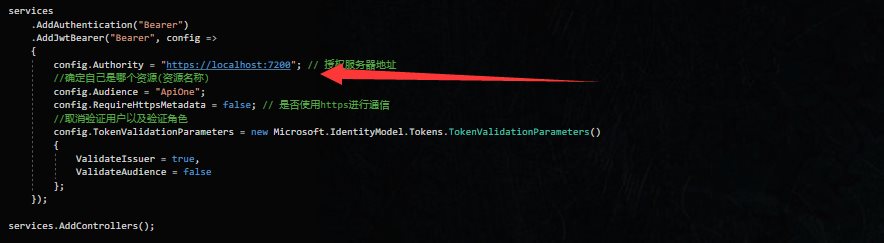 >### 修改授权服务器 tn>在`Config.cs`添加`Mvc`客户端 ```csharp new Client { ClientId = "client_id_mvc", ClientName = "ASP.NET Core MVC Client", AllowedGrantTypes = GrantTypes.Code, ClientSecrets = { new Secret("mvc_secret".Sha256()) }, // Species允许 URI返回令牌或授权代码到 RedirectUris = { "https://localhost:5002/signin-oidc" }, // 为基于HTTP前端通道的注销指定客户端的注销 URI。 FrontChannelLogoutUri = "https://localhost:5002/signout-oidc", // 允许URI在注销后重定向到的退出 PostLogoutRedirectUris = { "https://localhost:5002/Home/Index" }, AllowedScopes = { "ApiOne", IdentityServerConstants.StandardScopes.OpenId, IdentityServerConstants.StandardScopes.Profile, "rc.bc" }, // 将所有声明放在 id标记中,允许有很多Claims AlwaysIncludeUserClaimsInIdToken = true, // 获取或设置一个值,该值指示是否允许脱机访问. 默认值为 false。 AllowOfflineAccess = true, // 指定是否需要同意屏幕(默认值为 false) RequireConsent = false, }, ``` tn>在`Startup`的`ConfigureServices`中添加授权登录地址。 ```csharp services.ConfigureApplicationCookie(config => { config.Cookie.Name = "IdentityServer.Cookie"; // 设置Cookie名称 config.LoginPath = "/IdentityCodeAuth/Login"; // 设置登录地址 }); ``` tn>创建用户实例  ```csharp public class LoginViewModel { /// <summary> /// 用户名 /// </summary> public string Username { get; set; } /// <summary> /// 密码 /// </summary> public string Password { get; set; } /// <summary> /// 返回连接 /// </summary> public string ReturnUrl { get; set; } } ``` tn>在添加授权地址后我们也应该添加相应的控制器,并给对应的用户模型附上用户名与返回地址。`returnUrl`参数表示服务器跳转到客户端时的链接。 ```csharp public class IdentityCodeAuthController : Controller { // 用户界面使用提供的服务与 IdentityServer进行通信。 private readonly IIdentityServerInteractionService _interaction; public IdentityCodeAuthController( IIdentityServerInteractionService interaction, ) { _interaction = interaction; } [HttpGet] public async Task<IActionResult> Login(string returnUrl) { var vm = new LoginViewModel() { ReturnUrl = returnUrl }; // 获取上下文的内容 var context = await _interaction.GetAuthorizationContextAsync(returnUrl); // 判断用户名是否存在 vm.Username = context?.LoginHint; return View(vm); } } ``` tn>创建出所对应的view,里面放了一个表单 ```html @model LoginViewModel <form> <input type="hidden" asp-for="ReturnUrl" /> <div> <label>Username</label> <input asp-for="Username" /> </div> <div> <label>Password</label> <input asp-for="Password" /> </div> <div> <button type="submit">Sign In</button> </div> </form> ``` tn>接着我们来运行一下,通过点击客户端首页上的`Privacy`,然后成功跳转到了授权服务器的登录页面。完成了A项。  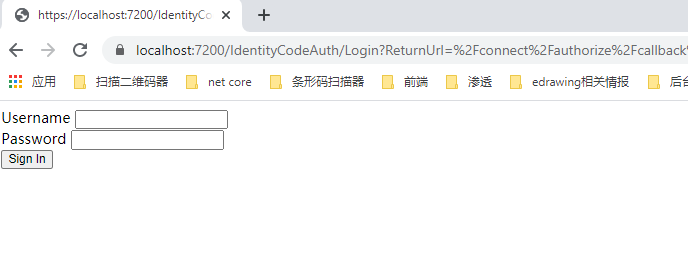 tn>接着我们添加登录时需要处理的代码,我们准备放到`IdentityCodeAuth`控制器中的`Login`页面进行处理。处理时登录成功,拿到授权验证码到跳转到客户端的页面,就完成了B与C两项。 ```html <form asp-controller="IdentityCodeAuth" asp-action="Login" method="post"> ``` ```csharp /// <summary> /// ValidateAntiForgeryToken 防伪 /// </summary> /// <param name="vm"></param> /// <returns></returns> [HttpPost] [ValidateAntiForgeryToken] public async Task<IActionResult> Login(LoginViewModel vm) { // 获取上下文的内容 var context = await _interaction.GetAuthorizationContextAsync(vm.ReturnUrl); if (ModelState.IsValid) { var result = await _signInManager.PasswordSignInAsync(vm.Username, vm.Password, false, false); // 判断登录是否成功 if (result.Succeeded) { // 登录成功 return Redirect(vm.ReturnUrl); } else if (result.IsLockedOut) { // 如果登录失败就执行如下。。。 // 不做处理就会直接回到Login页面中。。。 } } return View(vm); } ``` tn>接着我们尝试登录试一下 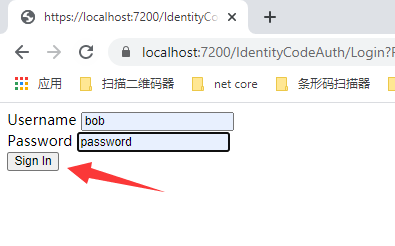 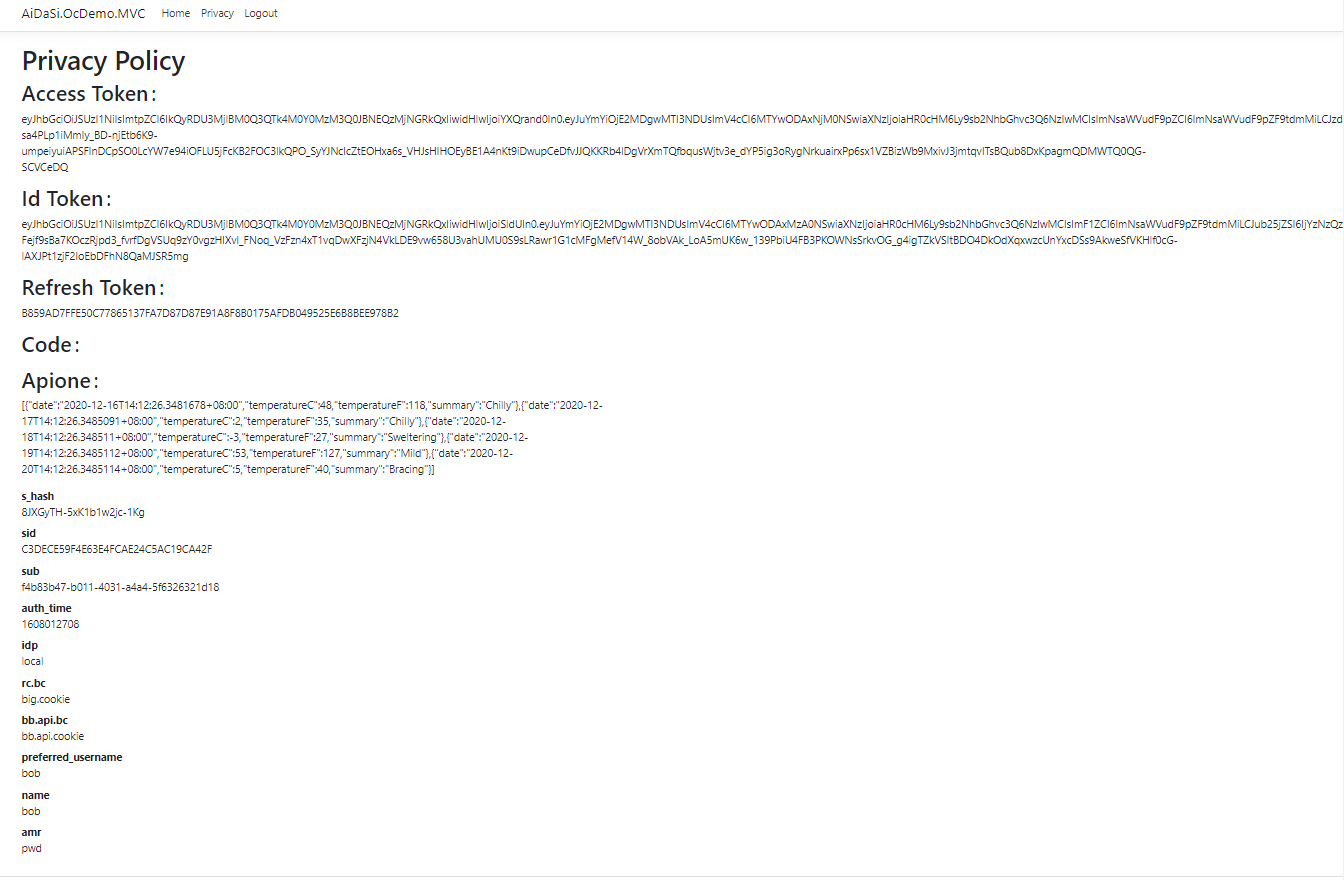 tn>最后我们看到访问需要授权接口时拿去到了Access Token,并访问到了接口。 >### 退出授权 tn>在`_Layout.cshtml`页面上`Privacy`后面添加一行判断是否登录的代码;如果登录了,则显示登录按钮。(同样的我们这里Logout方法并不存在,所以需要添加Home控制器下的Logout方法) ```html @if (User.Identity.IsAuthenticated) { <li class="nav-item"> <a class="nav-link text-dark" asp-area="" asp-controller="Home" asp-action="Logout">Logout</a> </li> } ``` ```csharp public async Task<IActionResult> Logout() { return SignOut("Cookies", "oidc"); } ``` tn>接着在授权服务器上`Startup.cs`添加登出的地址。(因为你再客户端上登出了,在没有授权服务器上退出) ```csharp services.ConfigureApplicationCookie(config => { config.Cookie.Name = "IdentityServer.Cookie"; // 设置Cookie名称 config.LoginPath = "/IdentityCodeAuth/Login"; // 设置登录地址 config.LogoutPath = "/IdentityCodeAuth/Logout"; // 设置退出地址 }); ``` tn>在`IdentityCodeAuth`控制器下添加退出的`Logout`方法 ```csharp [HttpGet] public async Task<IActionResult> Logout(string logoutId) { await _signInManager.SignOutAsync(); var logoutRequest = await _interaction.GetLogoutContextAsync(logoutId); if (string.IsNullOrEmpty(logoutRequest.PostLogoutRedirectUri)) { return RedirectToAction("Index", "WeatherForecast"); } return Redirect(logoutRequest.PostLogoutRedirectUri); } ``` tn>运行测试一下。 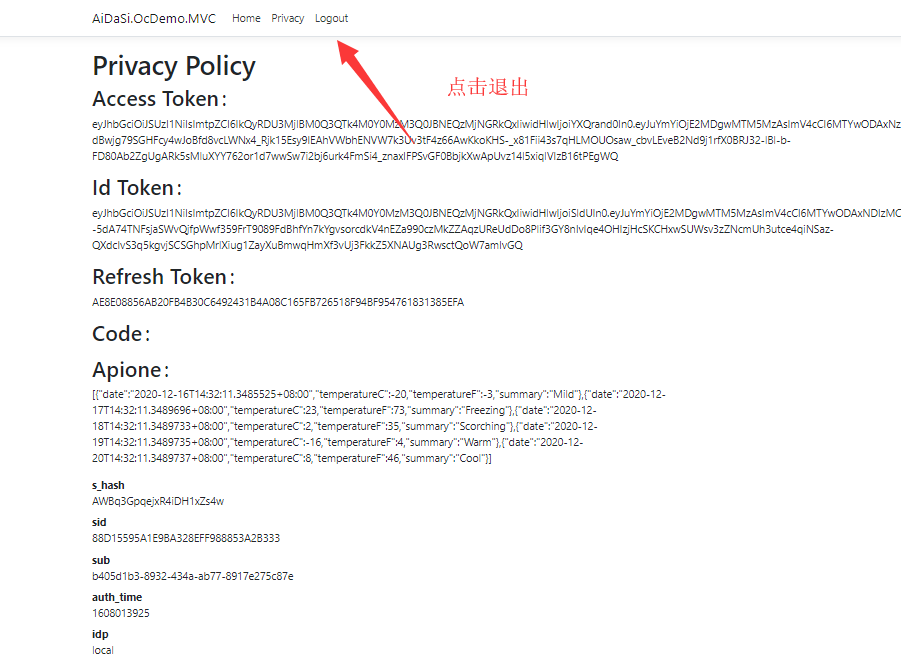 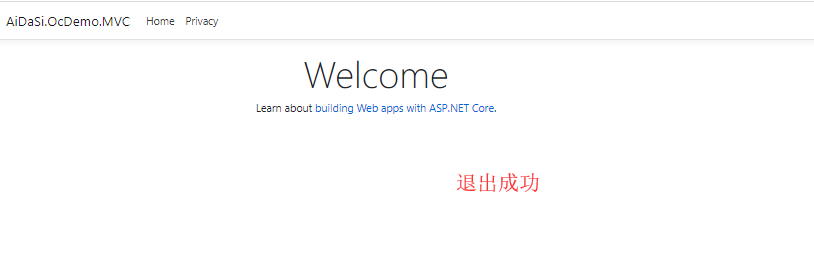 >### 注册模块 tn>在授权服务器上创建`RegisterViewModel.cs`注册实例,添加注册方法(Register)与对应的视图 >RegisterViewModel.cs ```csharp public class RegisterViewModel { [Required] public string Username { get; set; } [Required] [DataType(DataType.Password)] public string Password { get; set; } [Required] [DataType(DataType.Password)] [Compare("Password")] public string ConfirmPassword { get; set; } public string ReturnUrl { get; set; } } ``` >IdentityCodeAuthController.cs ```csharp /// <summary> /// 注册页面 /// </summary> /// <param name="returnUrl"></param> /// <returns></returns> [HttpGet] public IActionResult Register(string returnUrl) { return View(new RegisterViewModel { ReturnUrl = returnUrl }); } ``` >Register.cshtml ```html @model RegisterViewModel @* 注册失败的错误消息 *@ @if (ViewData["Message"] != null ) { <div style="color:red"> @ViewData["Message"].ToString() </div> } <form asp-controller="IdentityCodeAuth" asp-action="Register" method="post"> <input type="hidden" asp-for="ReturnUrl" /> <div> <label>Username</label> <input asp-for="Username" /> <span asp-validation-for="Username"></span> </div> <div> <label>Password</label> <input asp-for="Password" /> <span asp-validation-for="Password"></span> </div> <div> <label>Confirm Password</label> <input asp-for="ConfirmPassword" /> <span asp-validation-for="ConfirmPassword"></span> </div> <div> <button type="submit">Register In</button> </div> </form> <a asp-controller="IdentityCodeAuth" asp-action="Login" asp-route-returnUrl="@Model.ReturnUrl">Back to Login</a> ``` >为登录页面添加注册标签 Login.cshtml ```html <a asp-controller="IdentityCodeAuth" asp-action="Register" asp-route-returnUrl="@Model.ReturnUrl">Register</a> ``` 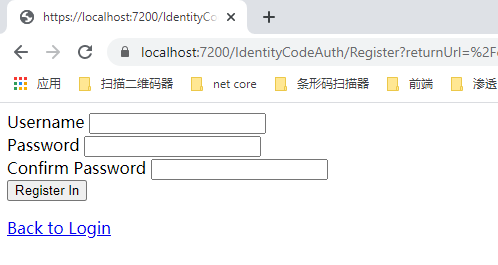 >接着我们在`IdentityCodeAuthController`添加处理注册方法 ```csharp /// <summary> /// 验证注册 /// </summary> /// <param name="vm"></param> /// <returns></returns> [HttpPost] public async Task<IActionResult> Register(RegisterViewModel vm) { string Message = ""; try { //验证模型是否有效 //判断两次密码是否一致 if (!ModelState.IsValid) { throw new Exception("验证模型失败"); } //创建用户 var user = new IdentityUser(vm.Username); var result = await _userManager.CreateAsync(user, vm.Password); if (result.Succeeded) { //登录用户 await _signInManager.SignInAsync(user, false); return Redirect(vm.ReturnUrl); } } catch (Exception ex) { Message = ex.Message; } ViewData["Message"] = Message; return View(vm); } ``` >当我们验证不通过时,会显示错误消息,通过则会直接登录返回到客户端。 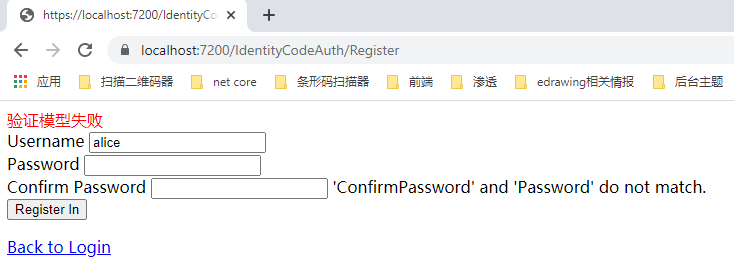 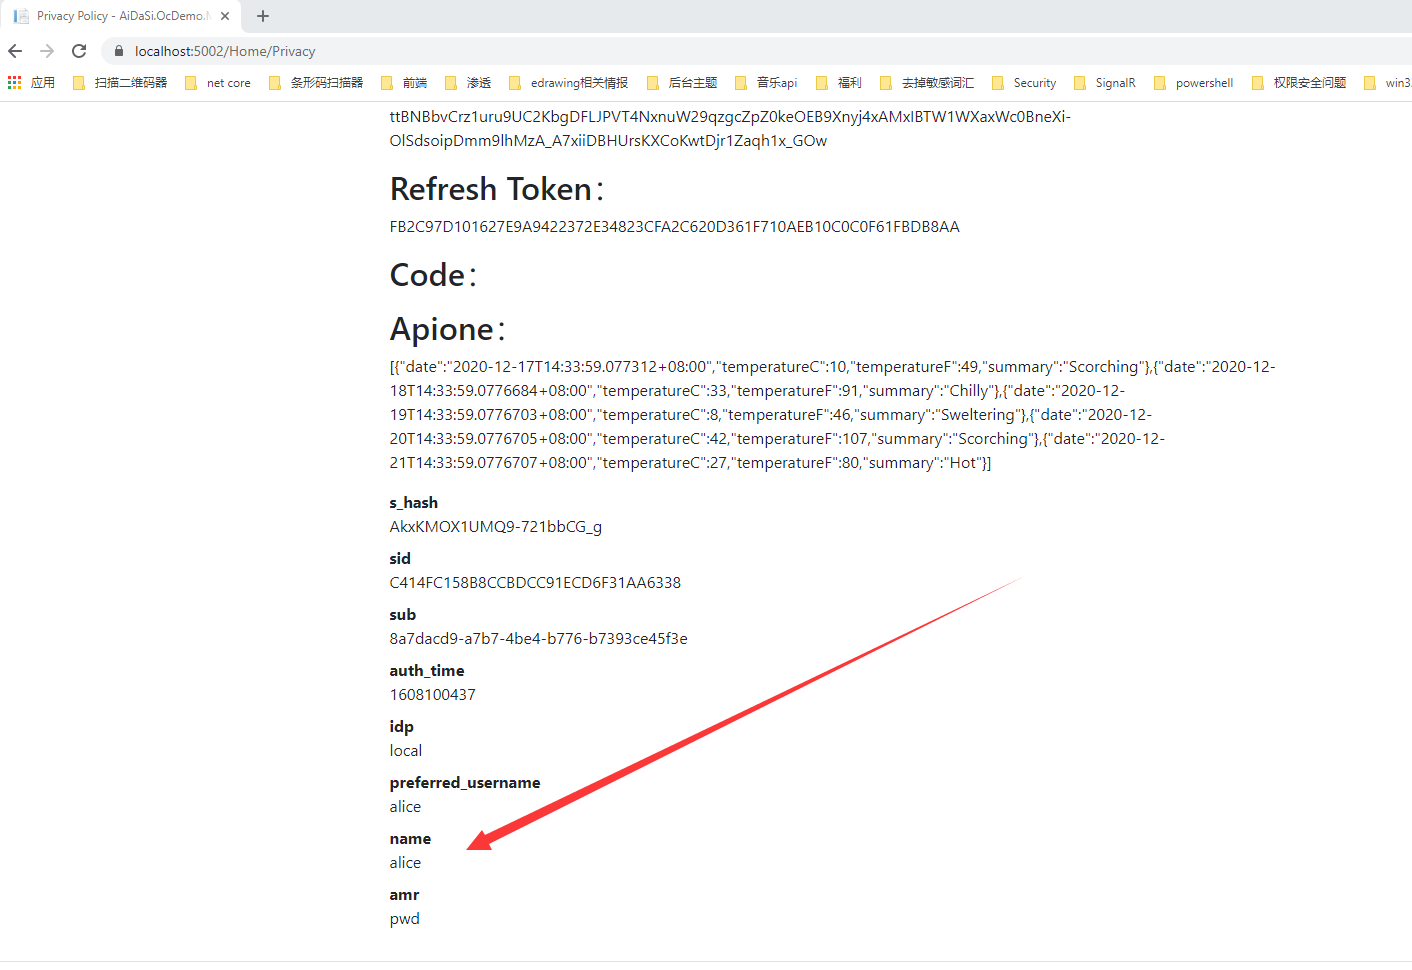 >### 删除cookie声明映射 tn>我们发现有些Cookie声明映射是多余的不需要的,如:amr、s_hash,我们可以在MVC客户端中的`Startup.cs`中AddOpenIdConnect委托里将其删除。 ```csharp //删除cookie声明映射 options.ClaimActions.DeleteClaim("amr"); options.ClaimActions.DeleteClaim("s_hash"); ``` 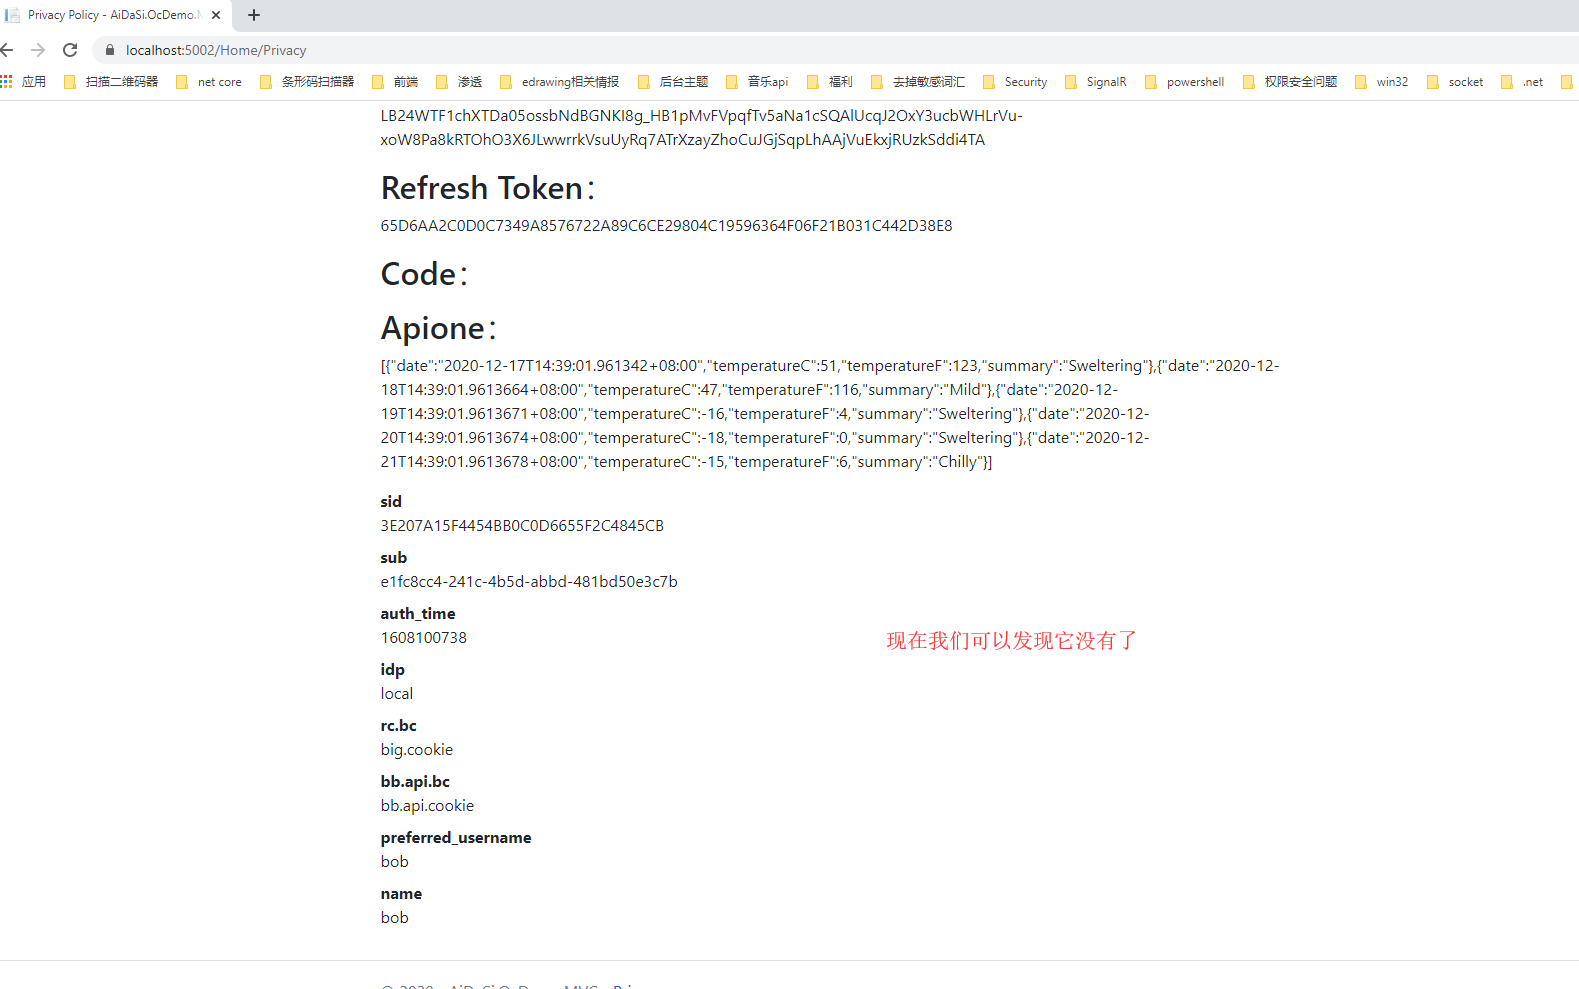 >### 刷新Token tn>在这之前呢我们先把授权服务器的Access Token设置为1分钟,并且把Api的验证Token的时间也为1分钟。二者缺一不可。在此之前请在mvc客户端引用好`IdentityModel`。 >AiDaSi.OcDemo.Authenzation --> Config.cs ```csharp new Client { ClientId = "client_id_mvc", ClientName = "ASP.NET Core MVC Client", AllowedGrantTypes = GrantTypes.Code, ClientSecrets = { new Secret("mvc_secret".Sha256()) }, // Species允许 URI返回令牌或授权代码到 RedirectUris = { "https://localhost:5002/signin-oidc" }, // 为基于HTTP前端通道的注销指定客户端的注销 URI。 FrontChannelLogoutUri = "https://localhost:5002/signout-oidc", // 允许URI在注销后重定向到的退出 PostLogoutRedirectUris = { "https://localhost:5002/Home/Index" }, AllowedScopes = { "ApiOne", IdentityServerConstants.StandardScopes.OpenId, IdentityServerConstants.StandardScopes.Profile, "rc.bc" }, // 允许浏览器通过 (如果js等SPA需要通过验证) // AllowAccessTokensViaBrowser = true, // 将所有声明放在 id标记中,允许有很多Claims AlwaysIncludeUserClaimsInIdToken = true, // 获取或设置一个值,该值指示是否允许脱机访问. 默认值为 false。 AllowOfflineAccess = true, // 设置Token时间为60秒,除了这里要设置之外也需要在api资源中设置验证过期时间 AccessTokenLifetime = 60, // 指定是否需要同意屏幕(默认值为 false) RequireConsent = false, }, ``` >ApIDemo1 --> Startup.cs ```csharp services .AddAuthentication("Bearer") .AddJwtBearer("Bearer", config => { config.Authority = "https://localhost:7200"; // 授权服务器地址 //确定自己是哪个资源(资源名称) config.Audience = "ApiOne"; config.RequireHttpsMetadata = false; // 是否使用https进行通信 //取消验证用户以及验证角色 config.TokenValidationParameters = new Microsoft.IdentityModel.Tokens.TokenValidationParameters() { ValidateIssuer = true, ValidateAudience = false, //每间隔1分钟去检查Token是否有效 ClockSkew = TimeSpan.FromMinutes(1), //要求运行有超时时间 RequireExpirationTime = true }; }); ``` tn>启动项目,我们通过 jwt.io 解析到过期时间(exp),相隔1分钟后我们再次刷新页面。 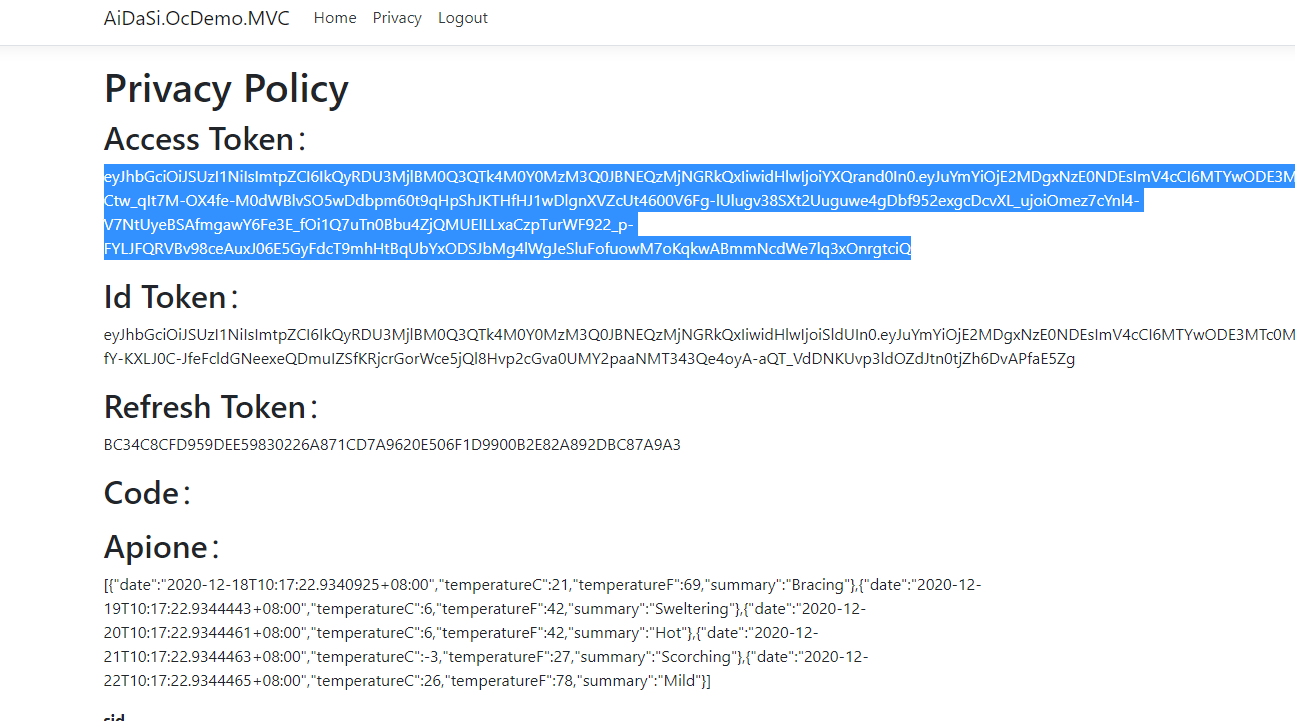 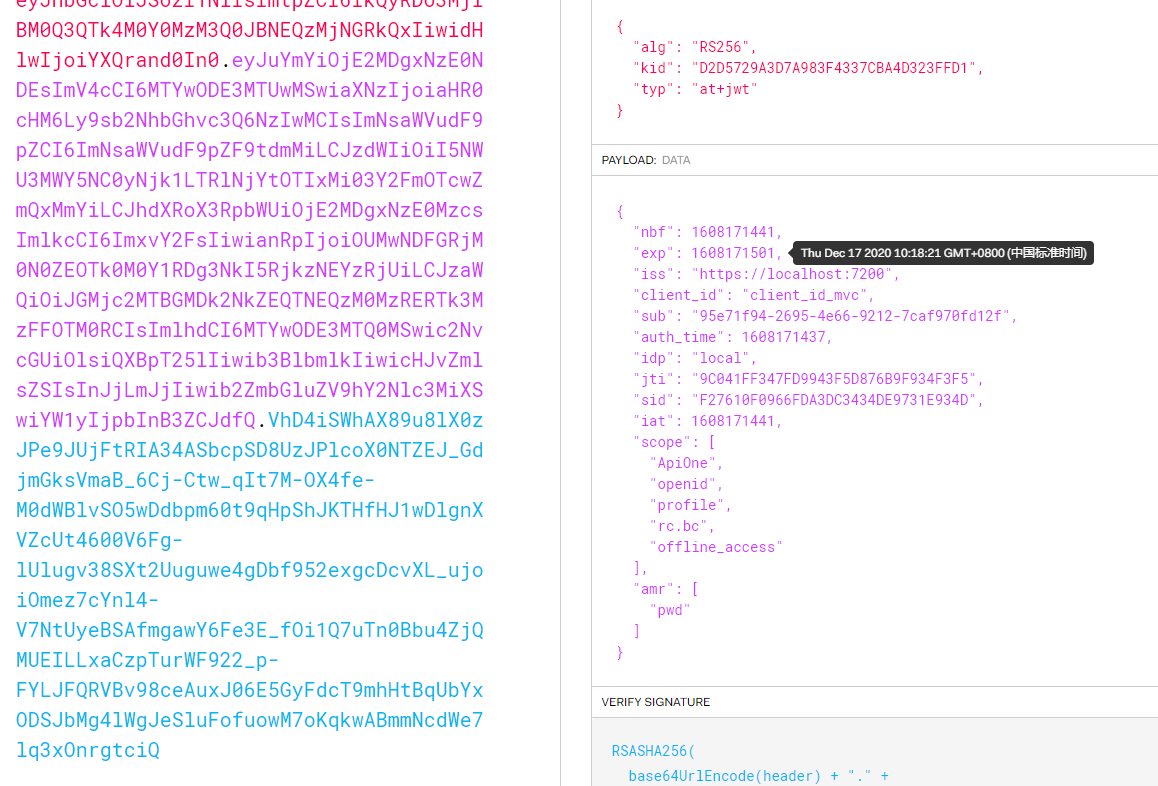 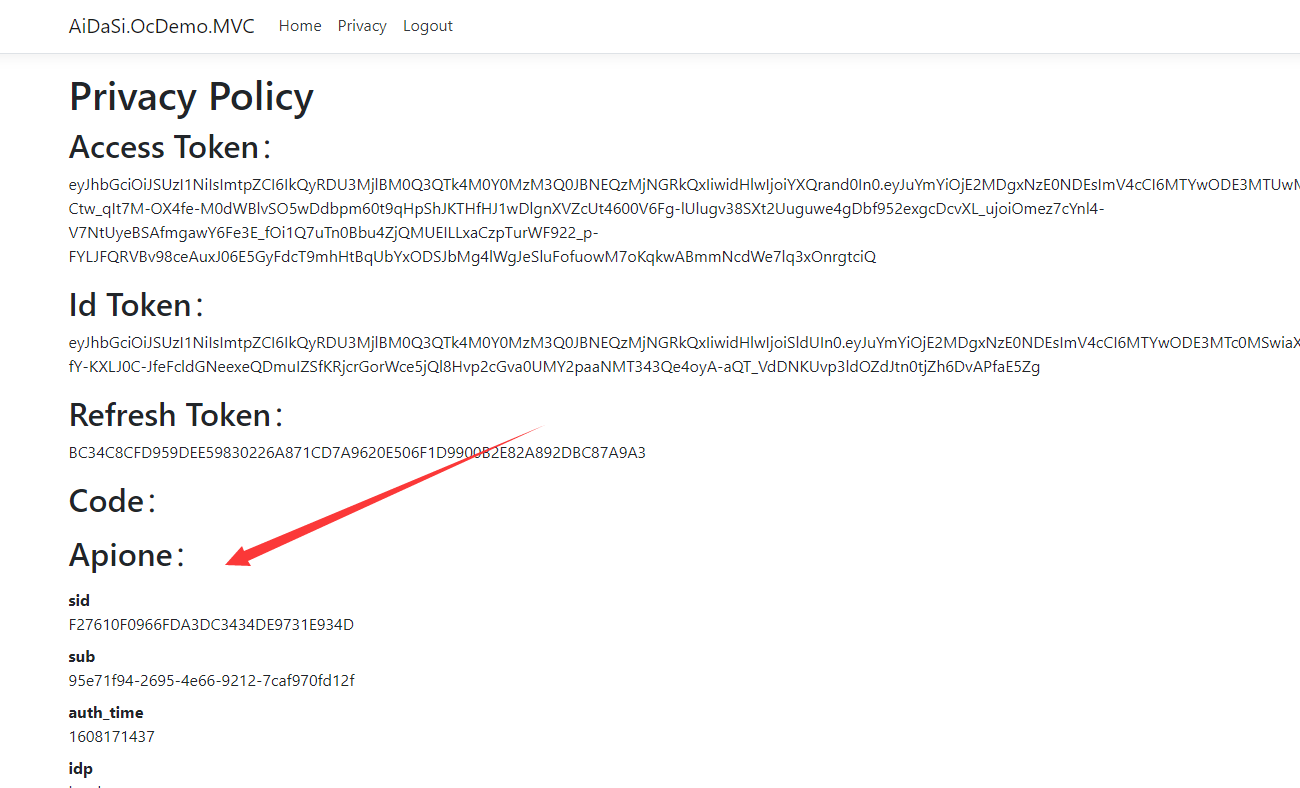 tn>我们发现Api请求不了了,下面我们将添加刷新Token的代码;由于`exp`是Unix时间戳,所以这里我们创建一个`TimeHelper.cs`工具类  ```csharp public static class TimeHelper { //将unix时间戳转换成系统时间 public static DateTime unixtime(this string time) { DateTime dtStart = TimeZone.CurrentTimeZone.ToLocalTime(new DateTime(1970, 1, 1)); long lTime = long.Parse(time + "0000000"); TimeSpan toNow = new TimeSpan(lTime); DateTime dtResult = dtStart.Add(toNow); return dtResult; } //将系统时间转换成unix时间戳 public static long timeunix2(this DateTime dt) { DateTimeOffset dto = new DateTimeOffset(dt); return dto.ToUnixTimeSeconds(); } //将系统时间转换成unix时间戳 public static DateTime unixtime2(this double d) { System.DateTime time = System.DateTime.MinValue; System.DateTime startTime = TimeZone.CurrentTimeZone.ToLocalTime(new System.DateTime(1970, 1, 1)); time = startTime.AddMilliseconds(d); return time; } } ``` tn>在`HomeController.cs`控制器中引用`AiDaSi.OcDemo.MVC.Helper`的命名空间,并添加`RenewTokensAsync`方法,对Token进行刷新。获取到新Token后我们有两种不同的方法对Token进行更新。 ```csharp private async Task<string> RenewTokensAsync() { var client = _httpClientFactory.CreateClient(); var disco = await client.GetDiscoveryDocumentAsync("https://localhost:7200"); if (disco.IsError) { // 我们这里将Cookie清空掉 foreach (var item in Request.Cookies) { Response.Cookies.Delete(item.Key); } // 报错 return await Task.FromResult(disco.Error); // throw new Exception(disco.Error); } var refreshToken = await HttpContext.GetTokenAsync(OpenIdConnectParameterNames.RefreshToken) // 刷新token的操作 var tokenResponse = await client.RequestRefreshTokenAsync(new RefreshTokenRequest { Address = disco.TokenEndpoint, ClientId = "client_id_mvc", ClientSecret = "mvc_secret", RefreshToken = refreshToken }); #region 第一种写法 if (tokenResponse.IsError) { // 我们这里将Cookie清空掉 foreach (var item in Request.Cookies) { Response.Cookies.Delete(item.Key); } return await Task.FromResult(tokenResponse.Error); // 报错 // throw new Exception(tokenResponse.Error); } var expiresAt = DateTime.UtcNow + TimeSpan.FromSeconds(tokenResponse.ExpiresIn); var tokens = new[] { new AuthenticationToken { Name = OpenIdConnectParameterNames.IdToken, Value = tokenResponse.IdentityToken }, new AuthenticationToken { Name = OpenIdConnectParameterNames.AccessToken, Value = tokenResponse.AccessToken }, new AuthenticationToken { Name = OpenIdConnectParameterNames.RefreshToken, Value = tokenResponse.RefreshToken }, new AuthenticationToken { Name = "expires_at", Value = expiresAt.ToString("o", CultureInfo.InvariantCulture) } }; // 获取身份认证的结果,包含当前的pricipal和properties var currentAuthenticateResult = await HttpContext.AuthenticateAsync(CookieAuthenticationDefaults.AuthenticationScheme); // 把新的tokens存起来 currentAuthenticateResult.Properties.StoreTokens(tokens); // 登录 await HttpContext.SignInAsync(CookieAuthenticationDefaults.AuthenticationScheme, currentAuthenticateResult.Principal, currentAuthenticateResult.Properties); return tokenResponse.AccessToken; #endregion #region 第二种写法 //下面将修改上下文 var authInfo = await HttpContext.AuthenticateAsync("Cookies"); authInfo.Properties.UpdateTokenValue("access_token", tokenResponse.AccessToken); authInfo.Properties.UpdateTokenValue("id_token", tokenResponse.IdentityToken); authInfo.Properties.UpdateTokenValue("refresh_token", tokenResponse.RefreshToken); //二次认证(更新token) await HttpContext.SignInAsync("Cookies", authInfo.Principal, authInfo.Properties); #endregion } ``` tn>在`Privacy`方法中对Token失效进行验证 ```csharp [Authorize] public async Task<IActionResult> Privacy() { var accessToken = await HttpContext.GetTokenAsync(OpenIdConnectParameterNames.AccessToken); var idToken = await HttpContext.GetTokenAsync(OpenIdConnectParameterNames.IdToken); var refreshToken = await HttpContext.GetTokenAsync(OpenIdConnectParameterNames.RefreshToken); var code = await HttpContext.GetTokenAsync(OpenIdConnectParameterNames.Code); ViewData["accessToken"] = accessToken; ViewData["idToken"] = idToken; ViewData["refreshToken"] = refreshToken; ViewData["code"] = code; // 获取接口数据 var httpClient = _httpClientFactory.CreateClient(); //httpClient.DefaultRequestHeaders.Authorization = new AuthenticationHeaderValue("Bearer", accessToken); httpClient.SetBearerToken(accessToken); // 验证Token是否失效 string tokenStr = accessToken; var handler = new JwtSecurityTokenHandler(); var payload = handler.ReadJwtToken(tokenStr).Payload; var expclaim = payload.Claims.FirstOrDefault(x=>x.Type == "exp"); DateTime dateTime = expclaim.Value.unixtime(); int compNum = DateTime.Compare(DateTime.Now, dateTime); //判断当前时间是否大于token的过期时间,如果有就刷新token,这样就能达到无缝衔接 if (compNum > 0) { await RenewTokensAsync(); return RedirectToAction(); } var Result = await httpClient.GetAsync("http://localhost:5280/WeatherForecast"); if (Result.IsSuccessStatusCode) { ViewData["Apione"] = await Result.Content.ReadAsStringAsync(); } return View(); ``` tn>由于场景很难模拟,大家可以打断点自行测试。 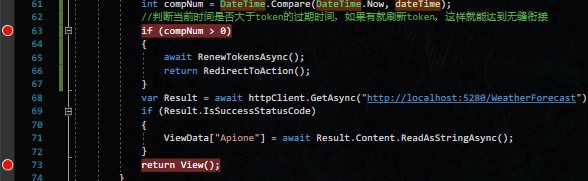 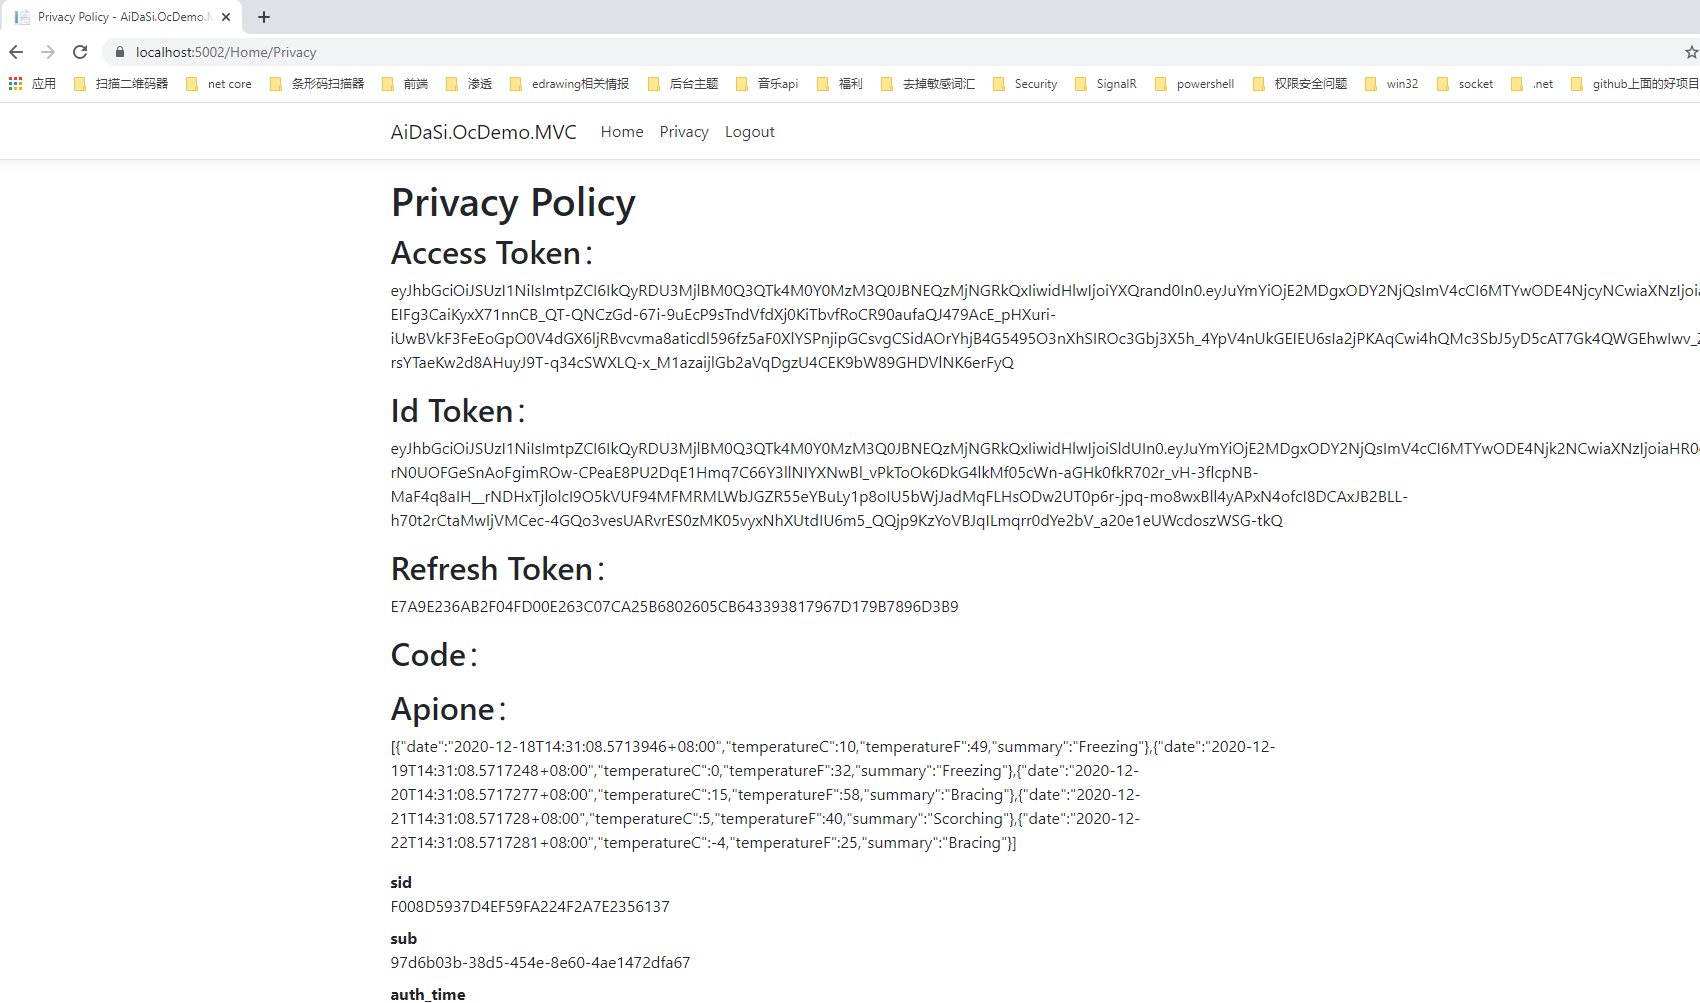 接下来将更新`javascript`的客户端...

