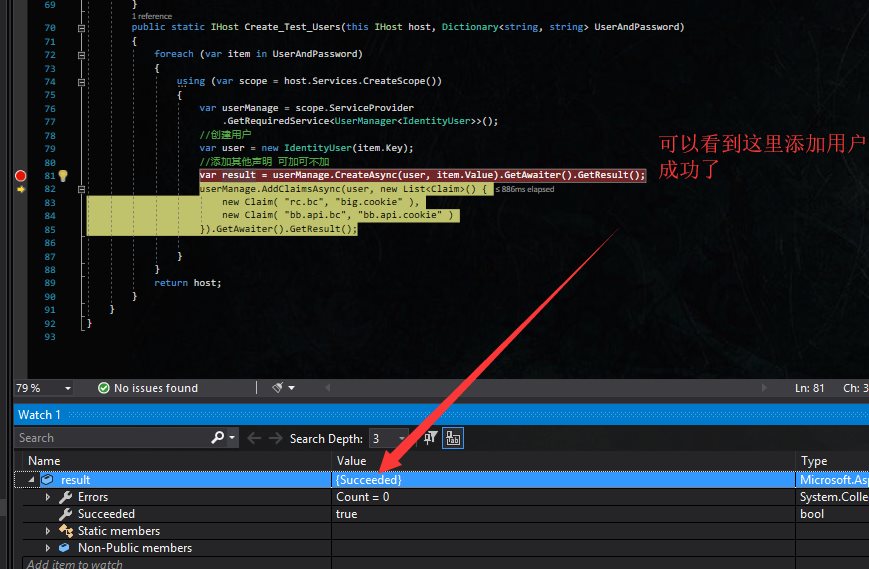
.net core 3.1 Identity Server4 (Password模式) 电脑版发表于:2020/12/14 12:01  >#.net core 3.1 Identity Server4 (Password模式) [TOC]  >### Password 模式的理解 tn>当应用程序将用户的用户名和密码交换为访问令牌时,将使用密码授予。这就是OAuth最初创建时要防止的事情,因此,您绝对不应允许第三方应用程序使用此授权。 一般这种授予类型的常见用法是为服务自己的应用启用密码登录。用户使用其用户名和密码登录该服务的网站或本机应用程序不会感到惊讶,但是绝不允许第三方应用程序向用户询问其密码。 >### 项目源码修改 tn>基于上一个项目进行添加:https://www.tnblog.net/hb/article/details/5319 >先安装包`Microsoft.EntityFrameworkCore.InMemory` 修改 <span style="color:#27ae60;font-weight:bold;">Config.cs</span> 创建身份资源 ```csharp /// <summary> /// 创建身份资源 /// </summary> /// <returns></returns> public static IEnumerable<IdentityResource> GetIdentityResources() => new List<IdentityResource> { new IdentityResources.OpenId(), //添加其他声明 new IdentityResource { Name = "rc.bc", UserClaims = { "rc.bc", "bb.api.bc" } } }; ``` >创建客户端(Client) ```csharp new Client { ClientId = "passwordgrant", // 客户端的Id名称 AllowedGrantTypes = GrantTypes.ResourceOwnerPassword, // 客户端的请求类型 ClientSecrets = { new Secret("passwordgrantsecrect".Sha256()) }, // 需要验证的secret AllowedCorsOrigins = { "http://localhost" }, // 允许请求的范围 AllowedScopes = { IdentityServerConstants.StandardScopes.OpenId, // 允许的请求的资源 "ApiOne", "rc.bc" }, }, ``` >创建用户添加的扩展 ```csharp public static IHost Create_Test_Users(this IHost host, Dictionary<string, string> UserAndPassword) { foreach (var item in UserAndPassword) { using (var scope = host.Services.CreateScope()) { var userManage = scope.ServiceProvider .GetRequiredService<UserManager<IdentityUser>>(); //创建用户 var user = new IdentityUser(item.Key); //添加其他声明 可加可不加 var result = userManage.CreateAsync(user, item.Value).GetAwaiter().GetResult(); userManage.AddClaimsAsync(user, new List<Claim>() { new Claim( "rc.bc", "big.cookie" ), new Claim( "bb.api.bc", "bb.api.cookie" ) }).GetAwaiter().GetResult(); } } return host; } ``` >修改 <span style="color:#27ae60;font-weight:bold;">Startup.cs</span> ```csharp services.AddDbContext<AppDbContext>(config => { //将数据存入本地内存中 config.UseInMemoryDatabase("Memory"); }); services .AddIdentity<IdentityUser, IdentityRole>(config => { config.Password.RequiredLength = 4; // 获取或设置密码必须具有的最小长度, 默认值为6。 config.Password.RequireDigit = false; // 如果密码必须包含数字,则为 True。 config.Password.RequireNonAlphanumeric = false; // 如果密码必须包含非字母数字字符,则为 True,否则为 False。 config.Password.RequireUppercase = false; // 如果密码必须包含大写 ASCII字符,则为 True。 }) .AddEntityFrameworkStores<AppDbContext>() .AddDefaultTokenProviders(); //重置密码和Token程序 services.AddIdentityServer() // 添加用户 .AddAspNetIdentity<IdentityUser>() .AddDeveloperSigningCredential() .AddInMemoryApiScopes(Config.GetApiResources()) .AddInMemoryClients(Config.GetClients()) // 添加身份资源 .AddInMemoryIdentityResources(Config.GetIdentityResources()) ; services.AddControllers(); ``` >修改 <span style="color:#27ae60;font-weight:bold;">Program.cs</span> ```csharp CreateHostBuilder(args).Build() .Create_Test_Users(new Dictionary<string, string>{ { "bob","password" }, }) .Run(); ``` >### Identity密码默认设置 tn>在ASP.NET Core Identity中,密码默认设置在PasswordOptions类中。读者可以在ASP.NET Core GitHub仓库中找到此类的源代码。 代码如下: ```csharp public class PasswordOptions { public int RequiredLength{get;set;} = 6; public int RequiredUniqueChars{get;set;} = 1; public bool RequireNonAlphanumeric{get;set;} = true; public bool RequireLowercase{get;set;} = true; public bool RequireUppercase{get;set;} = true; public bool RequireDigit{get;set;} = true; } ``` | | | | | ------------ | ------------ | ------------ | | RequiredLength | 密码最小长度验证 | 6 | | RequiredUniqueChars | 密码中允许最大的重复字符数 | 1 | | RequireNonAlphanumeric | 密码必须至少有一个非字母数字的字符 | true | | RequireLowercase | 密码是否必须包含小写字母 | true | | RequireUppercase | 密码是否必须包含大写字母 | true | | RequireDigit | 密码是否必须包含数字 | true | >### 请求参数 tn>访问令牌请求将包含以下参数. | 参数名称 | 值 | | ------------ | ------------ | | grant_type | (必填)grant_type参数必须设置为`password` | | username | (必填)用户的用户名。 | | password | (必填)用户的密码。 | | scope | (可选)应用程序请求的范围。 | | client_id | (必填)客户端ID | | client_secret | (可选)是否向客户端颁发了机密信息 | >### 运行启动 tn>启动认证服务器以及API,然后请求格式如下。(当scope不勾时将获取所有的访问权力)然后我们可以看到我们获取到了我们的 Token。 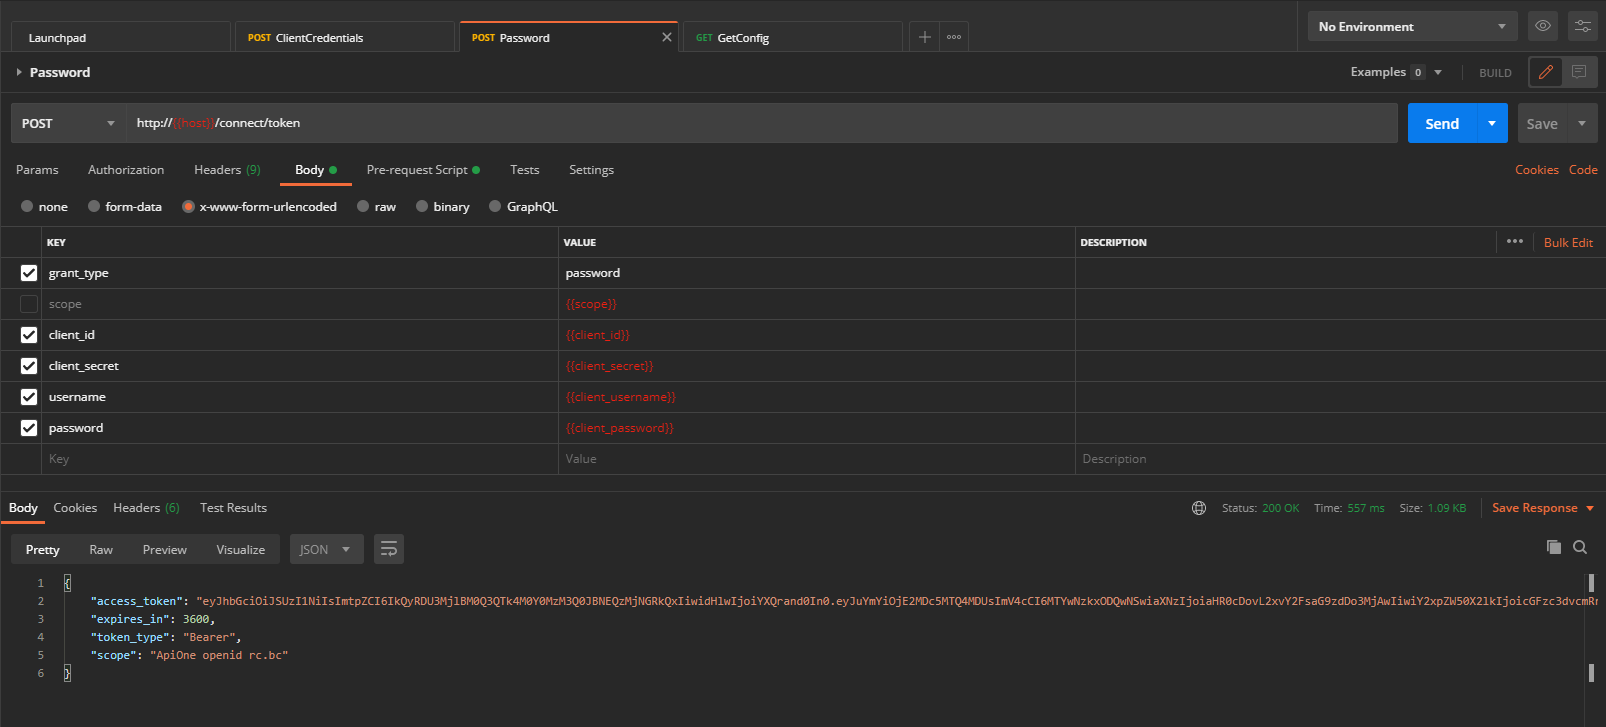 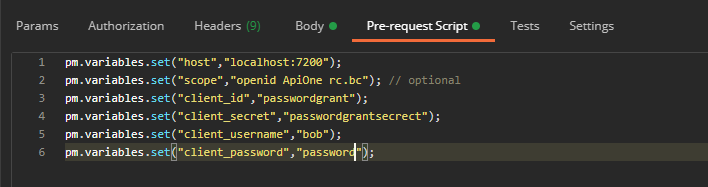 tn>接着我们用Token去访问接口,我们会看到我们拿到了数据 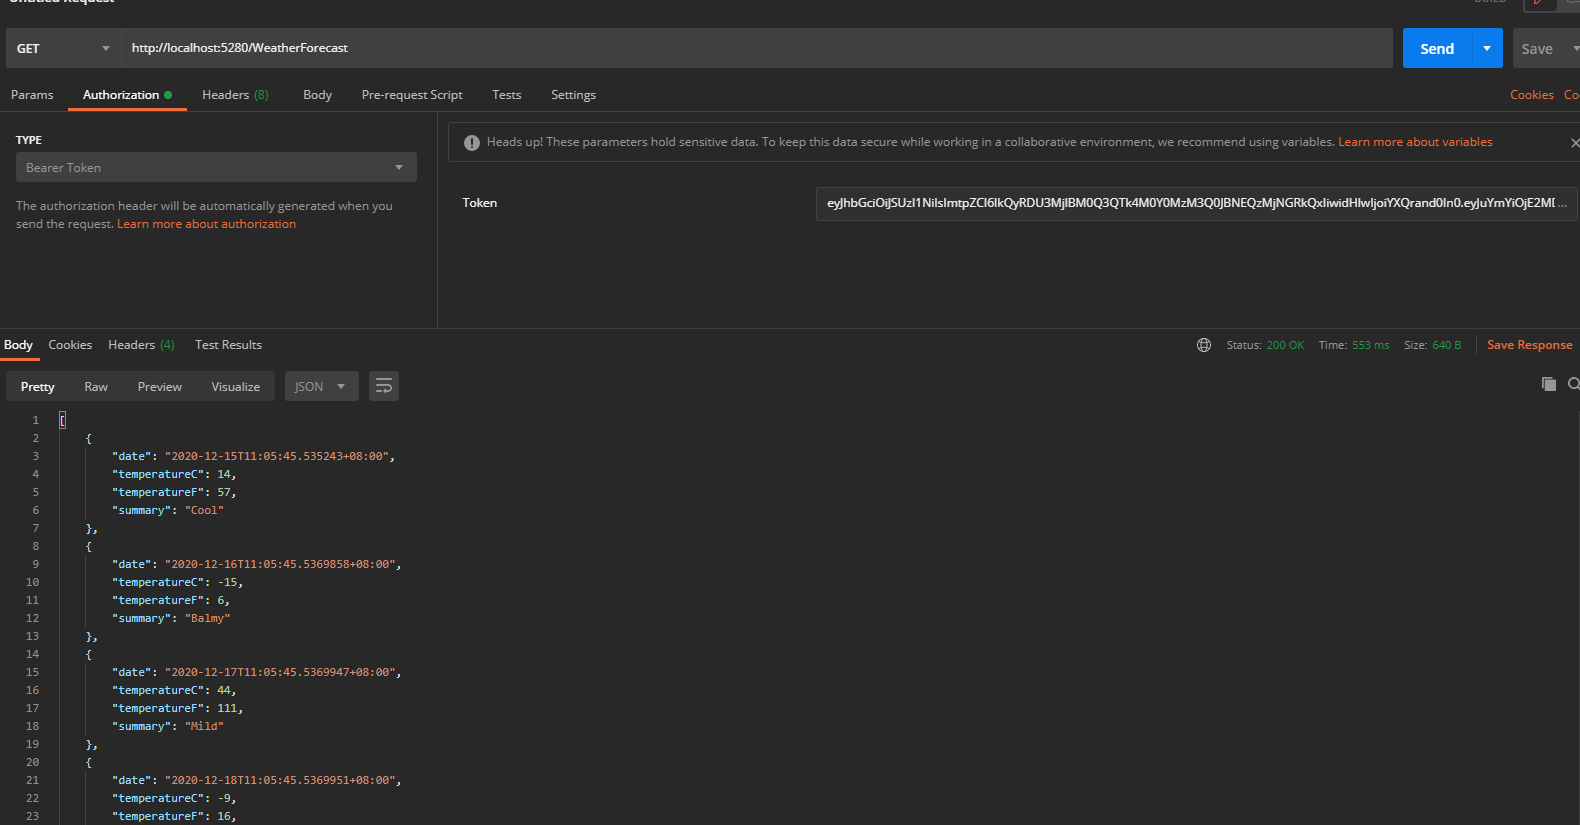 >### 注意 tn>当我们在添加用户的时候一定要符合创建时验证的规范,在`Create_Test_Users`方法中的`result`对象那大家可以打个断点调试一下,就知道账号和密码是否符合自定义的标准。否则请求时结果就会有其他的问题,如请求Token的时候。