.net core 3.1 Identity Server4 (ClientCredentials模式) 电脑版发表于:2020/12/7 19:34  >#.net core 3.1 Identity Server4 (ClientCredentials模式) [TOC]  >### ClientCredentials 模式的理解 tn>在这之前我先问大家一个小问题:倘若你要请假,请问你会怎么做? 我想很多人都会想到走流程。 如果你是一名学生,你得找老师开一张请假条,然后大门保安检验请假条有效过后才会放你走。 如果你是一名工作者,你就得找领导开一张请假条,然后同上。 大致如下图所示: 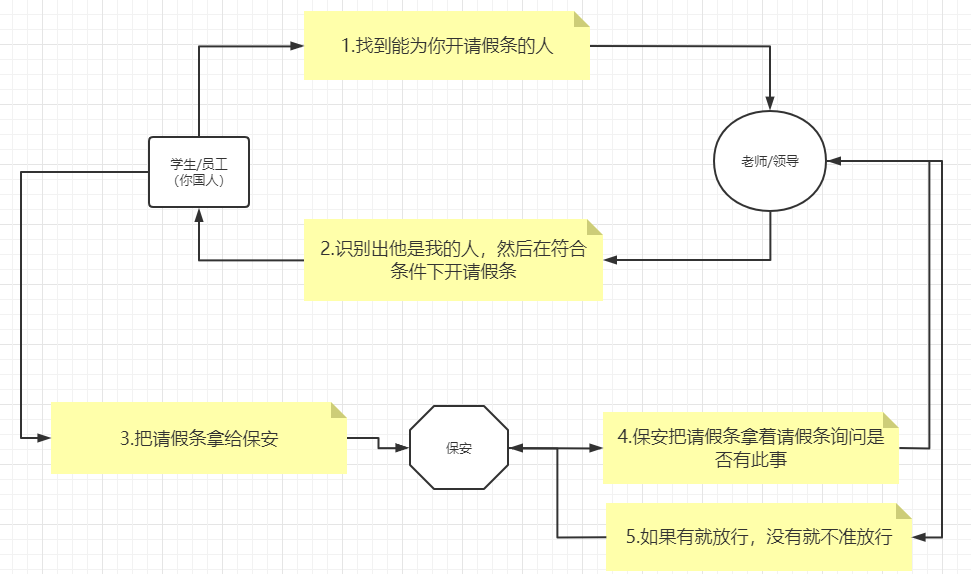 tn>如下图所对照,然后大家把其中的角色换一下。接下来我们将创建相关项目。 | | | | ------------ | ------------ | | 你国人 | 客户端 | | 老师/领导 | 授权服务器 | | 保安 | Api | | 请假条 | 授权验证码(Access Token) | | 请假 | 需要鉴权的端口 | >### 创建授权服务器(AiDaSi.OcDemo.Authenzation) 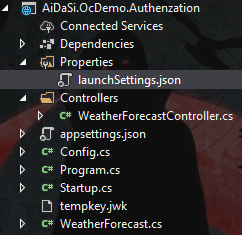 >安装依赖包 `IdentityServer4`.我这里使用版本是 `4.1.1`. **Package Reference** ```xml <ItemGroup> <PackageReference Include="IdentityServer4" Version="4.1.1" /> </ItemGroup> ``` **Package Manager** ```bash Install-Package IdentityServer4 -Version 4.1.1 ``` >创建`Config.cs`服务器资源配置文件 引用命名空间 ```csharp using IdentityServer4.Models; ``` 文件内容 ```csharp public class Config { public static List<ApiScope> GetApiResources() { return new List<ApiScope> { new ApiScope("ApiOne") // 这里可以想象成门卫叫什么名字 }; } public static List<Client> GetClients() { return new List<Client> { new Client { ClientId = "client", // 客户端Id ClientName = "Internal cluster usage", // 客户端名称 AllowedGrantTypes = GrantTypes.ClientCredentials, //创建ClientCredentials模式的客户端 ClientSecrets = { new Secret("secret".Sha256()) //带验证码 }, // 客户端有权访问的范围(Scopes) AllowedScopes = { "ApiOne" } } }; } } ``` >修改`Startup.cs`类 ```csharp public void ConfigureServices(IServiceCollection services) { services.AddControllers(); // 使用内存存储,密钥,客户端和资源来配置身份服务器。 services.AddIdentityServer() .AddDeveloperSigningCredential() //开发者凭证,在首次启动时,IdentityServer将为您创建一个开发人员签名密钥,该文件名为tempkey.jwk。您不必将该文件签入源代码管理中,如果不存在该文件将被重新创建。 .AddInMemoryApiScopes(Config.GetApiResources()) // 配置资源(门卫),计3.0后改用Scope .AddInMemoryClients(Config.GetClients()); // 配置客户端(你国人也在里面) } public void Configure(IApplicationBuilder app, IWebHostEnvironment env) { ... app.UseIdentityServer(); ... app.UseAuthorization(); ... } ``` >修改`launchSettings.json`,这里我指定授权地址为:http://localhost:7200 ```csharp { "profiles": { "AiDaSi.OcDemo.Authenzation": { "commandName": "Project", "launchBrowser": true, "launchUrl": "weatherforecast", "applicationUrl": "http://localhost:7200", "environmentVariables": { "ASPNETCORE_ENVIRONMENT": "Development" } } } } ``` >### 创建Api(ApIDemo1) 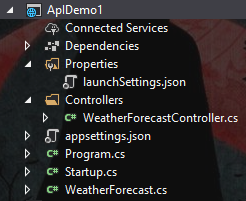 >安装依赖包 `IdentityServer4.AccessTokenValidation`.我这里使用版本是 `3.0.1`. **Package Reference** ```xml <ItemGroup> <PackageReference Include="IdentityServer4.AccessTokenValidation" Version="3.0.1" /> </ItemGroup> ``` **Package Manager** ```bash Install-Package IdentityServer4.AccessTokenValidation -Version 3.0.1 ``` >修改`WeatherForecastController.cs` ```csharp [Authorize] //需要认证才可以访问 public IEnumerable<WeatherForecast> Get() ``` >修改`Startup.cs` ```csharp public void ConfigureServices(IServiceCollection services) { services .AddAuthentication("Bearer") .AddJwtBearer("Bearer", config => { config.Authority = "http://localhost:7200"; // 授权服务器地址 //确定自己是哪个资源(资源名称) config.Audience = "ApiOne"; config.RequireHttpsMetadata = false; // 是否使用https进行通信 //取消验证用户以及验证角色 config.TokenValidationParameters = new Microsoft.IdentityModel.Tokens.TokenValidationParameters() { ValidateIssuer = false, ValidateAudience = false }; }); services.AddControllers(); } public void Configure(IApplicationBuilder app, IWebHostEnvironment env) { ... app.UseRouting(); app.UseAuthentication(); app.UseAuthorization(); ... } ``` >修改`launchSettings.json`,这里我指定接口地址为:http://localhost:5280 ```json { "profiles": { "ApIDemo1": { "commandName": "Project", "launchBrowser": true, "launchUrl": "weatherforecast", "applicationUrl": "http://localhost:5280", "environmentVariables": { "ASPNETCORE_ENVIRONMENT": "Development" } } } } ``` >### 添加 MSTest 项目(TestApi) 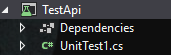 >修改`UnitTest1`类 ```csharp public async Task TestMethod1() { var client = new HttpClient(); // 获取配置文档信息相当于访问:http://localhost:7200/ // http://localhost:7200/.well-known/openid-configuration var disco = await client.GetDiscoveryDocumentAsync("http://localhost:7200/"); if (disco.IsError) { Console.WriteLine(disco.Error); return; } // 获取access Token(拿请假条) var tokenResponse = await client.RequestClientCredentialsTokenAsync(new ClientCredentialsTokenRequest { Address = disco.TokenEndpoint, ClientId = "client", ClientSecret = "secret", Scope = "ApiOne" }); if (tokenResponse.IsError) { Console.WriteLine(tokenResponse.Error); return; } // call Identity Resource API var apiClient = new HttpClient(); // 设置Access Token(拿请假条给门卫) apiClient.SetBearerToken(tokenResponse.AccessToken); var response = await apiClient.GetAsync("http://localhost:5280/WeatherForecast"); if (!response.IsSuccessStatusCode) { Console.WriteLine(response.StatusCode); } else { var content = await response.Content.ReadAsStringAsync(); Console.WriteLine(JArray.Parse(content)); } Console.ReadKey(); } ``` >### 启动项目 tn>分别在 **授权服务器项目** 与 **资源项目** 目录下,打开`powershell`工具执行`dotnet run`,让项目跑起来。然后我们访问一下:http://localhost:7200/.well-known/openid-configuration 授权服务器全局配置地址。  >首先我们直接访问(会被保安拦截下来),获取不到数据 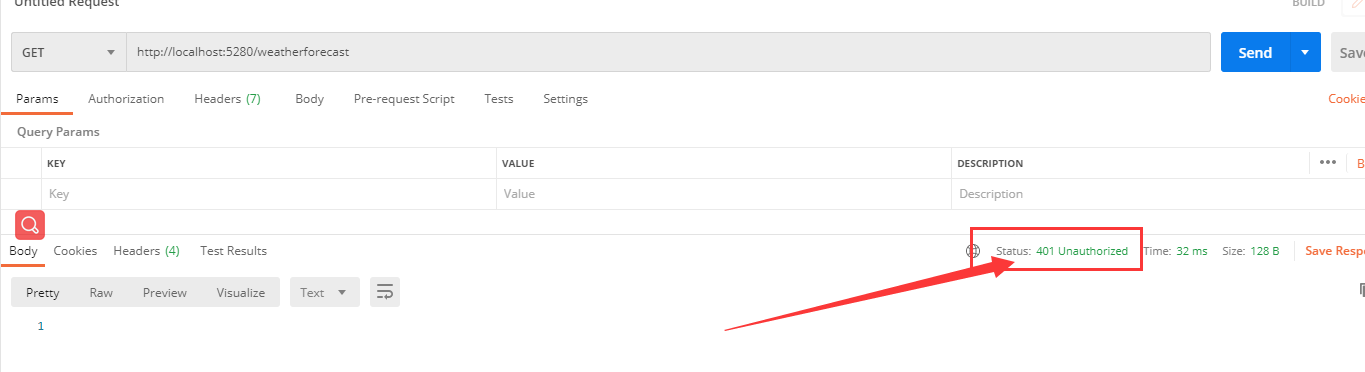 >获取Token 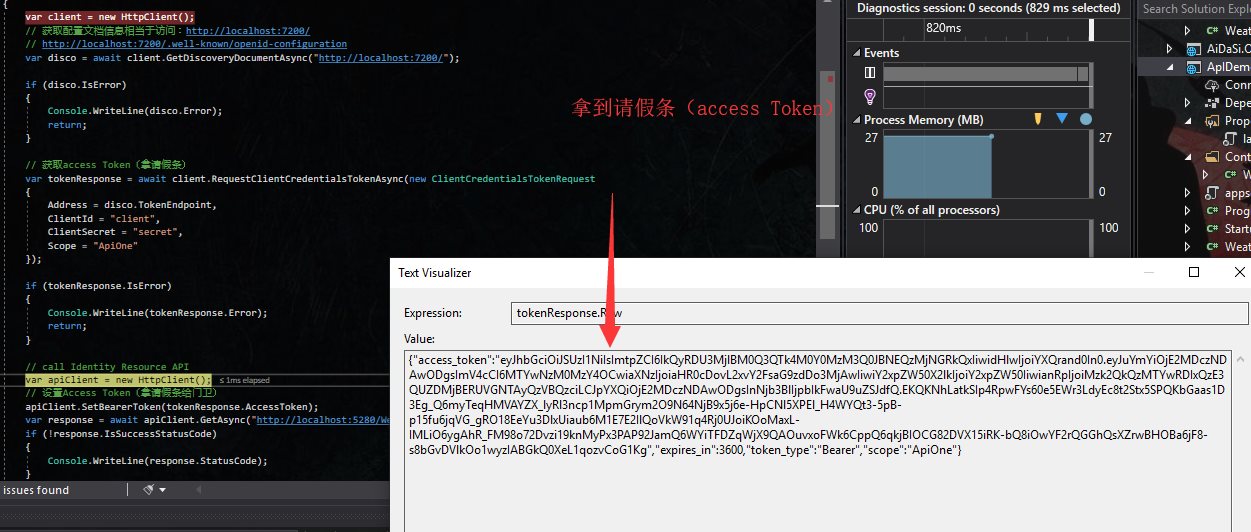 >获取到数据 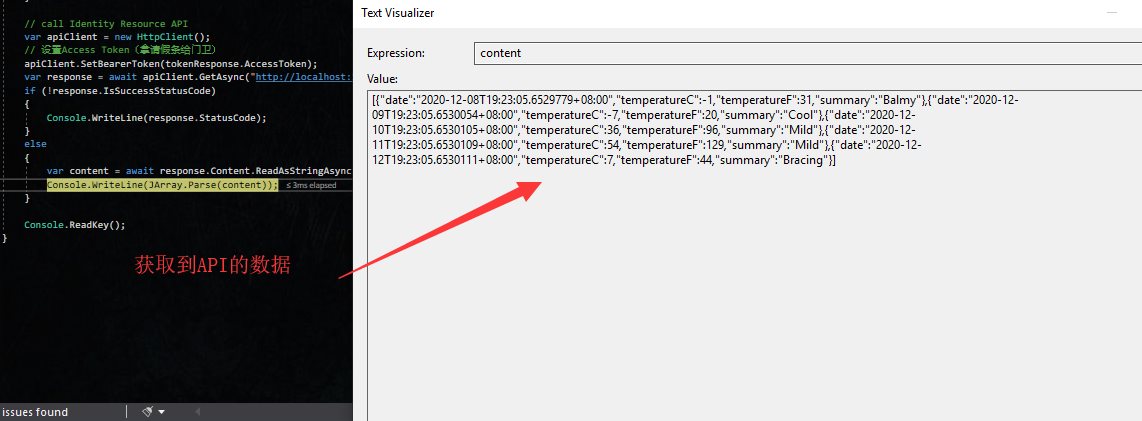 >###分析请求 tn>在第一次请求获取**Access Token**的时候,我们通过 **Fiddler** 工具可以看到它是这样请求的。关于参数大家可以参考这篇文章:https://www.oauth.com/oauth2-servers/access-tokens/client-credentials/ 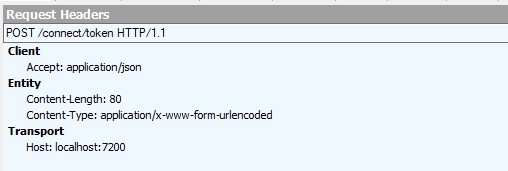 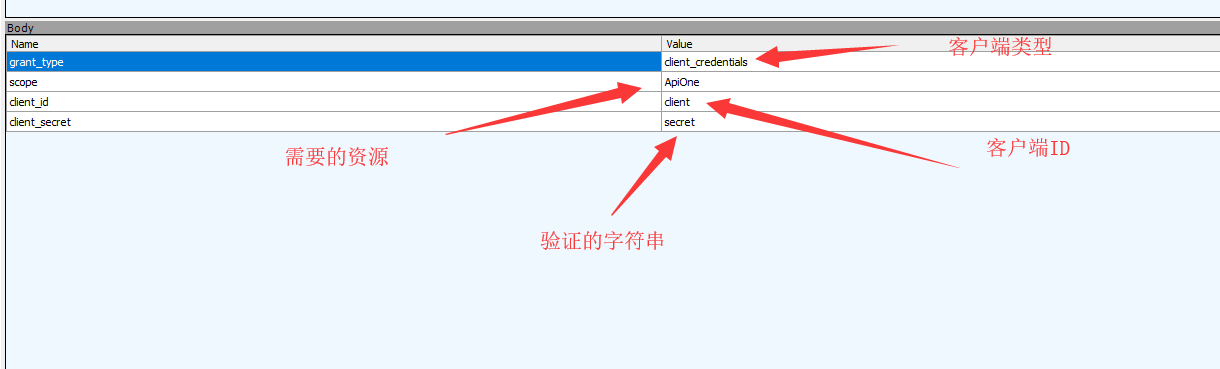 tn>我们也可以通过 **PostMan** 工具模拟一下请求 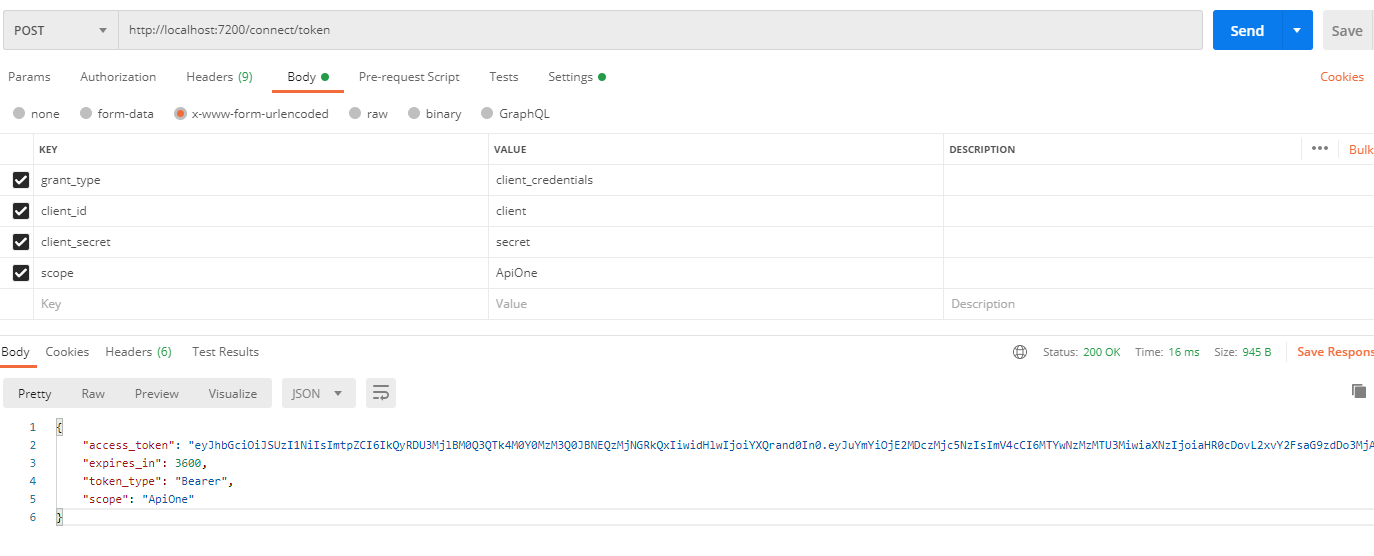 tn>请求Api,可以通过这样的方式  https验证绕过方式 ------------ ```csharp var filename = Path.Combine(Directory.GetCurrentDirectory(), "tempkey.jwk"); Microsoft.IdentityModel.Tokens.JsonWebKey jsonWebKey = new Microsoft.IdentityModel.Tokens.JsonWebKey(File.ReadAllText(filename)); builder.Services .AddAuthentication("Bearer") .AddJwtBearer("Bearer", config => { config.Authority = "https://newitemfeature-auth:8082/"; // 授权服务器地址 //确定自己是哪个资源(资源名称) config.Audience = "NewItemFeatureApi"; config.RequireHttpsMetadata = true; // 是否使用https进行通信 // 解决证书问题 config.BackchannelHttpHandler = GetHandler(); //取消验证用户以及验证角色 config.TokenValidationParameters = new Microsoft.IdentityModel.Tokens.TokenValidationParameters() { ValidateIssuer = false, ValidateAudience = false, IssuerSigningKey = jsonWebKey, }; IdentityModelEventSource.ShowPII = true; }); ``` tn>也可以不需要`IssuerSigningKey = jsonWebKey`这个。

