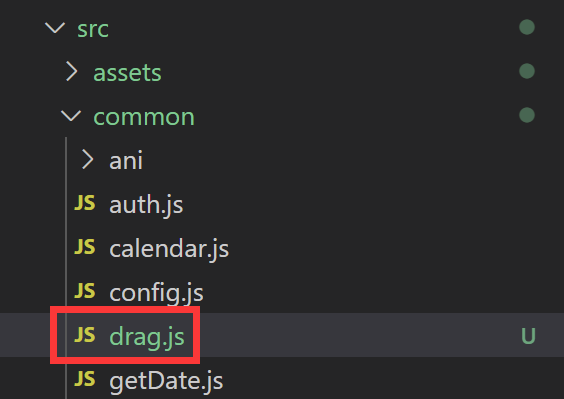
vue自定义组件实现右下角悬浮工具栏。vue实现可以拖动的右下角悬浮菜单。点击悬浮菜单,弹出一个自定义的弹窗组件,组件传参。vue模板 电脑版发表于:2020/9/10 10:19  ### 创建一个可以拖动的自定义指令 创建拖拽代码放到/src/common/drag.js,位置根据自己的情况随便放。代码如下。  ``` // 实现拖动的js import Vue from 'vue'; Vue.directive('drag', { bind: function (el) { const odiv = el; // 缓存 clientX clientY 的对象: 用于判断是点击事件还是移动事件 const clientOffset = {}; odiv.style.position = 'fixed'; odiv.onmousedown = (e) => { const disX = e.clientX - odiv.offsetLeft; const disY = e.clientY - odiv.offsetTop; // 缓存 clientX clientY clientOffset.clientX = e.clientX; clientOffset.clientY = e.clientY; document.onmousemove = (e) => { const left = e.clientX - disX; const top = e.clientY - disY; odiv.style.left = left + 'px'; odiv.style.top = top + 'px'; // odiv 距离顶部的距离 const dragDivTop = window.innerHeight - odiv.getBoundingClientRect().height; // odiv 距离左部的距离 const dragDivLeft = window.innerWidth - odiv.getBoundingClientRect().width; // 边界判断处理 // 2、超出顶部处理 if (odiv.getBoundingClientRect().top <= 0) { odiv.style.top = '0px'; } // 3、超出底部处理 if (odiv.getBoundingClientRect().top >= dragDivTop) { odiv.style.top = dragDivTop + 'px'; } // 4、超出右边边界区域处理 if (odiv.getBoundingClientRect().left >= dragDivLeft) { odiv.style.left = dragDivLeft + 'px'; } // 5、超出左边边界区域处理 if (odiv.getBoundingClientRect().left <= 0) { odiv.style.left = '0px'; } }; document.onmouseup = () => { document.onmousemove = null; document.onmouseup = null; }; }; // 绑定鼠标松开事件 odiv.addEventListener('mouseup', (event) => { const clientX = event.clientX; const clientY = event.clientY; if (clientX === clientOffset.clientX && clientY === clientOffset.clientY) { return false // console.log('click 事件'); } else { return false // console.log('drag 事件'); } }) } }); ``` ### 在main.js里面引入 ``` import "./common/drag.js"; ``` 这样引用后就可以自定义的全局使用v-drag指令了 ### 然后创建vue文件添加内容 ``` <template> <div> <!-- 悬浮菜单开始 --> <div class="realTranslationInfos" v-drag> <div class="RealtranslationBox"> <img draggable="false" @click="openFeedbackDialog()" src="@/assets/imgs/labroom/feedback.png" alt="" width="66px" height="66px"> </div> </div> <!-- 悬浮菜单结束 --> </div> </template> <script> export default { // 组件名字 name: 'FeedBack', // 组件参数 props: { id: { type: String, default: '' }, index: { type: Number, default: 0 }, }, data() { return { } }, mounted() { }, // 组件方法 methods: { openFeedbackDialog() { } } } </script> <style scoped="scoped" lang="scss"> .realTranslationInfos { width: 66px; height: 66px; // background: red; position: fixed; // position: absolute; bottom: 56px; right: 20px; // bottom: 122px; // right: -30px; .translationContent { min-height: 100px; line-height: 23px; width: 338px; padding: 18px 74px 19px 19px; background: #004CB3; opacity: 0.80; border-radius: 12px; color: #fff; position: fixed; // position: absolute; right: 58px; bottom: 22px; z-index: 99999; } .RealtranslationBox { display: flex; align-items: center; position: absolute; right: 2px; bottom: 5px; z-index: 99999; img { cursor: pointer; } } } </style> ``` ### 然后在需要使用封装的悬浮组件的页面引用一下即可 ``` <template> <div class="app-container learining-lab"> ........... <FeedBack/> </div> </template> <script> import FeedBack from '@/pages/feedback/feedback.vue' export default { components: { FeedBack }, ........ } </script> ``` 然后就会在右下角出现悬浮菜单了,而且可以拖动。如图右下角悬浮的用户反馈,这里就是简单的显示一个图标,也可以根据需求做复杂一点。  ### 点击悬浮菜单,弹出一个自定义的弹窗组件 参考另外一篇博文,直接搜索:elmentui 弹窗,自定义样式