领域驱动设计DDD ABP VNext 一:项目架构搭建,模块使用 电脑版发表于:2022/5/10 22:25 [TOC] ## 用户接口层改造 #### nuget中下载abp依赖 VoLo.Abp.AspNetCore.Mvc  ItemGroup添加方式 ``` <ItemGroup> <PackageReference Include="Volo.Abp.AspNetCore.Mvc" Version="4.4.4" /> </ItemGroup> ``` 我这里使用的是.net5.0的,最新版本是依赖与.net6.0的 #### 添加模块类 添加一个模块类,继承AbpModule,依赖AbpAspNetCoreMvcModule模块 ```c# using System; using System.Collections.Generic; using System.Linq; using System.Threading.Tasks; using Volo.Abp.Modularity; using Volo.Abp.AspNetCore.Mvc; namespace WY.JBLand.API { [DependsOn(typeof(AbpAspNetCoreMvcModule))] public class WYJBLandAPIModule:AbpModule { } } ``` 重写模块类中的ConfigureServices与OnApplicationInitialization方法,把Startup中的依赖注入与引用的中间件转移到这个模块中来。 ```c# using System; using System.Collections.Generic; using System.Linq; using System.Threading.Tasks; using Volo.Abp.Modularity; using Volo.Abp.AspNetCore.Mvc; using Microsoft.Extensions.DependencyInjection; using Volo.Abp; using Microsoft.Extensions.Hosting; using Microsoft.AspNetCore.Builder; namespace WY.JBLand.API { [DependsOn(typeof(AbpAspNetCoreMvcModule))] public class WYJBLandAPIModule : AbpModule { /// <summary> /// 重写ConfigureServices转移Startup中依赖注入到这里 /// </summary> /// <param name="context"></param> public override void ConfigureServices(ServiceConfigurationContext context) { var services = context.Services; services.AddControllers(); base.ConfigureServices(context); } /// <summary> /// 重写OnApplicationInitialization转移Startup中引入的中间件到这里 /// </summary> /// <param name="context"></param> public override void OnApplicationInitialization(ApplicationInitializationContext context) { var app = context.GetApplicationBuilder(); var env = context.GetEnvironment(); if (env.IsDevelopment()) { app.UseDeveloperExceptionPage(); } app.UseRouting(); app.UseAuthorization(); app.UseEndpoints(endpoints => { endpoints.MapControllers(); }); base.OnApplicationInitialization(context); } } } ``` 修改startup中的ConfigureServices与Configure方法,把原来代码删除掉添加如下代码即可。也就是直接加载我们刚刚添加的模块WYJBLandAPIModule,把这两个方法原来的工作给了WYJBLandAPIModule模块去做。 ``` public void ConfigureServices(IServiceCollection services) { services.AddApplication<WYJBLandAPIModule>(); } public void Configure(IApplicationBuilder app, IWebHostEnvironment env) { app.InitializeApplication(); } ``` ## 基础设施层ORM之EntityFrameworkCore ##### 添加相关依赖 连接的数据库根据需要选择,比如要连接的是sqlserver就添加Volo.Abp.EntityFrameworkCore.SqlServer ``` <ItemGroup> <PackageReference Include="Volo.Abp.AspNetCore.Mvc" Version="4.4.4" /> <PackageReference Include="Volo.Abp.EntityFrameworkCore" Version="4.4.4" /> <PackageReference Include="Volo.Abp.EntityFrameworkCore.SqlServer" Version="4.4.4" /> </ItemGroup> ``` ##### 添加EF CORE的上下文对象类: 这里需要继承AbpDbContext,而不是直接的DbContext,ABP另外封装了一些内容。AbpDbContext本身也是继承了DbContext的。 ``` using Microsoft.EntityFrameworkCore; using System; using System.Collections.Generic; using System.Linq; using System.Text; using System.Threading.Tasks; using Volo.Abp.EntityFrameworkCore; using Volo.Abp.Data; namespace WY.JBLand.EntityFrameworkCore { [ConnectionStringName("conn_mssql")] public class WyJBLandDbContext : AbpDbContext<WyJBLandDbContext> { public WyJBLandDbContext(DbContextOptions<WyJBLandDbContext> options) : base(options) { } protected override void OnModelCreating(ModelBuilder modelBuilder) { base.OnModelCreating(modelBuilder); } } } ``` ##### 添加该层的模块类: 该层的注入这些就放到这里 ``` using System; using Volo.Abp.Modularity; using Volo.Abp.EntityFrameworkCore; using Microsoft.Extensions.DependencyInjection; namespace WY.JBLand.EntityFrameworkCore { [DependsOn( typeof(AbpEntityFrameworkCoreModule) )] public class EntityFrameworkCoreModule : AbpModule { public override void ConfigureServices(ServiceConfigurationContext context) { var services = context.Services; services.AddAbpDbContext<WyJBLandDbContext>(); Configure<AbpDbContextOptions>(opt => { opt.UseSqlServer(); }); base.ConfigureServices(context); } } } ``` ##### 然后就可以在用户接口层中添加设施层模块,然后注入一个试试 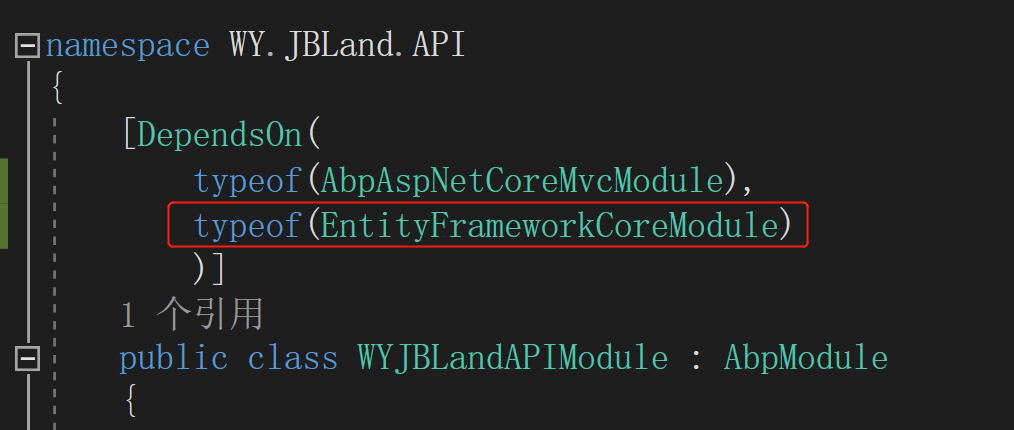 如果能拿到注入就ok  ## 创建领域层并通过EF CORE映射到数据库生成表 #### 添加相关依赖 Volo.Abp.AspNetCore与Volo.Abp.Ddd.Domain ``` <ItemGroup> <PackageReference Include="Volo.Abp.AspNetCore" Version="4.4.4" /> <PackageReference Include="Volo.Abp.Ddd.Domain" Version="4.4.4" /> </ItemGroup> ``` #### 添加该层的模块类 到目前这里还用到像事件总线EventBus等待的一些东西,所以暂时什么都可以不注入,我们这小节把领域实体通过ef core映射到数据库生成表即可。 ``` using System; using System.Collections.Generic; using System.Linq; using System.Text; using System.Threading.Tasks; using Volo.Abp.Domain; using Volo.Abp.Modularity; namespace WY.JBLand.Domain { [DependsOn( typeof(AbpDddDomainModule) )] public class WYJBLandDomainModule : AbpModule { } } ``` #### 创建一个简单的领域实体 ``` using System; using System.Collections.Generic; using System.Linq; using System.Text; using System.Threading.Tasks; using Volo.Abp.Domain.Entities; namespace WY.JBLand.Domain.User { public class UserInfo:Entity<int> { public string UserName { get; set; } public string Password { get; set; } } } ``` #### 给启动项目添加EF Code First迁移工具包 添加Tools库或者Design库都可以。Tools库里边其实就包含了Design库。 添加一个Microsoft.EntityFrameworkCore.Tools ``` <PackageReference Include="Microsoft.EntityFrameworkCore.Tools" Version="5.0.12"> ``` Tools库里边其实就包含了Design库,这里也能看到  工具包必须要添加不然你执行不了迁移命令的。 #### 然后把领域层添加的实体加到基础设置层的EF CORE里边 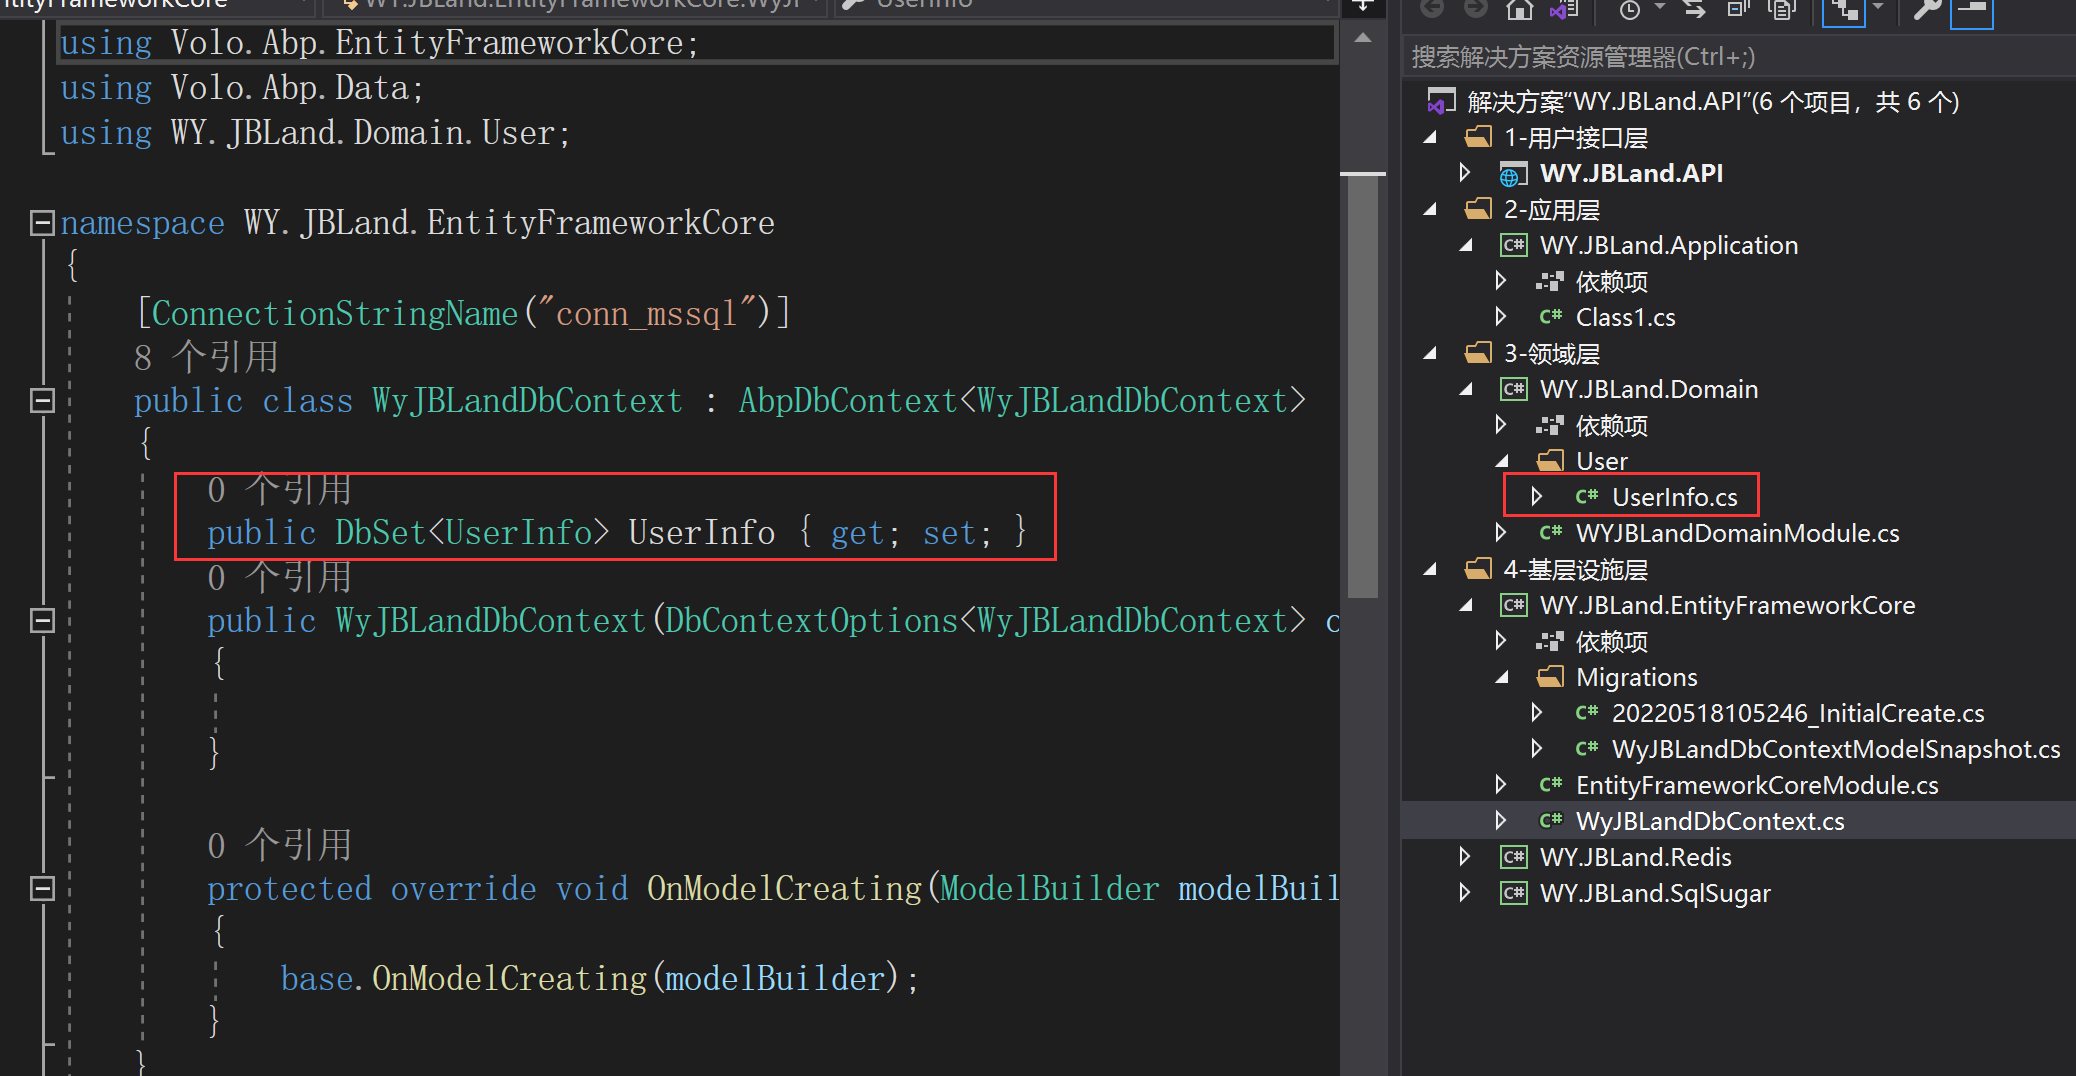 #### 最后执行EF CORE的迁移命令就可以根据实体生成好数据库了 1:Add-Migration InitialCreate 2:Update-Database 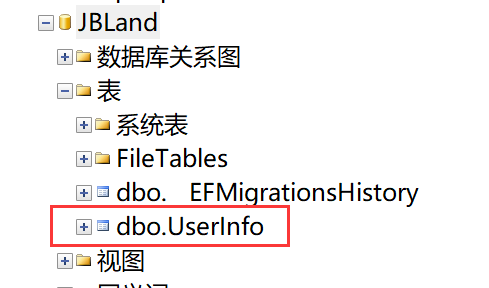 关于EF CORE 数据库迁移命令的详解,可以参考: https://www.tnblog.net/aojiancc2/article/details/5370 ## 应用层创建与AutoMapper使用 #### 添加相关依赖 应用层目前需要添加的依赖有。添加依赖的时候都要注意版本,不然可能会有问题的 tn2>Volo.Abp.AspNetCore Volo.Abp.AutoMapper Volo.Abp.Ddd.Application ``` <ItemGroup> <PackageReference Include="Volo.Abp.AspNetCore" Version="4.4.4" /> <PackageReference Include="Volo.Abp.AutoMapper" Version="5.2.2" /> <PackageReference Include="Volo.Abp.Ddd.Application" Version="4.4.4" /> </ItemGroup> ``` #### 添加好应用层模块类 到目前位置应用层模块类需要依赖的模块有 tn2>AbpDddApplicationModule AbpAutoMapperModule WyJBLandEntityFrameworkCoreModule ``` using System; using Volo.Abp.Application; using Volo.Abp.AutoMapper; using Volo.Abp.Modularity; using WY.JBLand.EntityFrameworkCore; namespace WY.JBLand.Application { [DependsOn( typeof(AbpDddApplicationModule), typeof(AbpAutoMapperModule), typeof(WyJBLandEntityFrameworkCoreModule) )] public class WyJBLandApplicationModule : AbpModule { } } ``` #### 添加一个DTO 就添加上面创建的userinfo实体对应的的DTO ``` using System; using System.Collections.Generic; using System.Linq; using System.Text; using System.Threading.Tasks; namespace WY.JBLand.Application.User { public class UserInfoDTO { public string UserName { get; set; } public string Password { get; set; } } } ``` 大概的结构如下: 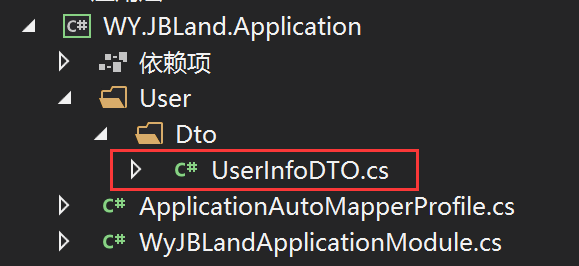 #### 添加一个AutoMapper的Profile类用于设置对象与对象的映射关系 关于对象映射的官方文档: https://docs.abp.io/zh-Hans/abp/4.4/Object-To-Object-Mapping ``` using AutoMapper; using WY.JBLand.Application.User.Dto; using WY.JBLand.Domain.User; namespace WY.JBLand.Application { public class ApplicationAutoMapperProfile : Profile { public ApplicationAutoMapperProfile() { // 创建一个实体的映射 CreateMap<UserInfo, UserInfoDTO>().ReverseMap(); } } } ``` 在应用层的模块注入ApplicationAutoMapperProfile ``` using Volo.Abp.Application; using Volo.Abp.AutoMapper; using Volo.Abp.Modularity; using WY.JBLand.EntityFrameworkCore; namespace WY.JBLand.Application { [DependsOn( typeof(AbpDddApplicationModule), typeof(AbpAutoMapperModule), typeof(WyJBLandEntityFrameworkCoreModule) )] public class WyJBLandApplicationModule : AbpModule { public override void ConfigureServices(ServiceConfigurationContext context) { Configure<AbpAutoMapperOptions>(opt => { //添加一个具体映射配置模块 opt.AddProfile<ApplicationAutoMapperProfile>(); //添加该层所有映射配置模块 //opt.AddMaps<WyJBLandApplicationModule>(); }); } } } ``` #### 添加一个应用服务 应用服务接口 ``` using System.Collections.Generic; using Volo.Abp.Application.Services; using WY.JBLand.Application.User.Dto; namespace WY.JBLand.Application.User { public interface IUserInfoAppService : IApplicationService { List<UserInfoDTO> Get(); } } ``` 应用服务实现类。这里直接使用EF上下文对象测试还没有使用仓储 ``` using System; using System.Collections.Generic; using System.Linq; using System.Text; using System.Threading.Tasks; using Volo.Abp.Application.Services; using Volo.Abp.Domain.Repositories; using WY.JBLand.Application.User.Dto; using WY.JBLand.Domain.User; using WY.JBLand.EntityFrameworkCore; namespace WY.JBLand.Application.User { public class UserInfoAppService : ApplicationService, IUserInfoAppService { private readonly WyJBLandDbContext _wyJBLandDbContext; public UserInfoAppService(WyJBLandDbContext wyJBLandDbContext) { _wyJBLandDbContext = wyJBLandDbContext; } public List<UserInfoDTO> Get() { List<UserInfo> userInfos = _wyJBLandDbContext.UserInfo.ToList(); //使用AutoMapper进行对象转换 var result = ObjectMapper.Map<List<UserInfo>, List<UserInfoDTO>>(userInfos); return result; } } } ``` 大概的结构如下: 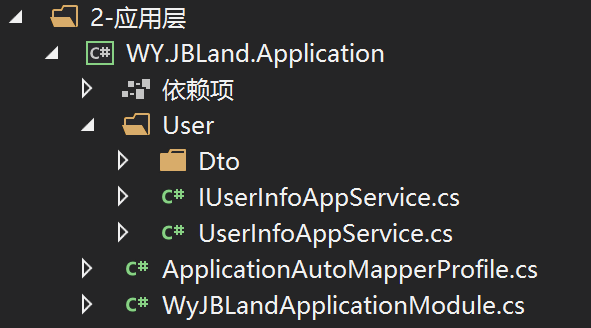 tn> 注意:用户接口层中要把依赖注入容易切换成AutoFac,不然你的AutoMapper,或者仓储这些的依赖拿到就会是空。因为abp vnext里边是使用AutoFac实现依赖注入的,而且不仅仅是引入改模块就行,还需要手动切换以下容器。是个坑要注意 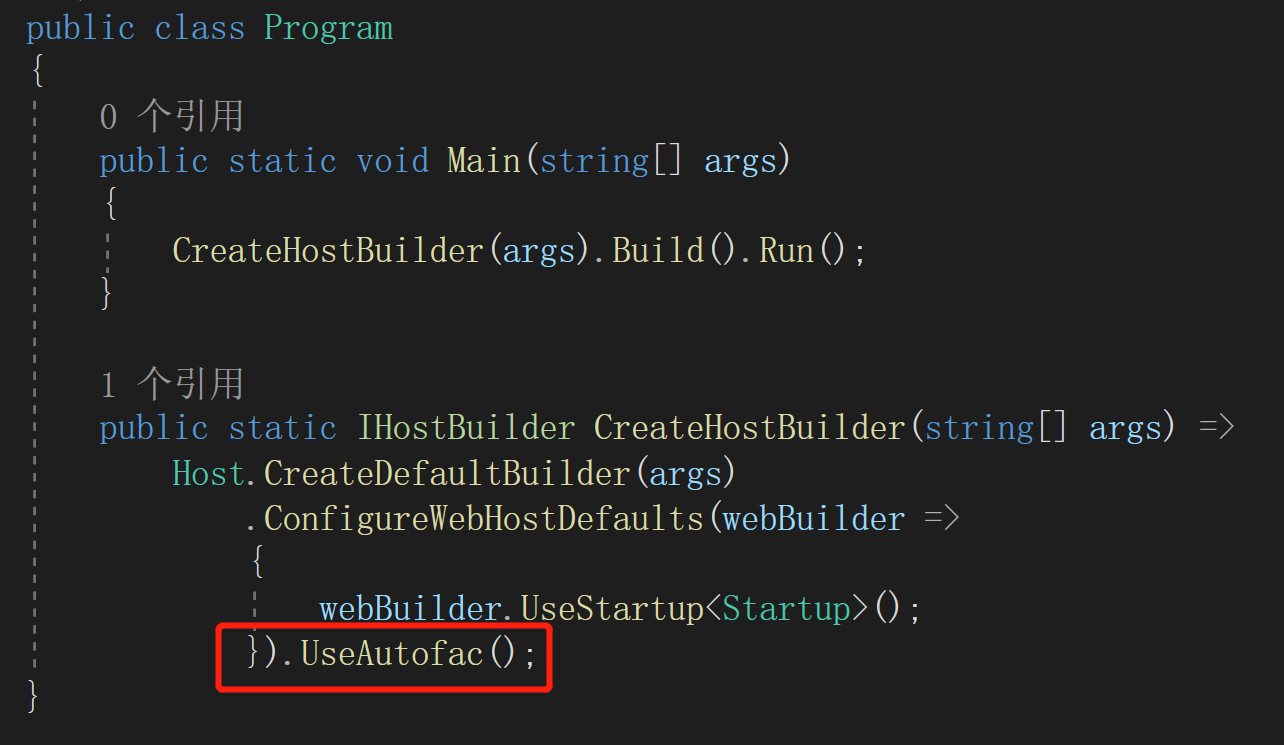 #### 然后在用户接口层使用以下这个应用服务即可 ``` [ApiController] [Route("[controller]")] public class WeatherForecastController : ControllerBase { private readonly ILogger<WeatherForecastController> _logger; private readonly IUserInfoAppService _userInfoAppService; public WeatherForecastController(ILogger<WeatherForecastController> logger, IUserInfoAppService userInfoAppService) { _logger = logger; _userInfoAppService = userInfoAppService; } [HttpGet("{id}")] public IEnumerable<UserInfoDTO> Get(int id) { List<UserInfoDTO> userInfos = _userInfoAppService.Get(); return userInfos; } } ``` ## 示例代码下载 https://download.tnblog.net/resource/index/0fc403f7505e48c99ed33f791c1d4ffa)